Sure, Easter is about chocolate, but it also gives you the opportunity to spend time with your family. So why not have a go at making Melissa’s Easter basket with your kids? Since baskets can be woven from a variety of bendy materials, you can use stuff you find in the backyard or park to save money and give it a natural look. And by the time Easter rolls around, your children will have a cute basket to put all their eggs in.
WATCH: Melissa makes woven Easter baskets
One of the oldest crafts in the world, weaving is also one of the easiest. At least when it comes to basket making! You don’t need any special tools or skills, just the simple techniques for interlacing branches and vines that have been used for millennia. And there’s usually a great supply of basket-making materials in your own backyard – it’s the ultimate upcycling of your garden prunings! Add in a few items you probably already have, or can pick up at the hardware store, such as natural twine and plant ties, and you’re ready to weave your way to bespoke baskets.
Project 1: How to hang a woven log basket
Gather your supplies
- Log slice
- 100mm flat head galvanised nails
- Twisted paper rope
- Plastic or a plant pot
- Assorted plants
You’ll also need
- Tape measure
- Black marker pen
- Drill
- Hammer
- Scissors
- Black texta
- Garden gloves
- Potting mix
For you to note
- The size of your woven basket will depend on the diameter and thickness of your log slice, and the length of your nails.
- For a slice about 12cm in diameter, use 100mm nails. You can also get nails that are 50, 75 and 150mm long.
Here’s how
Step 1

Wrap tape measure around log slice, and mark nail locations, about 5mm in from the edge and evenly spaced about 20mm apart, with a marker pen.
Step 2
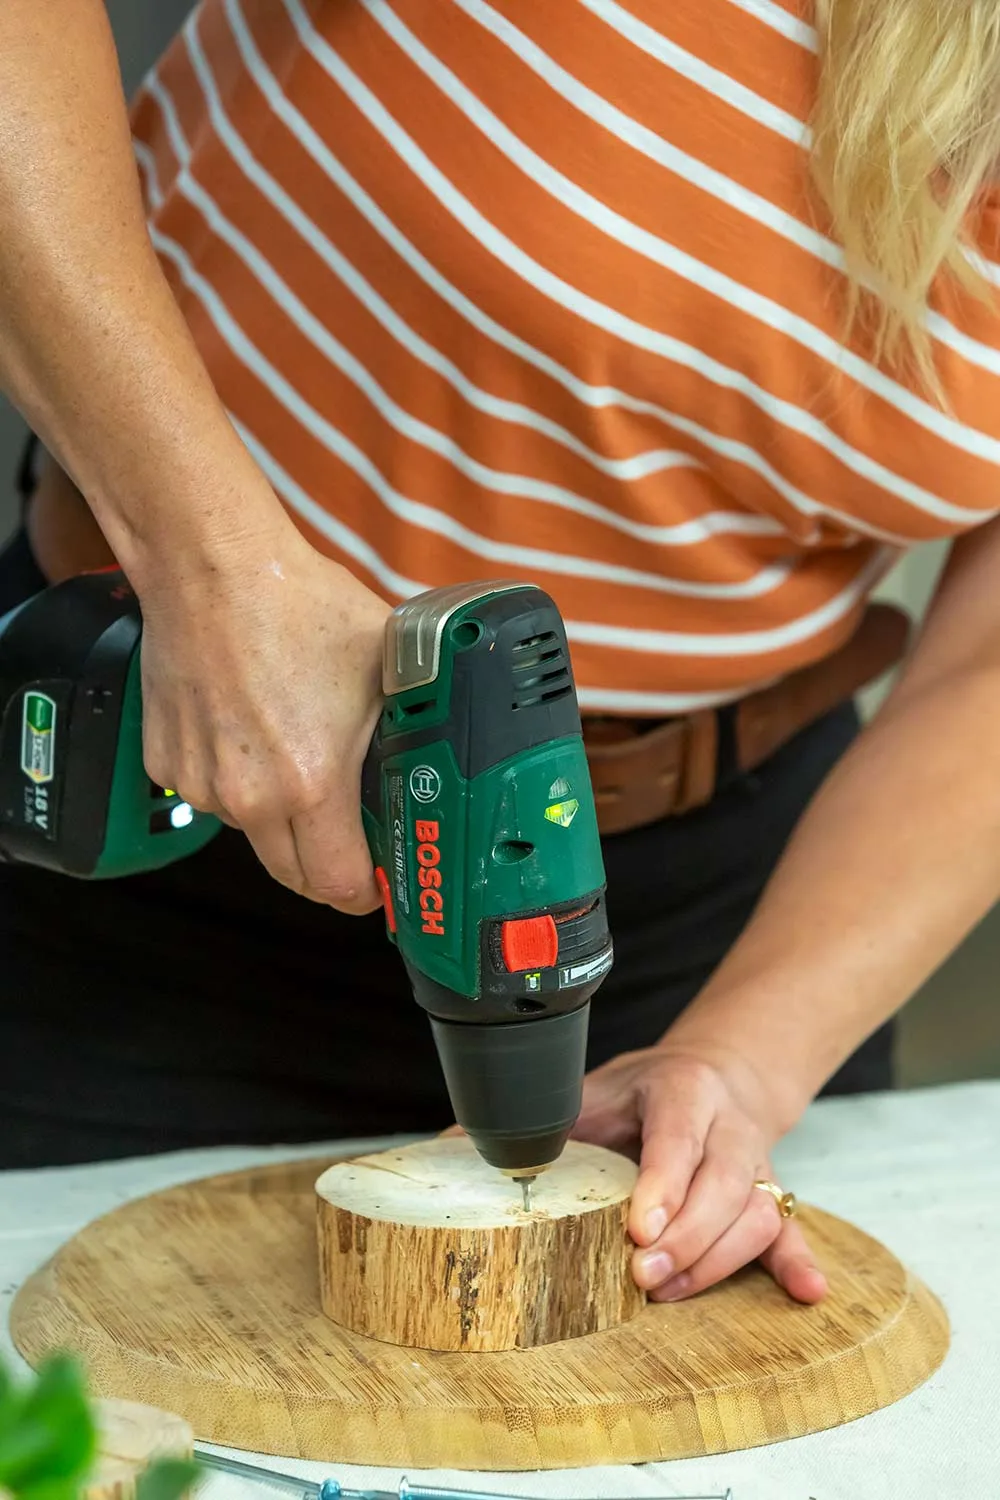
Drill pilot holes at marked locations on the log slice so the timber doesn’t split.
Step 3
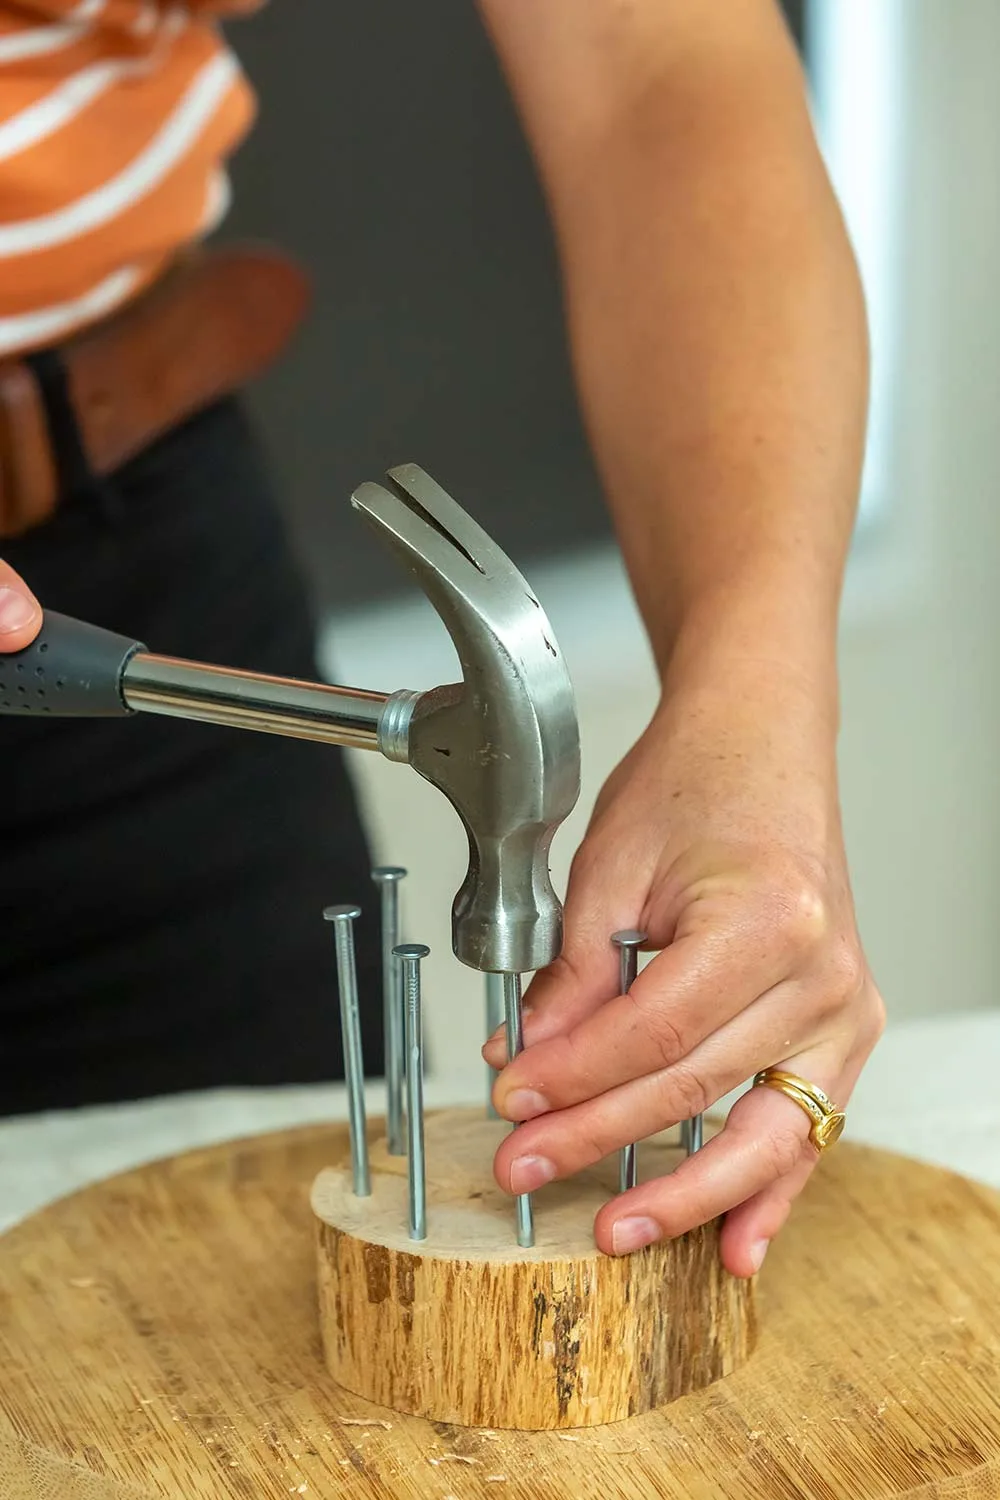
Carefully hammer in a galvanised nail at each predrilled hole.
Step 4
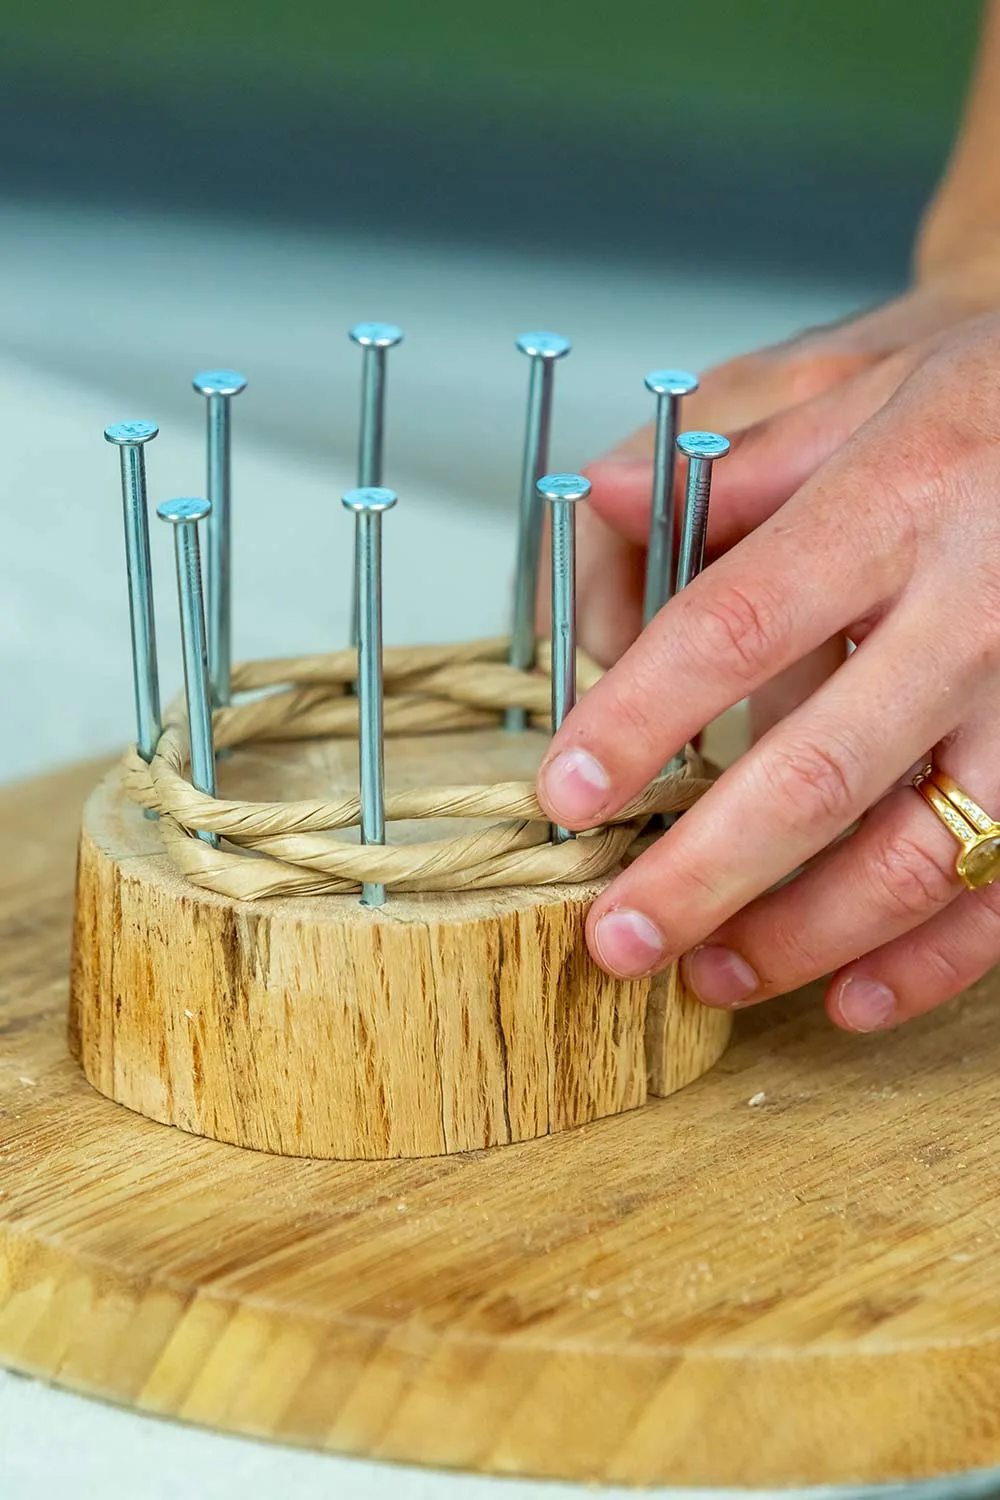
Leaving a 30mm tail in the centre of the slice, and starting at the base, weave paper rope around nails, going around the outside of one nail, then around the inside of the next. Continue around log slice in this way, then, when you get to the starting point, weave the next row in the opposite way – on the outside or inside – of each nail.
Step 5
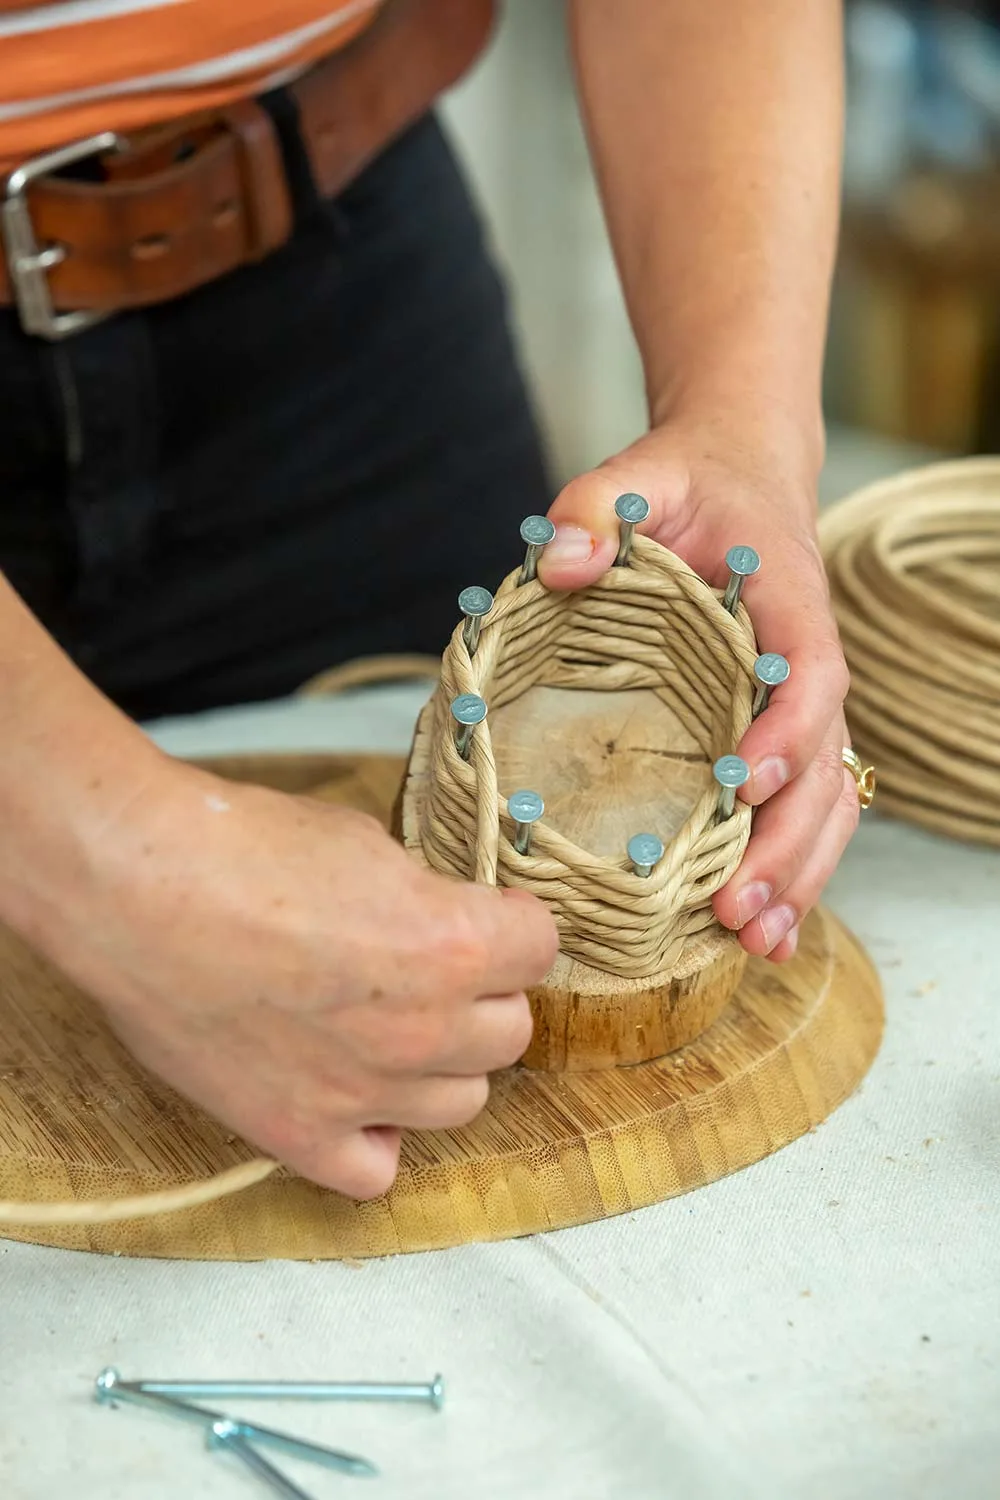
Continue weaving paper rope to the top, pushing down the rope as you go to create a tight weave, stopping just under the nail heads. Tip: Tuck in the tail left at the base.
Step 6
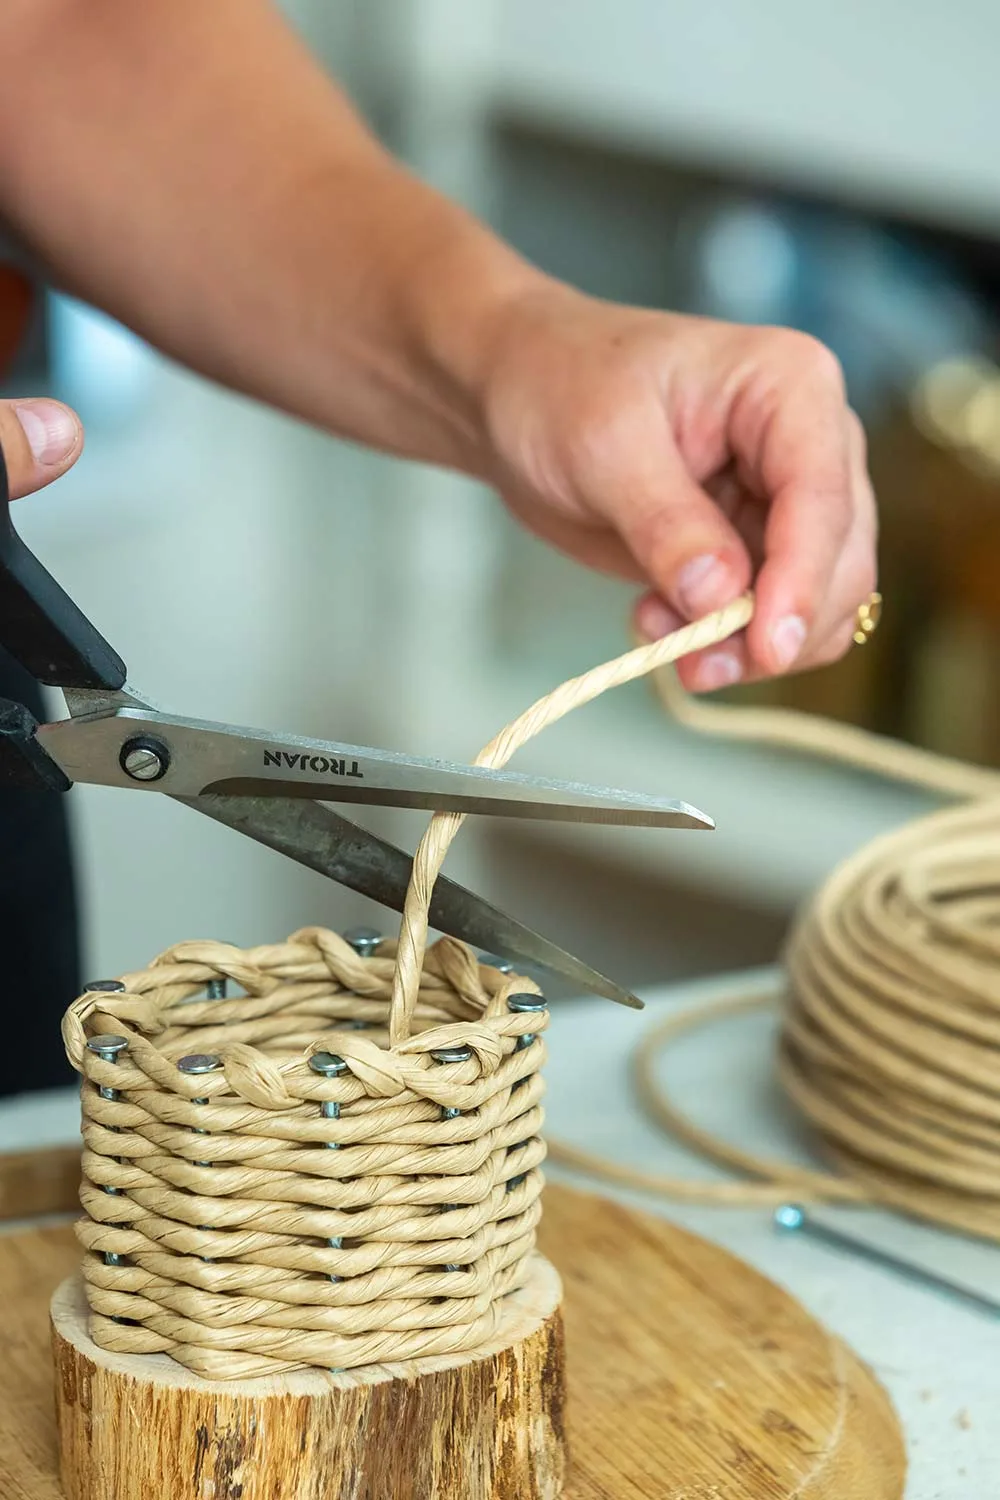
Take paper rope over the top row to outside of basket, then weave it under 2 rows of rope to the inside. Bring it back up, then over and under in the next section between 2 nails. Keep going and, when you have gone around the entire basket to form a top edge, trim rope with scissors and tuck tail into the weave.
Step 7
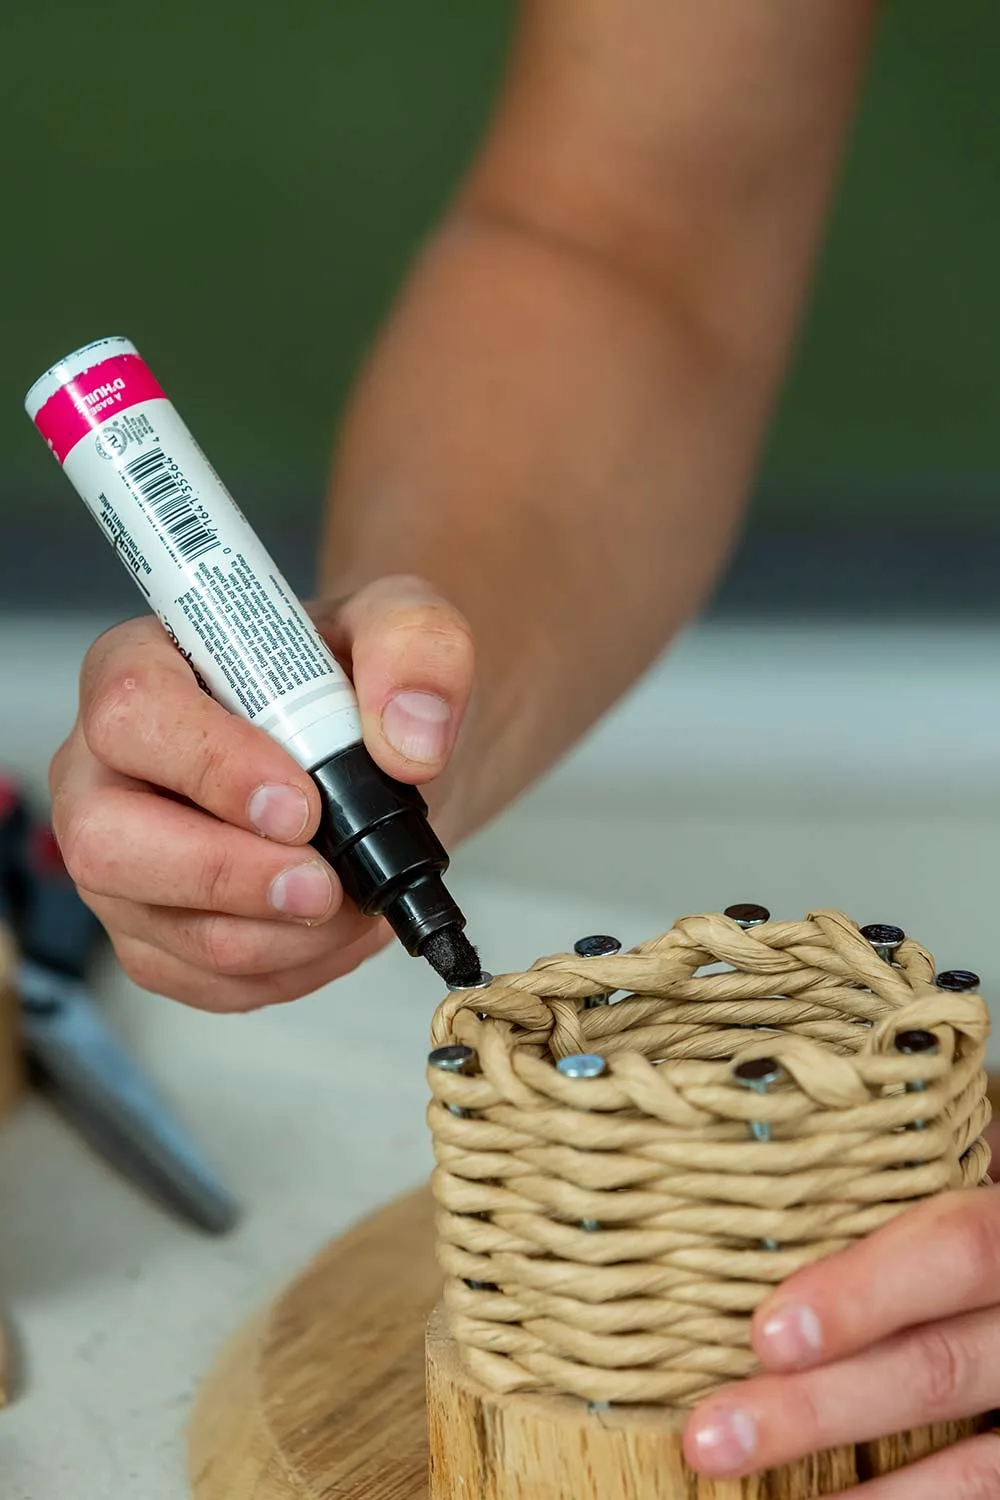
Use a thick black texta to blacken the top of each nail head and leave to dry for a few minutes.
Step 8
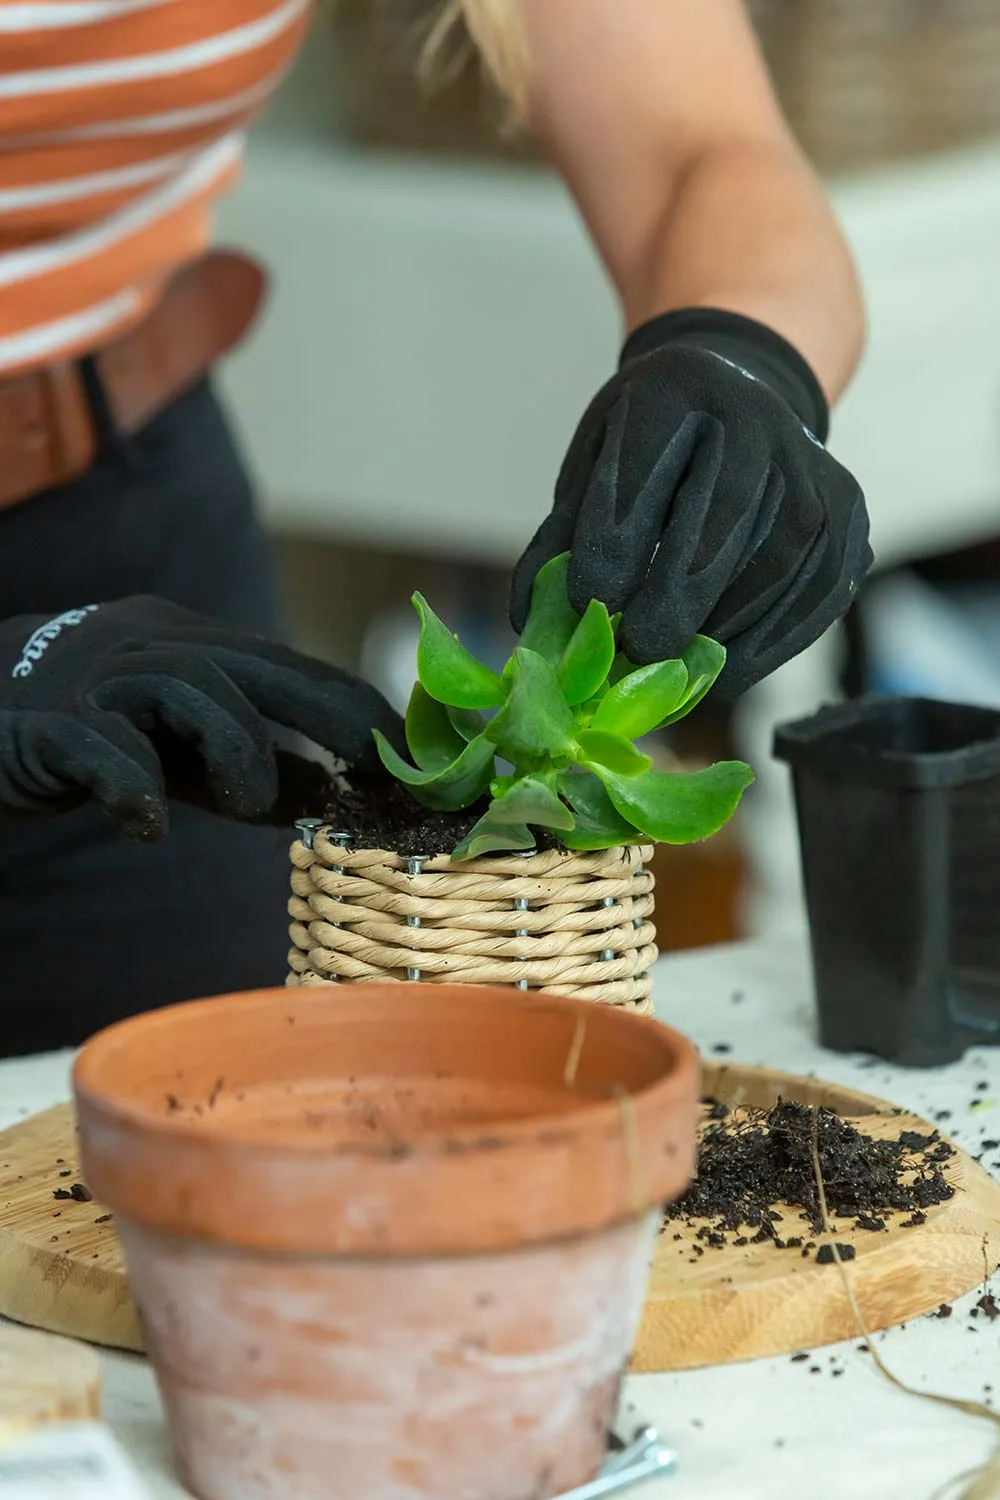
Line basket with plastic or a pot, part-fill with potting mix, position plants, then add more mix, firming it down gently. Water in.

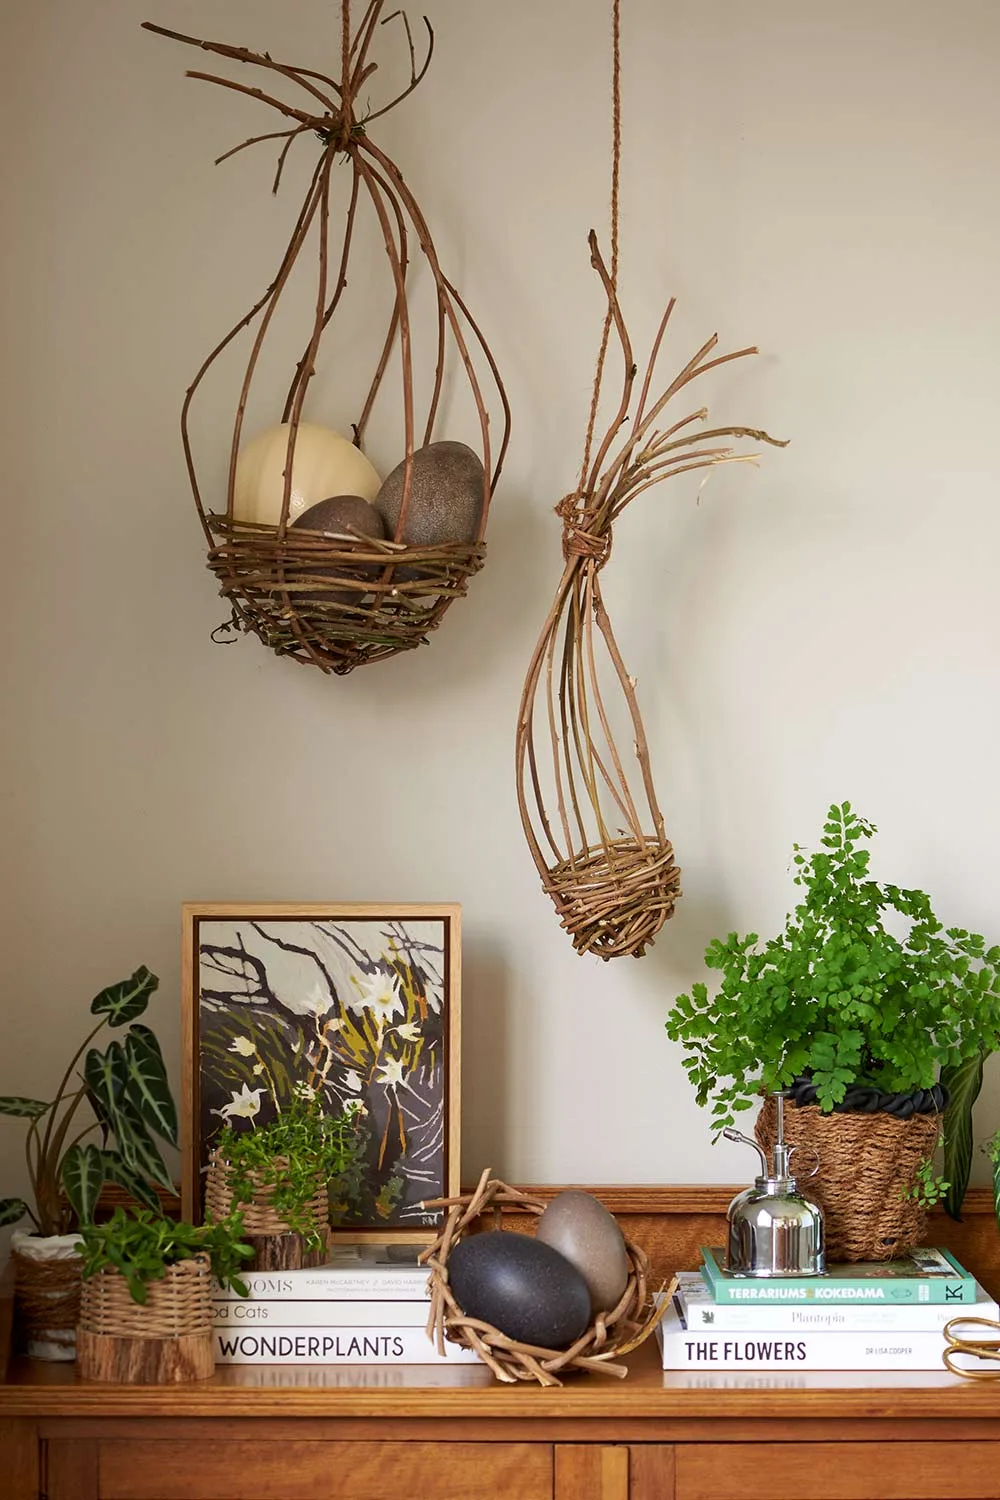
Project 2: How to weave a hanging basket
Step 1
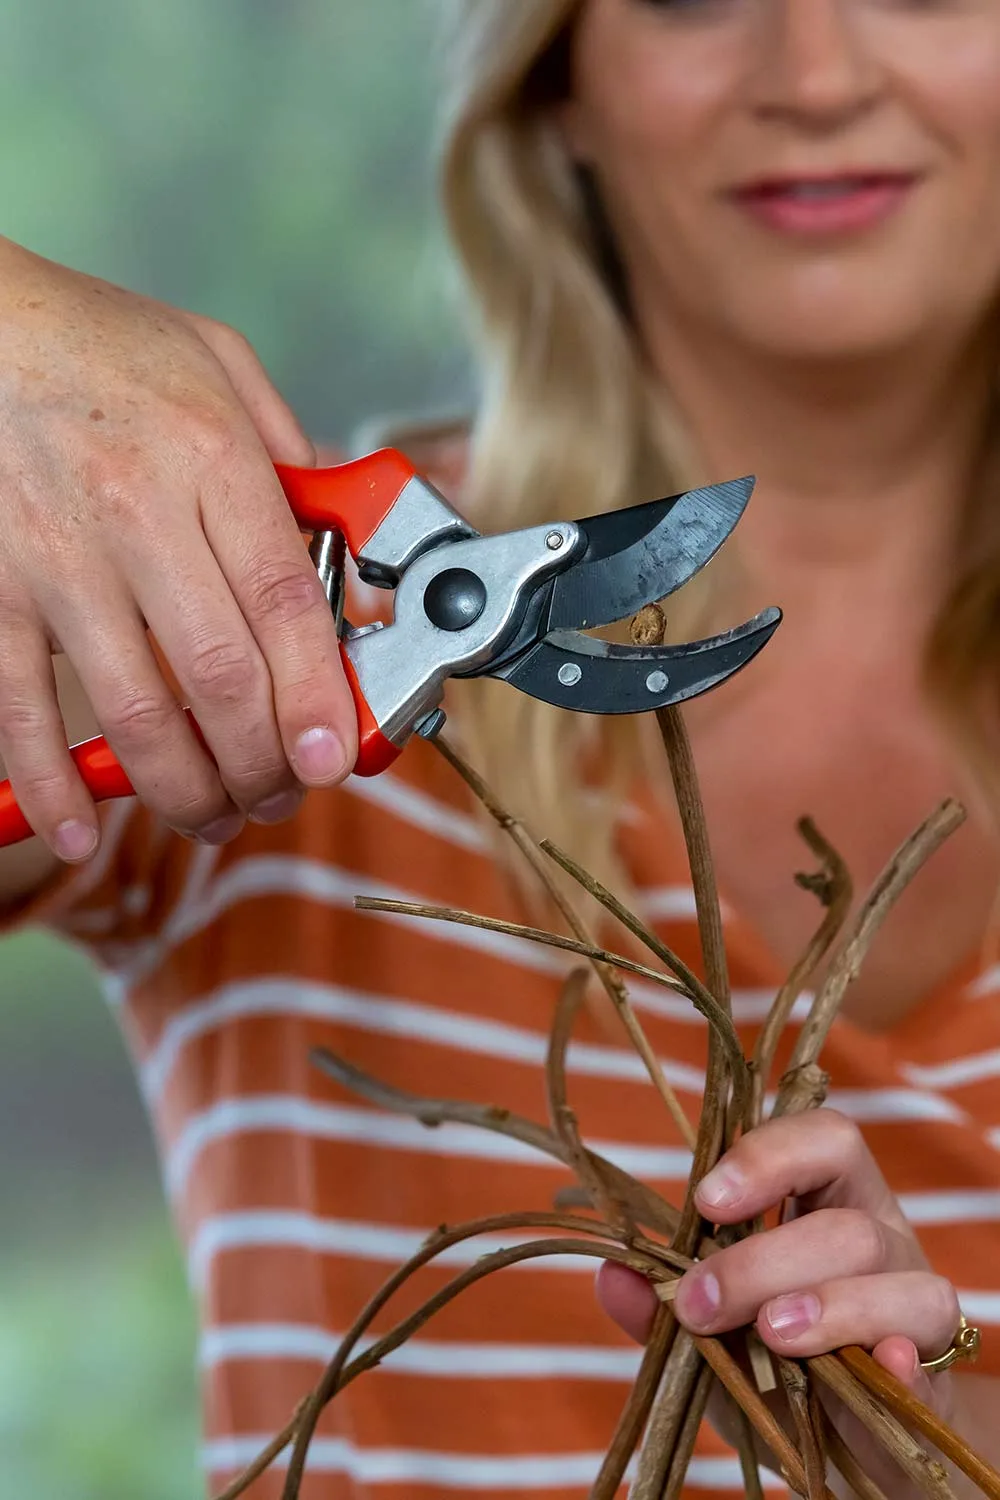
Using clean and sharp secateurs, cut pliable branches or vines up to 3m long and trim cuttings.
Step 2
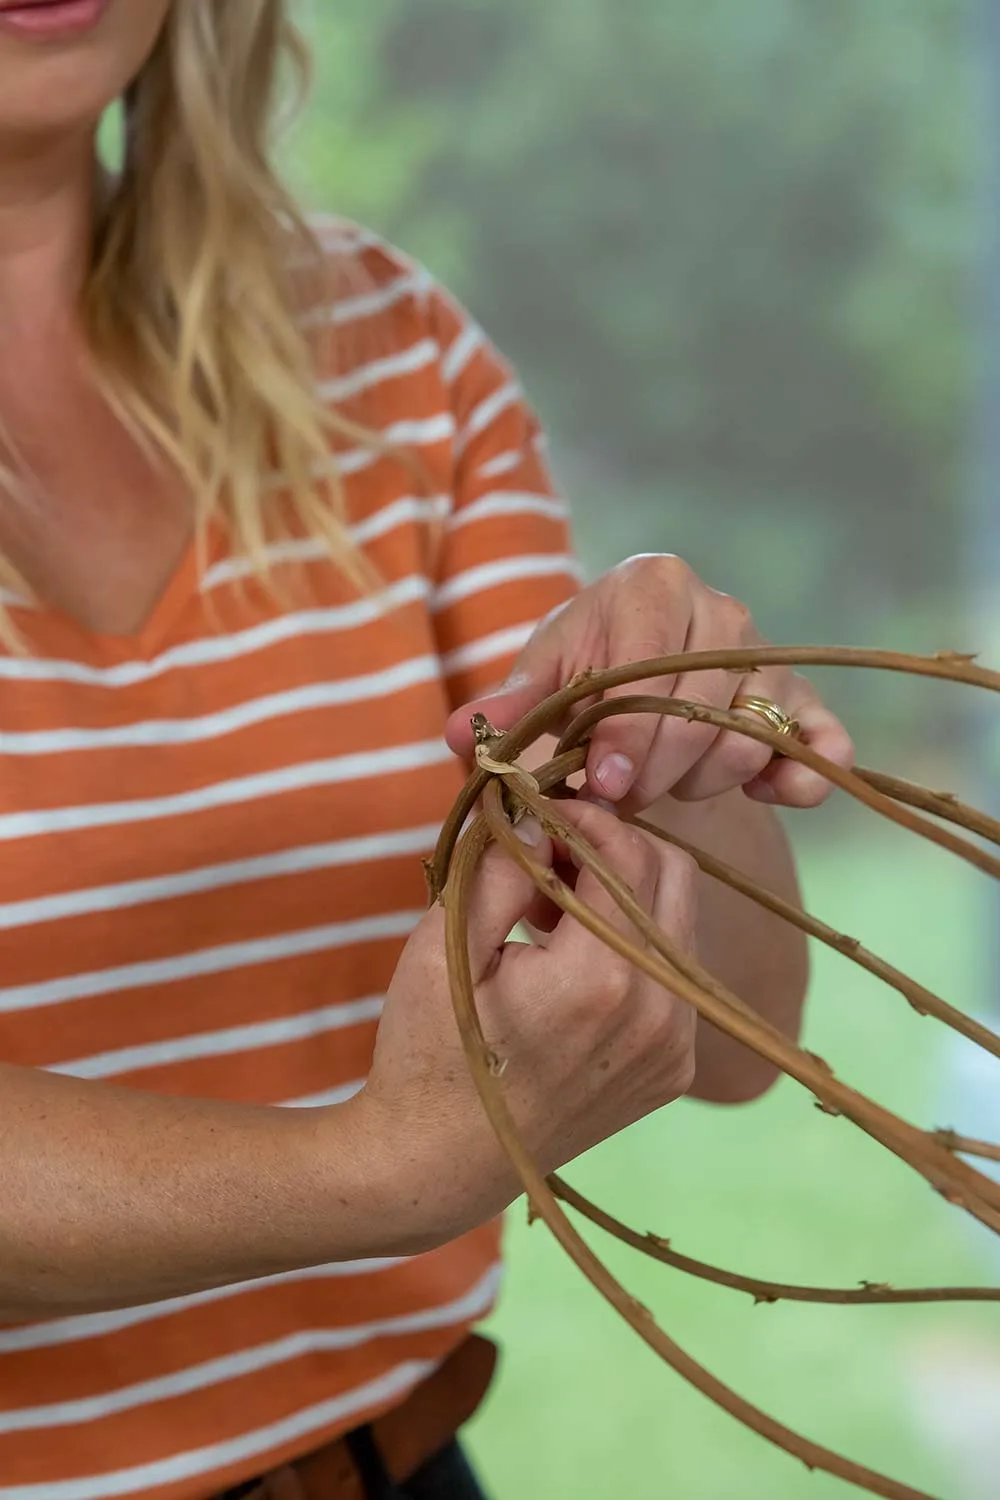
Fashion up to 8 branches at least 2m long into U shapes, securing at base with paper twist ties.
Step 3
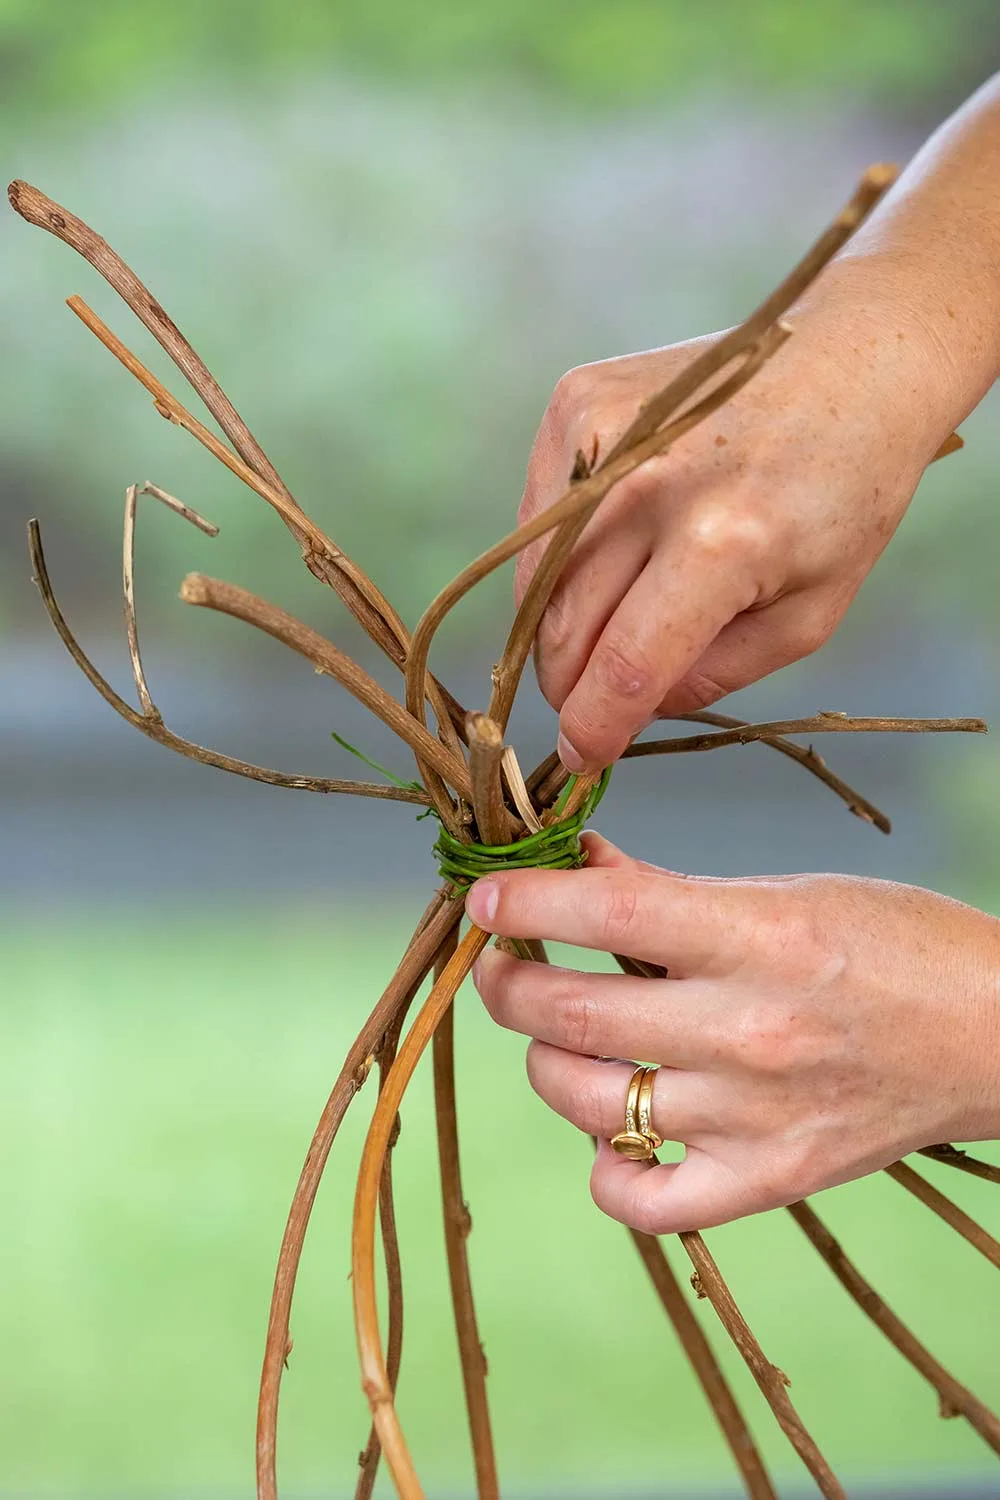
At the top, wrap plant wire around branches at least 200mm from ends. Wrap a branch around the join 6-8 times to cover wire, tucking in the ends.
Step 4
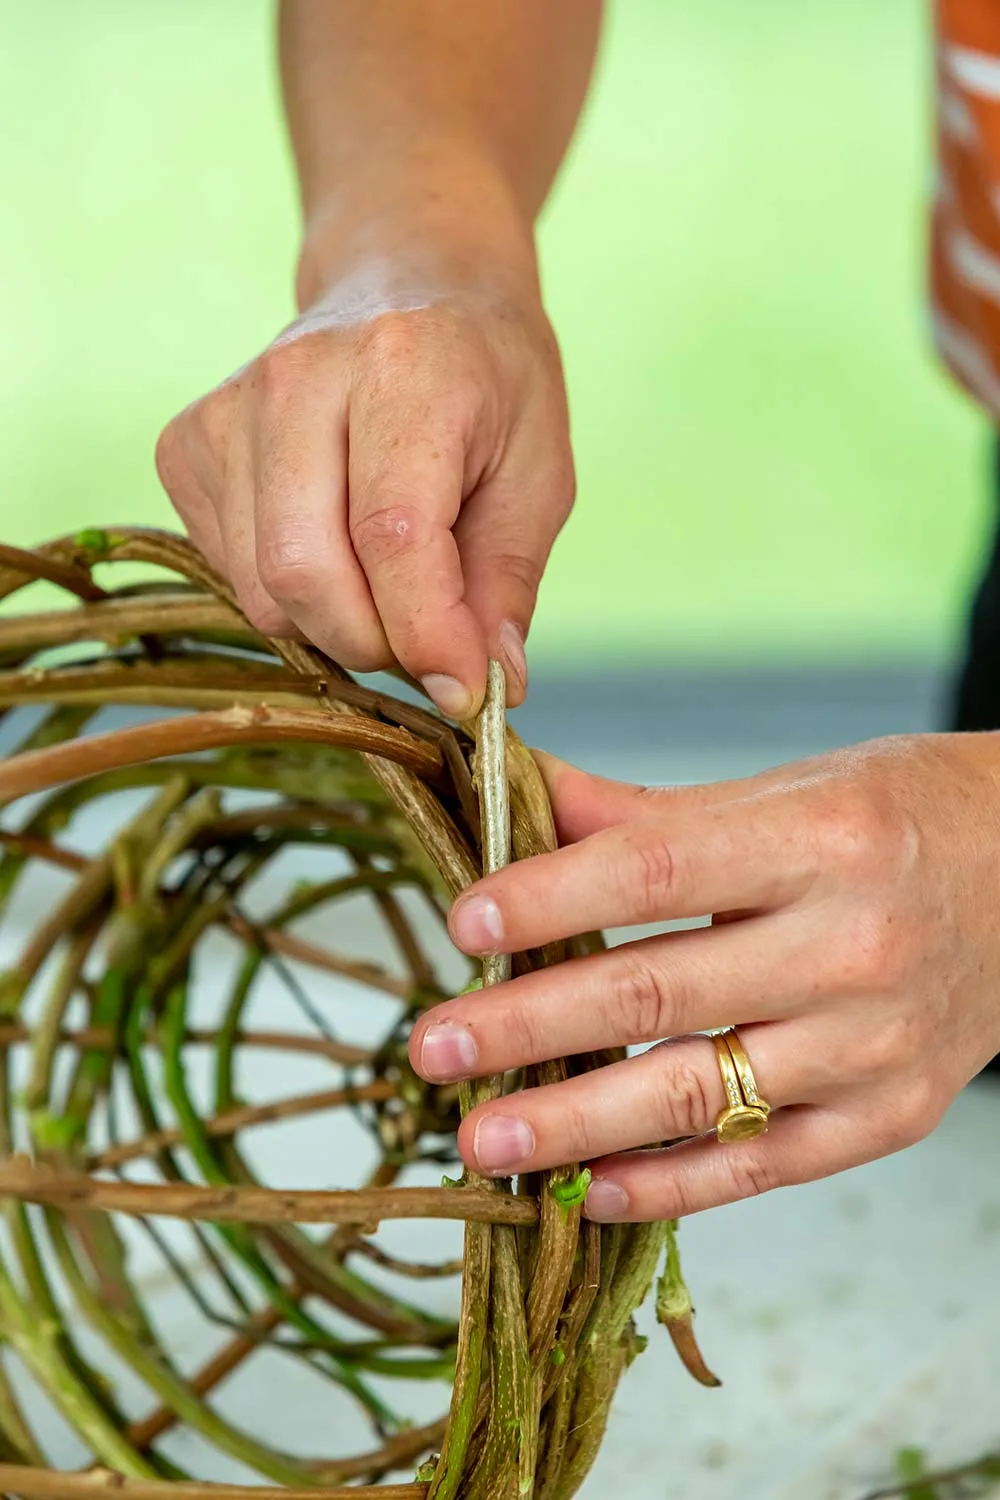
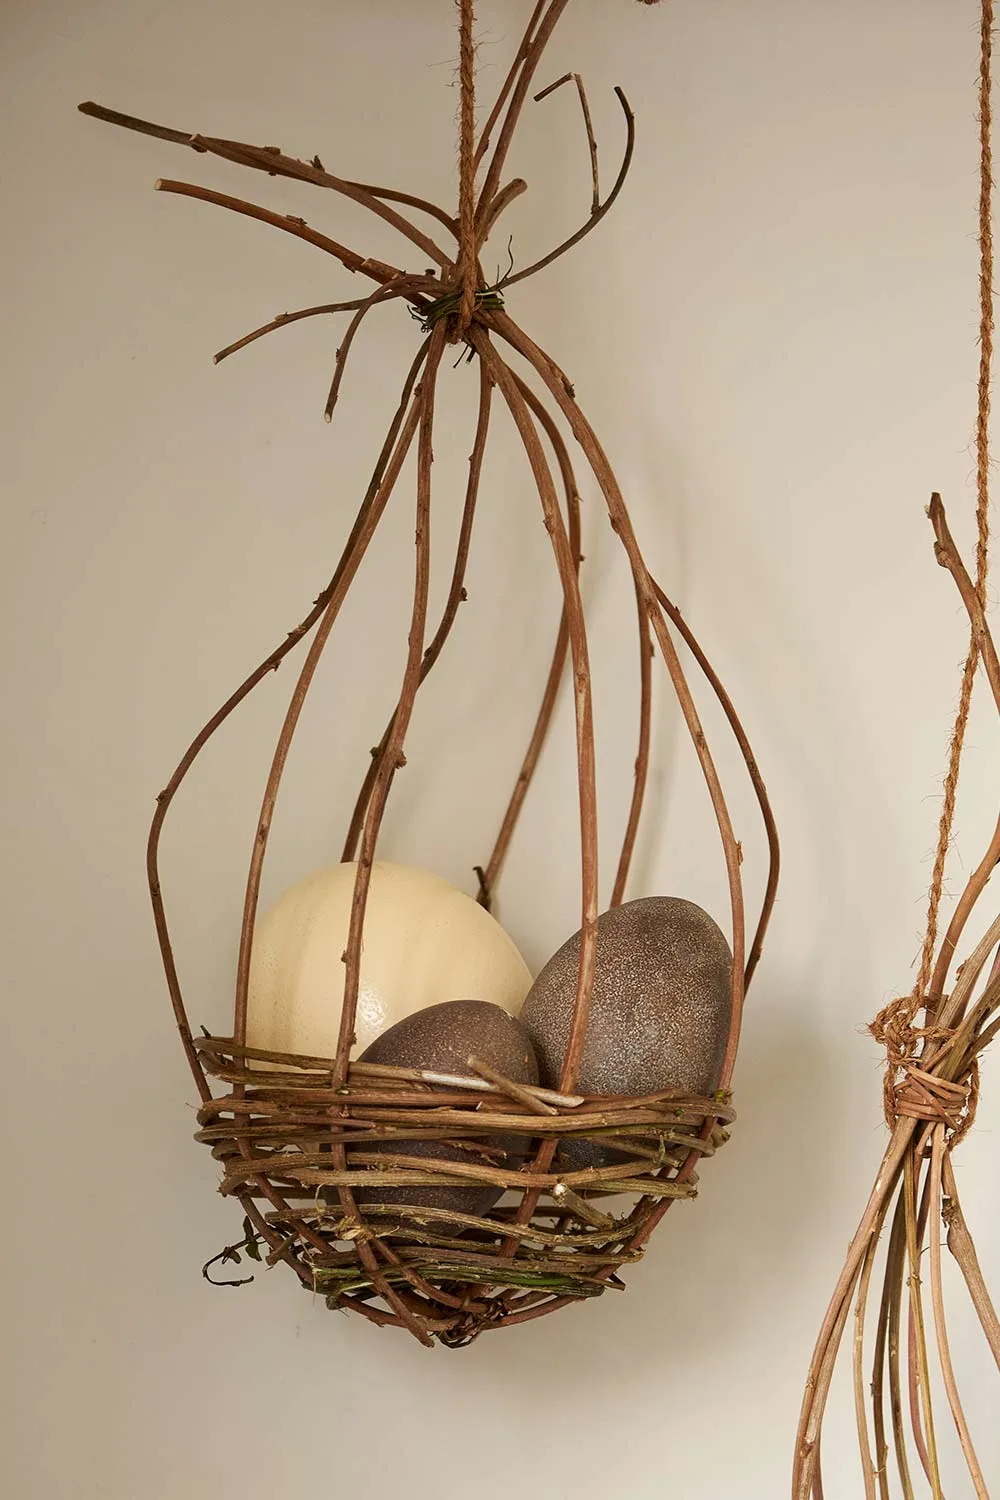
Starting at the base, poke a branch in the centre, then weave it over and under cage branches, alternating the weaving on each row. At the top, tuck in the branch end. Use a length of coir twine as a hanger.
Project 3: Wire basket
Gather your supplies
- Heavy-duty twistable soft tie plant wire
- Paper twist ties
- Coir fibre twine
You’ll also need
- Wire cutters
- Scissors
- Bowl or vase
- Soft nose pliers
Here’s how
Step 1
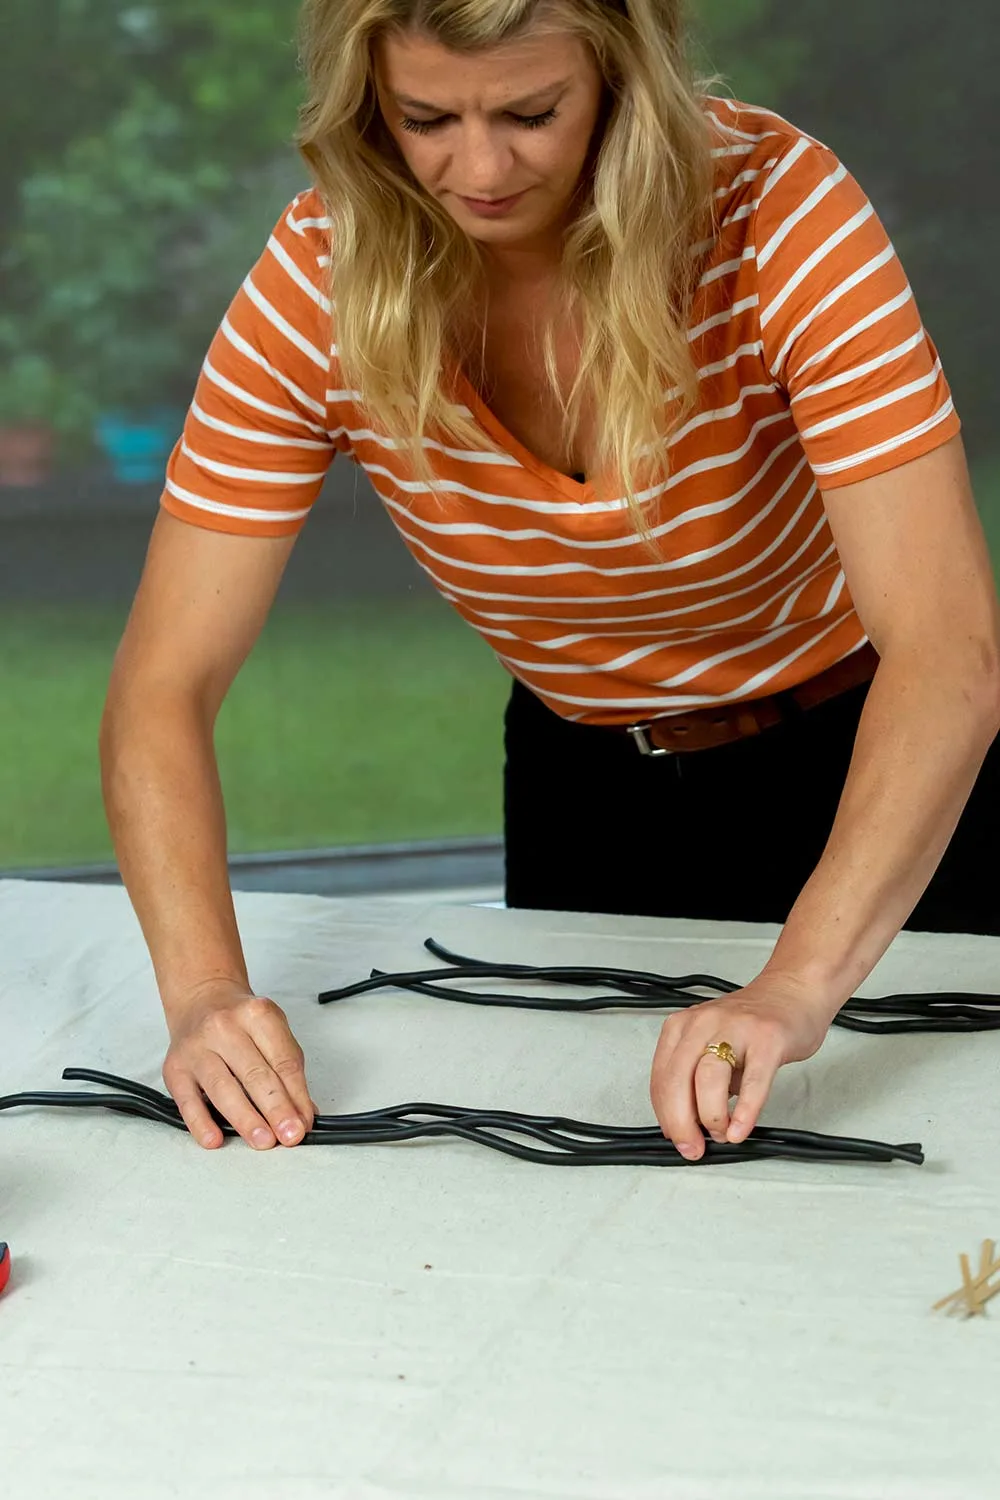
Cut soft tie into six 400mm lengths. Lay out 2 groups of 3 soft ties horizontally.
Step 2
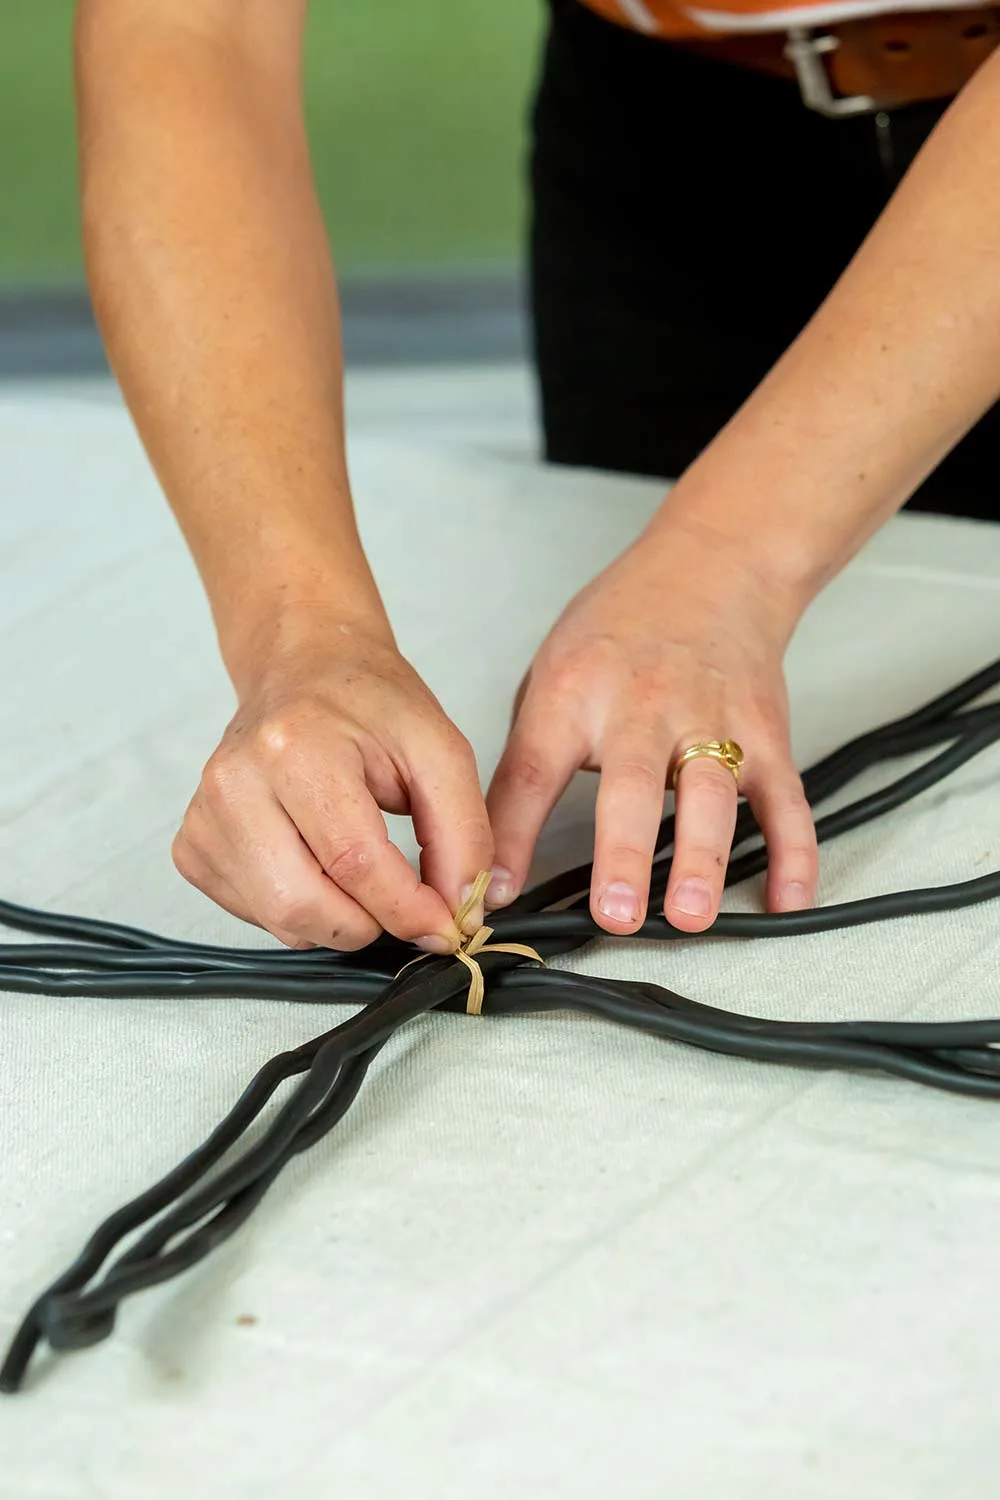
Centre a set of 3 ties vertically on the other set to make a cross. Use 3-4 paper twist ties to join cross at centre.
Step 3
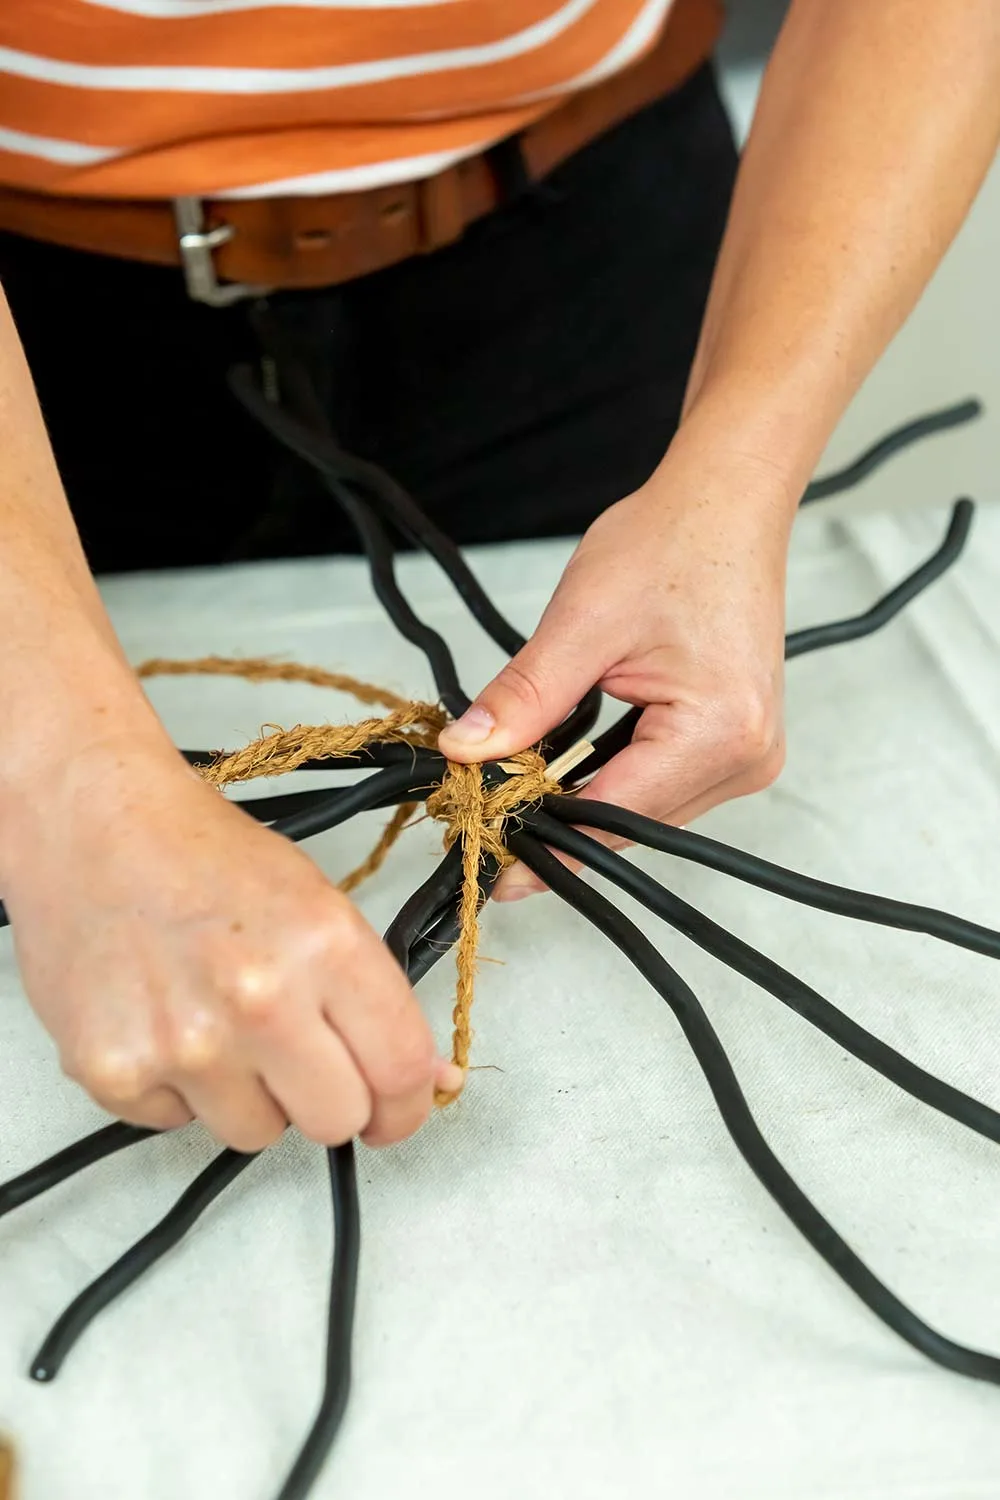
Wrap coir twine around centre of cross, going around 3 soft ties at a time.
Step 4
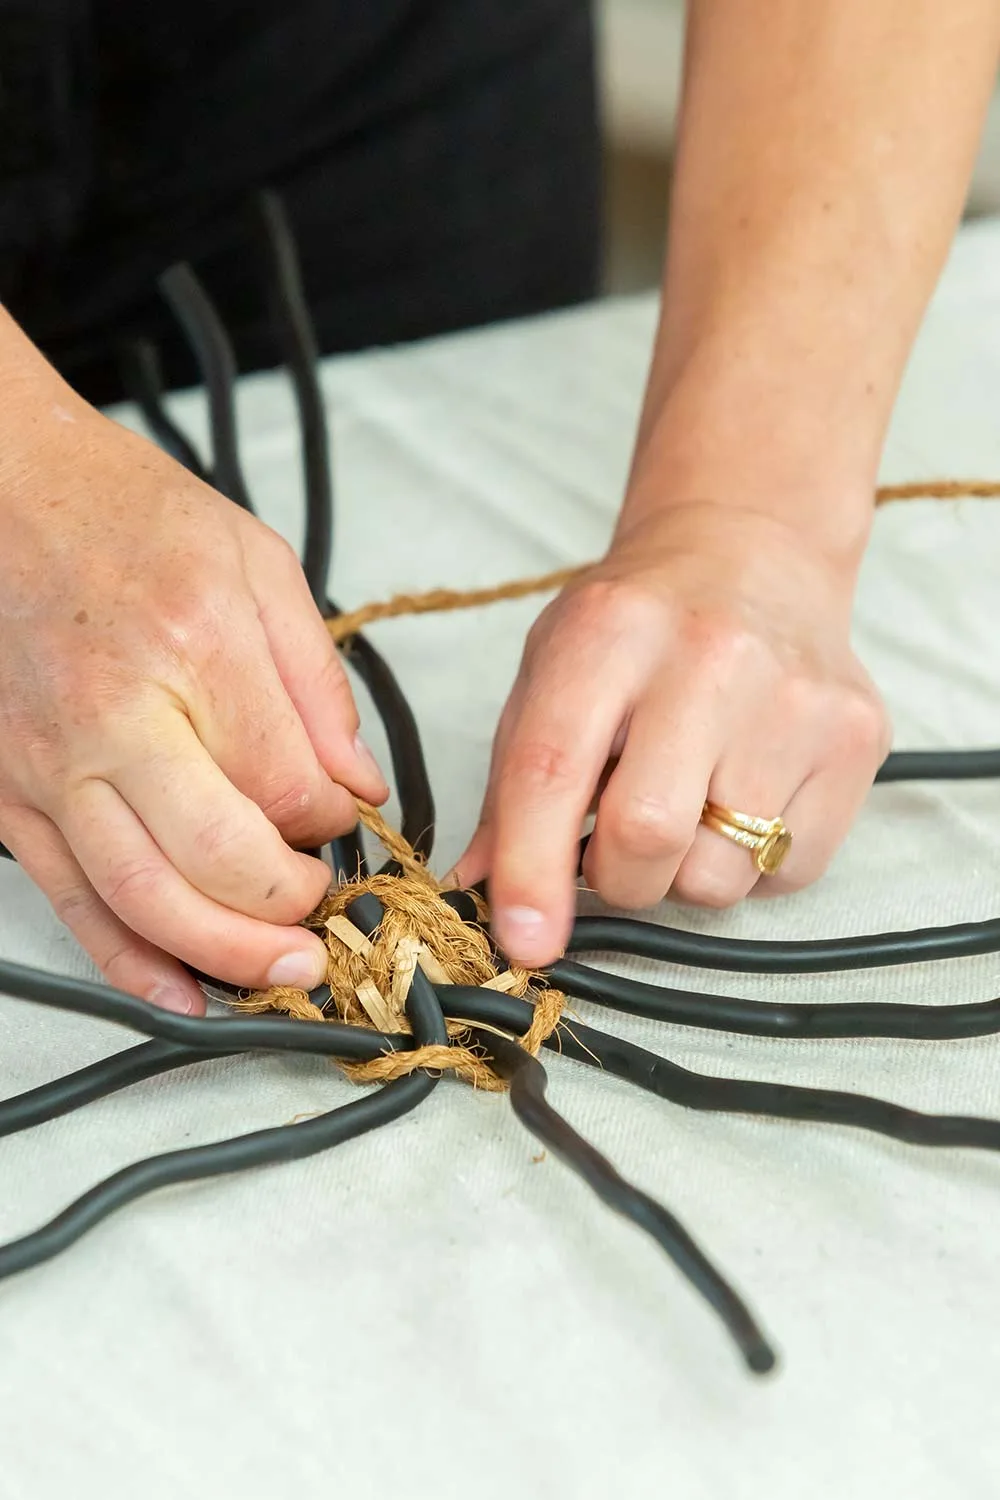
Start weaving twine over and under soft ties at the centre, spreading the ties out as you go.
Step 5
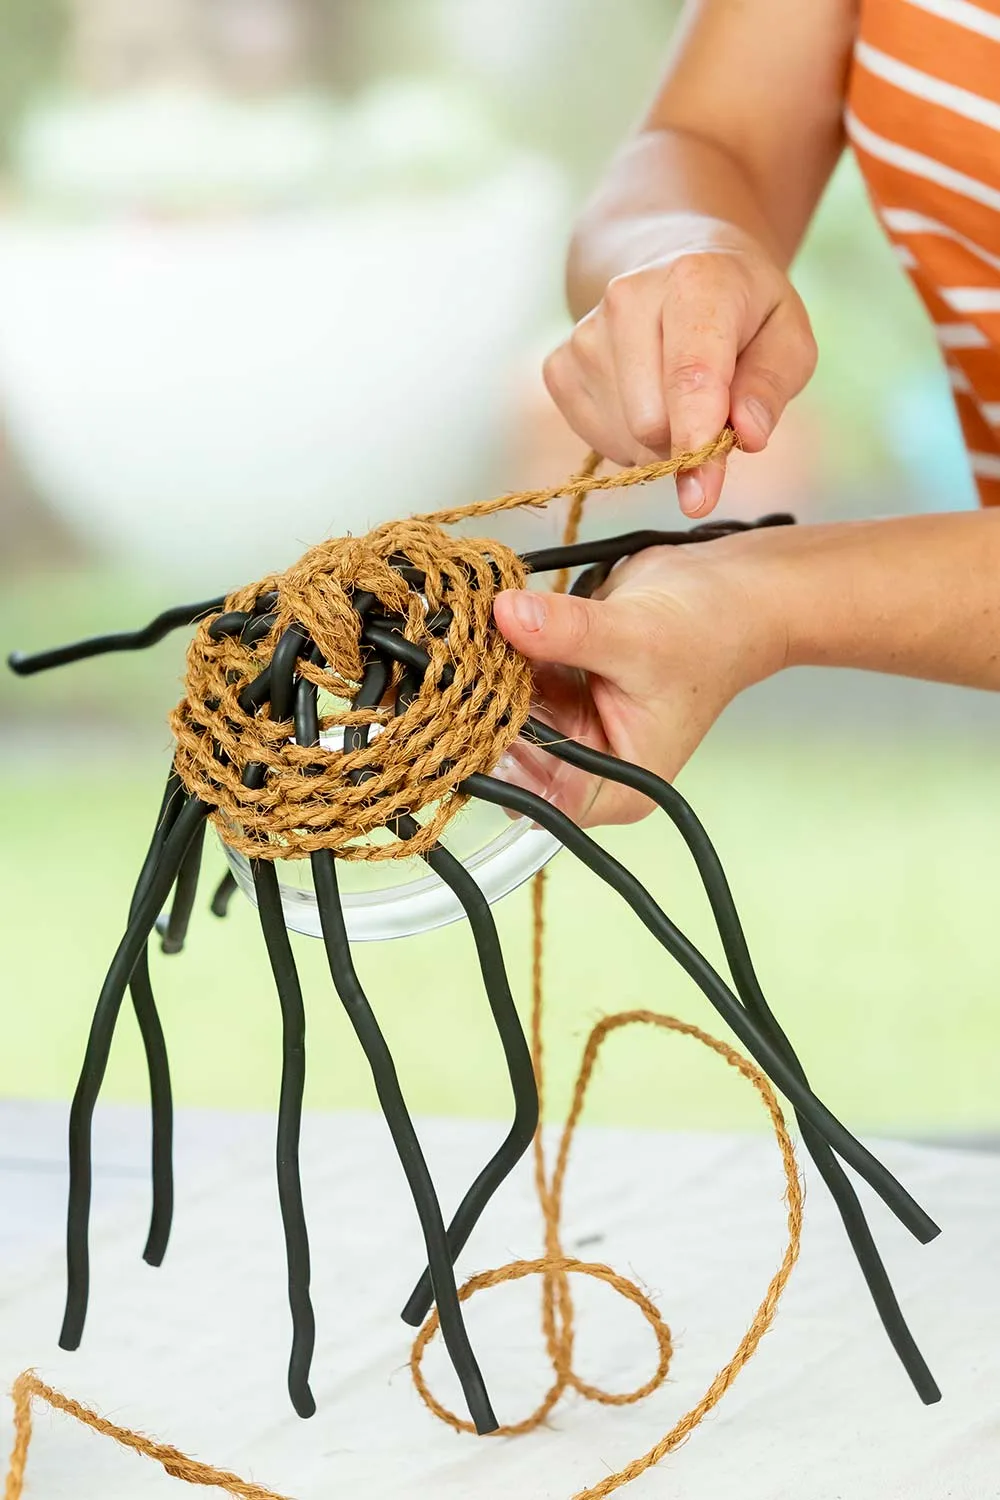
Use a bowl or vase to shape your basket, taking twine over and under each soft tie that makes up the warp. Keep weaving in this way until you reach the top of the vessel you are using.
Step 6
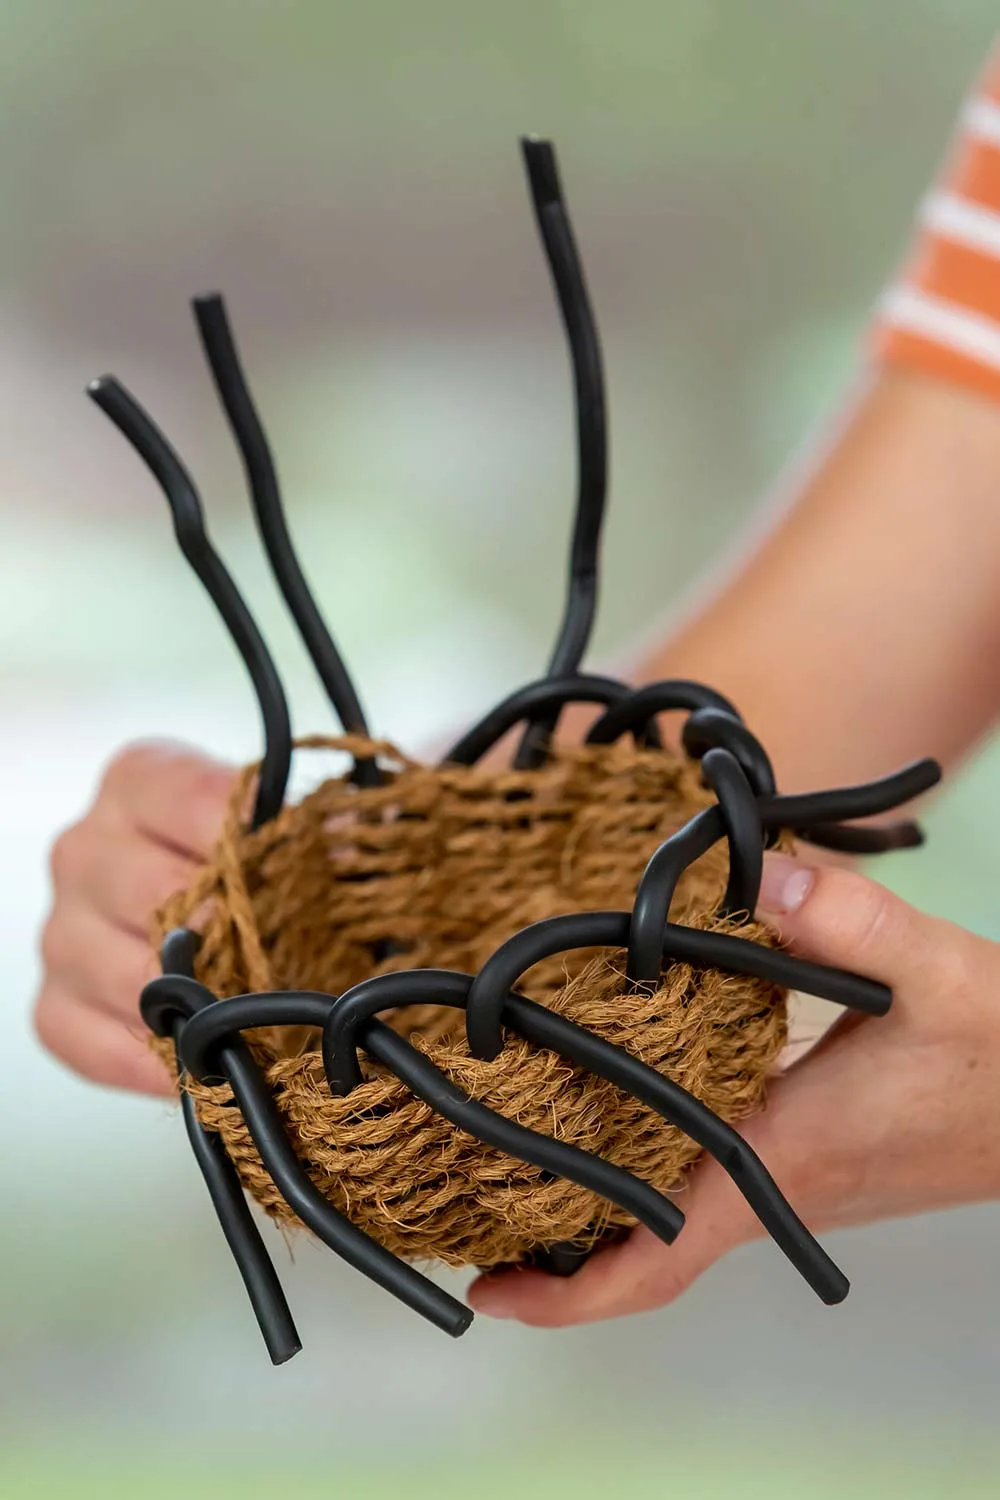
Remove the vessel and cut twine with a long tail. Bend each soft tie over its neighbour to the outside of the basket.
Step 7
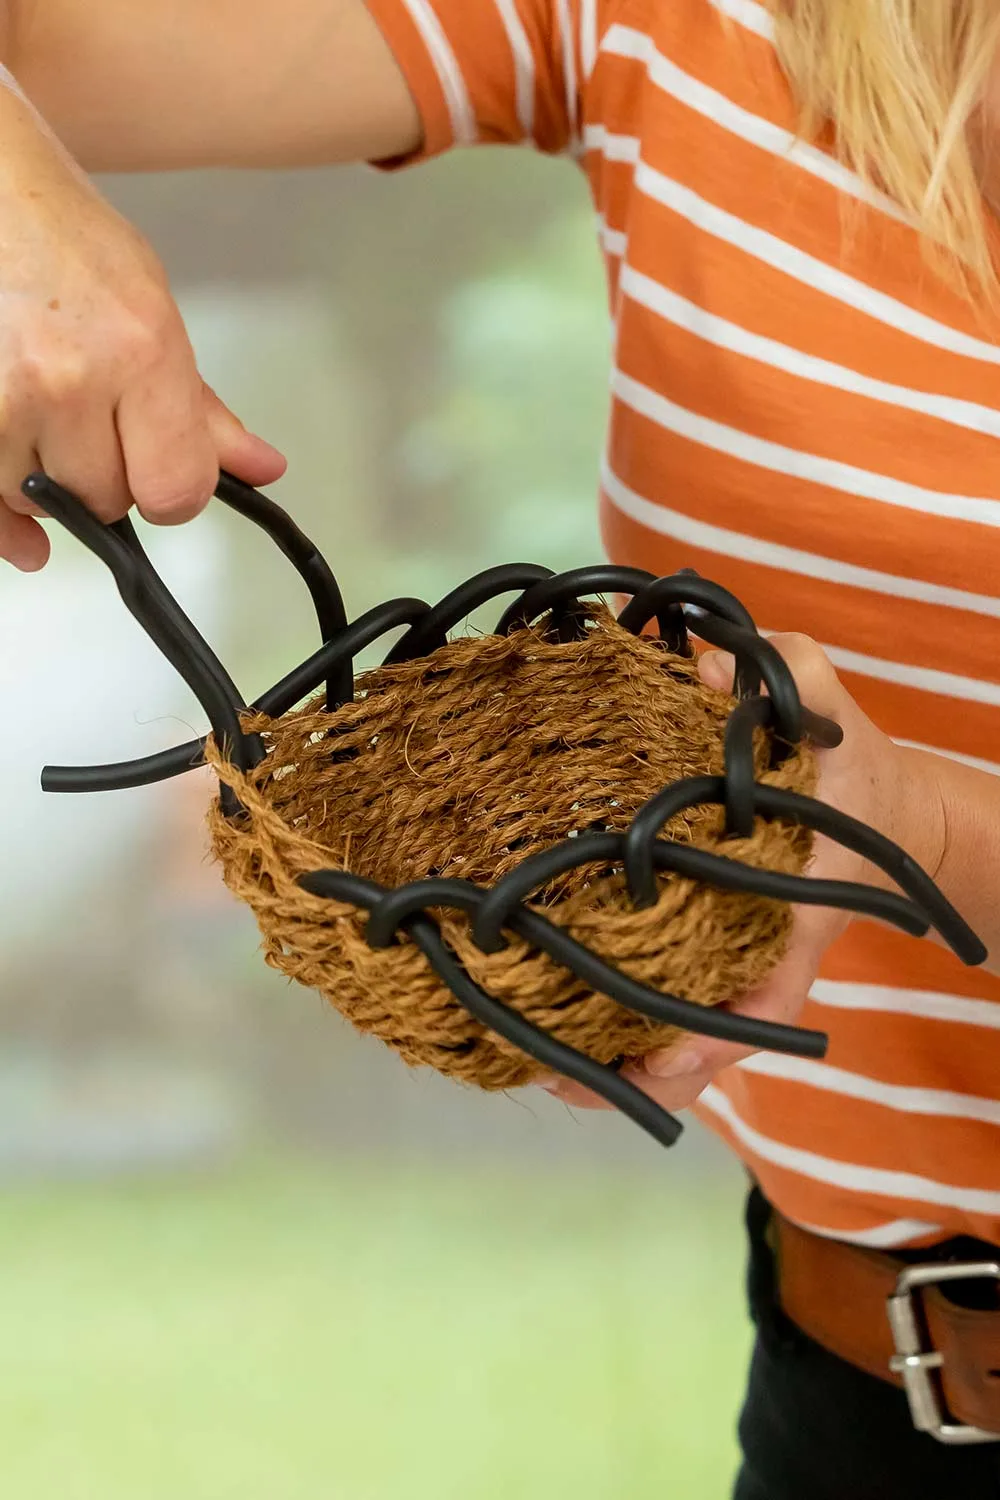
When you come to the last few ties, weave the twine tail around them to tuck into basket to secure. Finish the last few soft ties.
Step 8
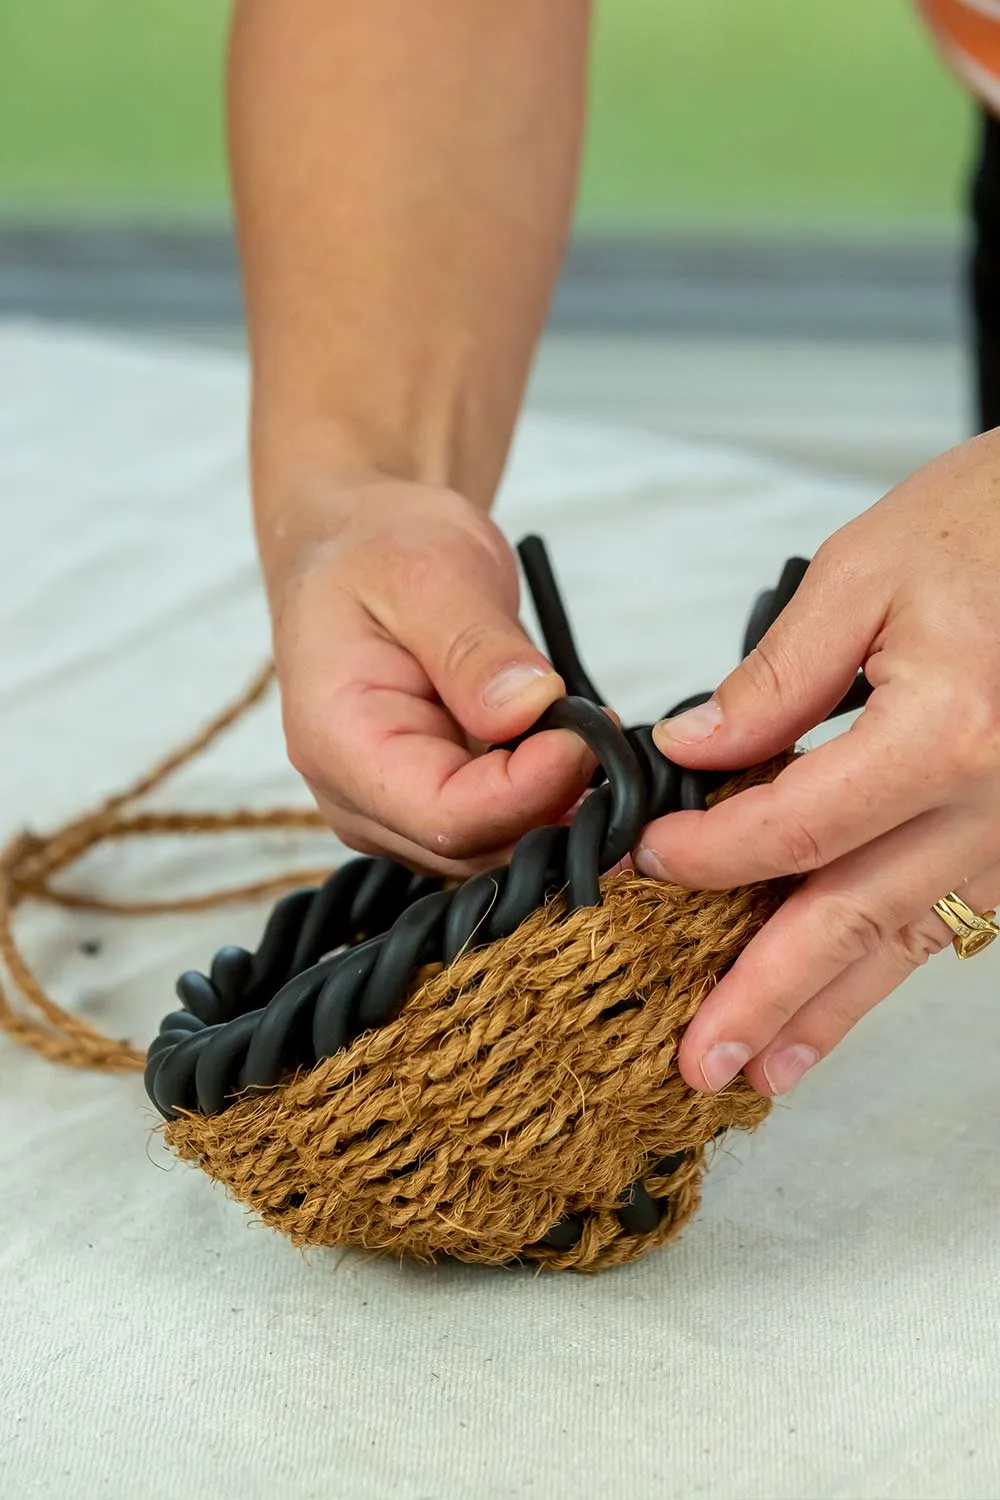
Keep taking each soft tie over and under its neighbour until tightly coiled.
Step 9
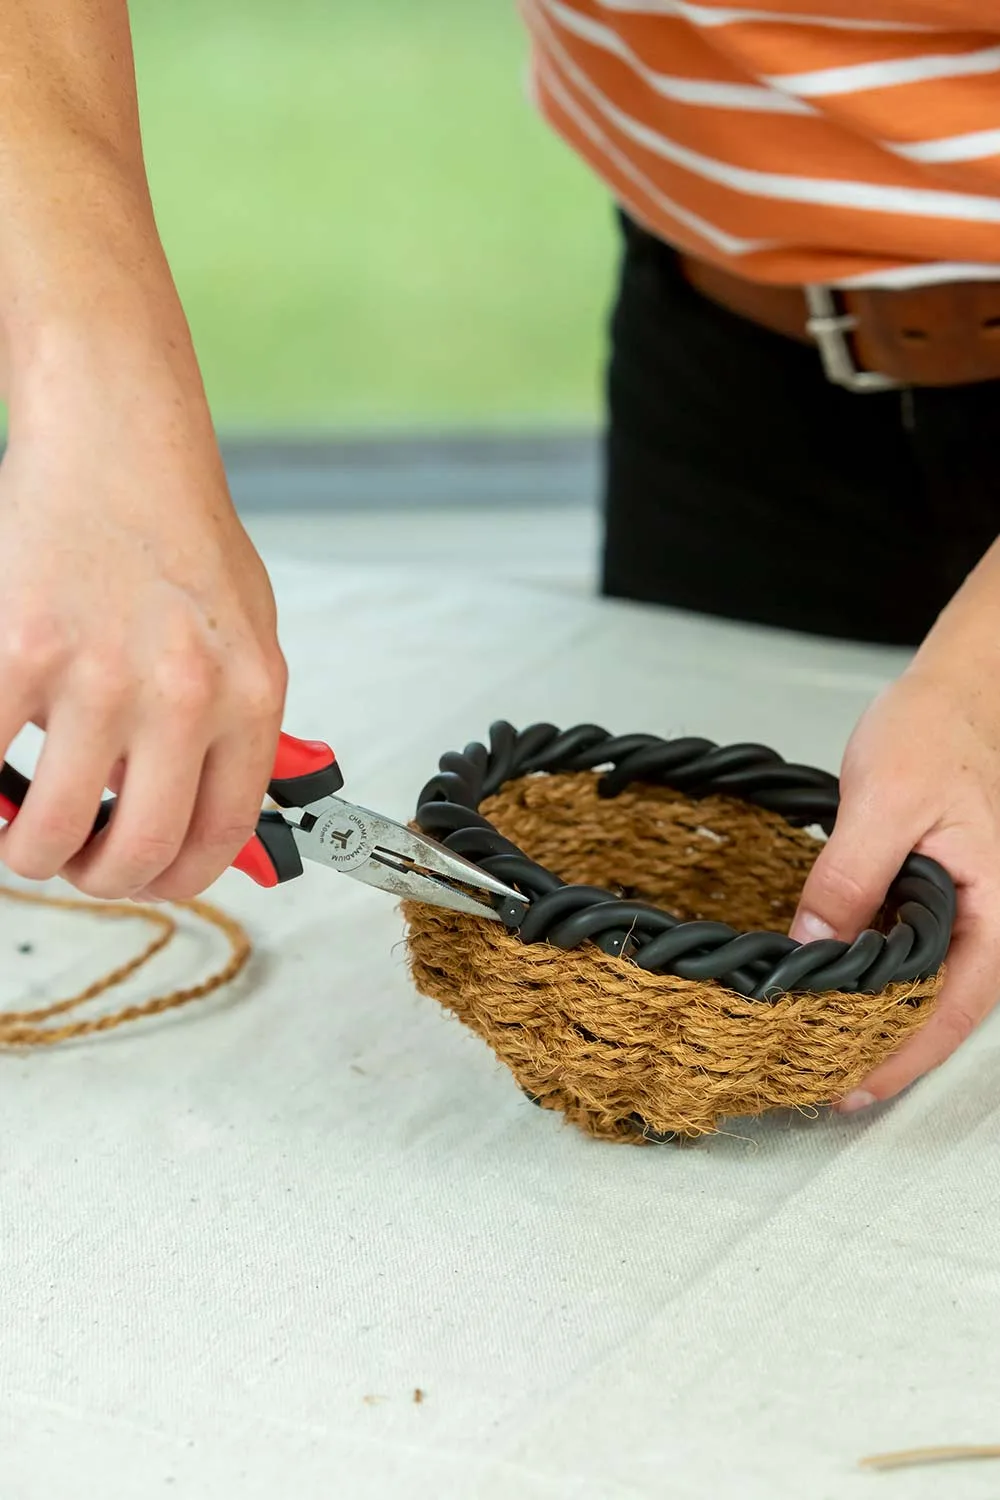
Trim ends of soft ties and tuck into woven rim using pliers.

Grow your own
Here is a list of plants with fibres suitable for weaving:
- Wisteria
- New Zealand flax leaf
- Palm tree bracts and frond sheaths
- Banana leaf sheaths
- Yucca leaf
- Cordyline
- Daylily leaves
- Philodendron leaf sheaths
- Red hot poker leaves
- English lavender stems
- Choko vine
- Kangaroo paw (Anigozanthos sp)
