The one feature of a home that influences any decorating to come is the floor. While it can be hard to narrow down your options for flooring with so much on offer, if you live in an older home its likely that whats hiding under your dated and worn-out carpet are beautiful timber floorboards.
Rather than starting from scratch with new flooring, breathe new life into what’s already there. With the right equipment and by following a few simple tips, you can polish them up and transform the look and feel of your home instantly. But that’s not all – a polished timber floor can add thousands to the value of your house. Cha-ching!
Gather your supplies
• Floor sander (hired)
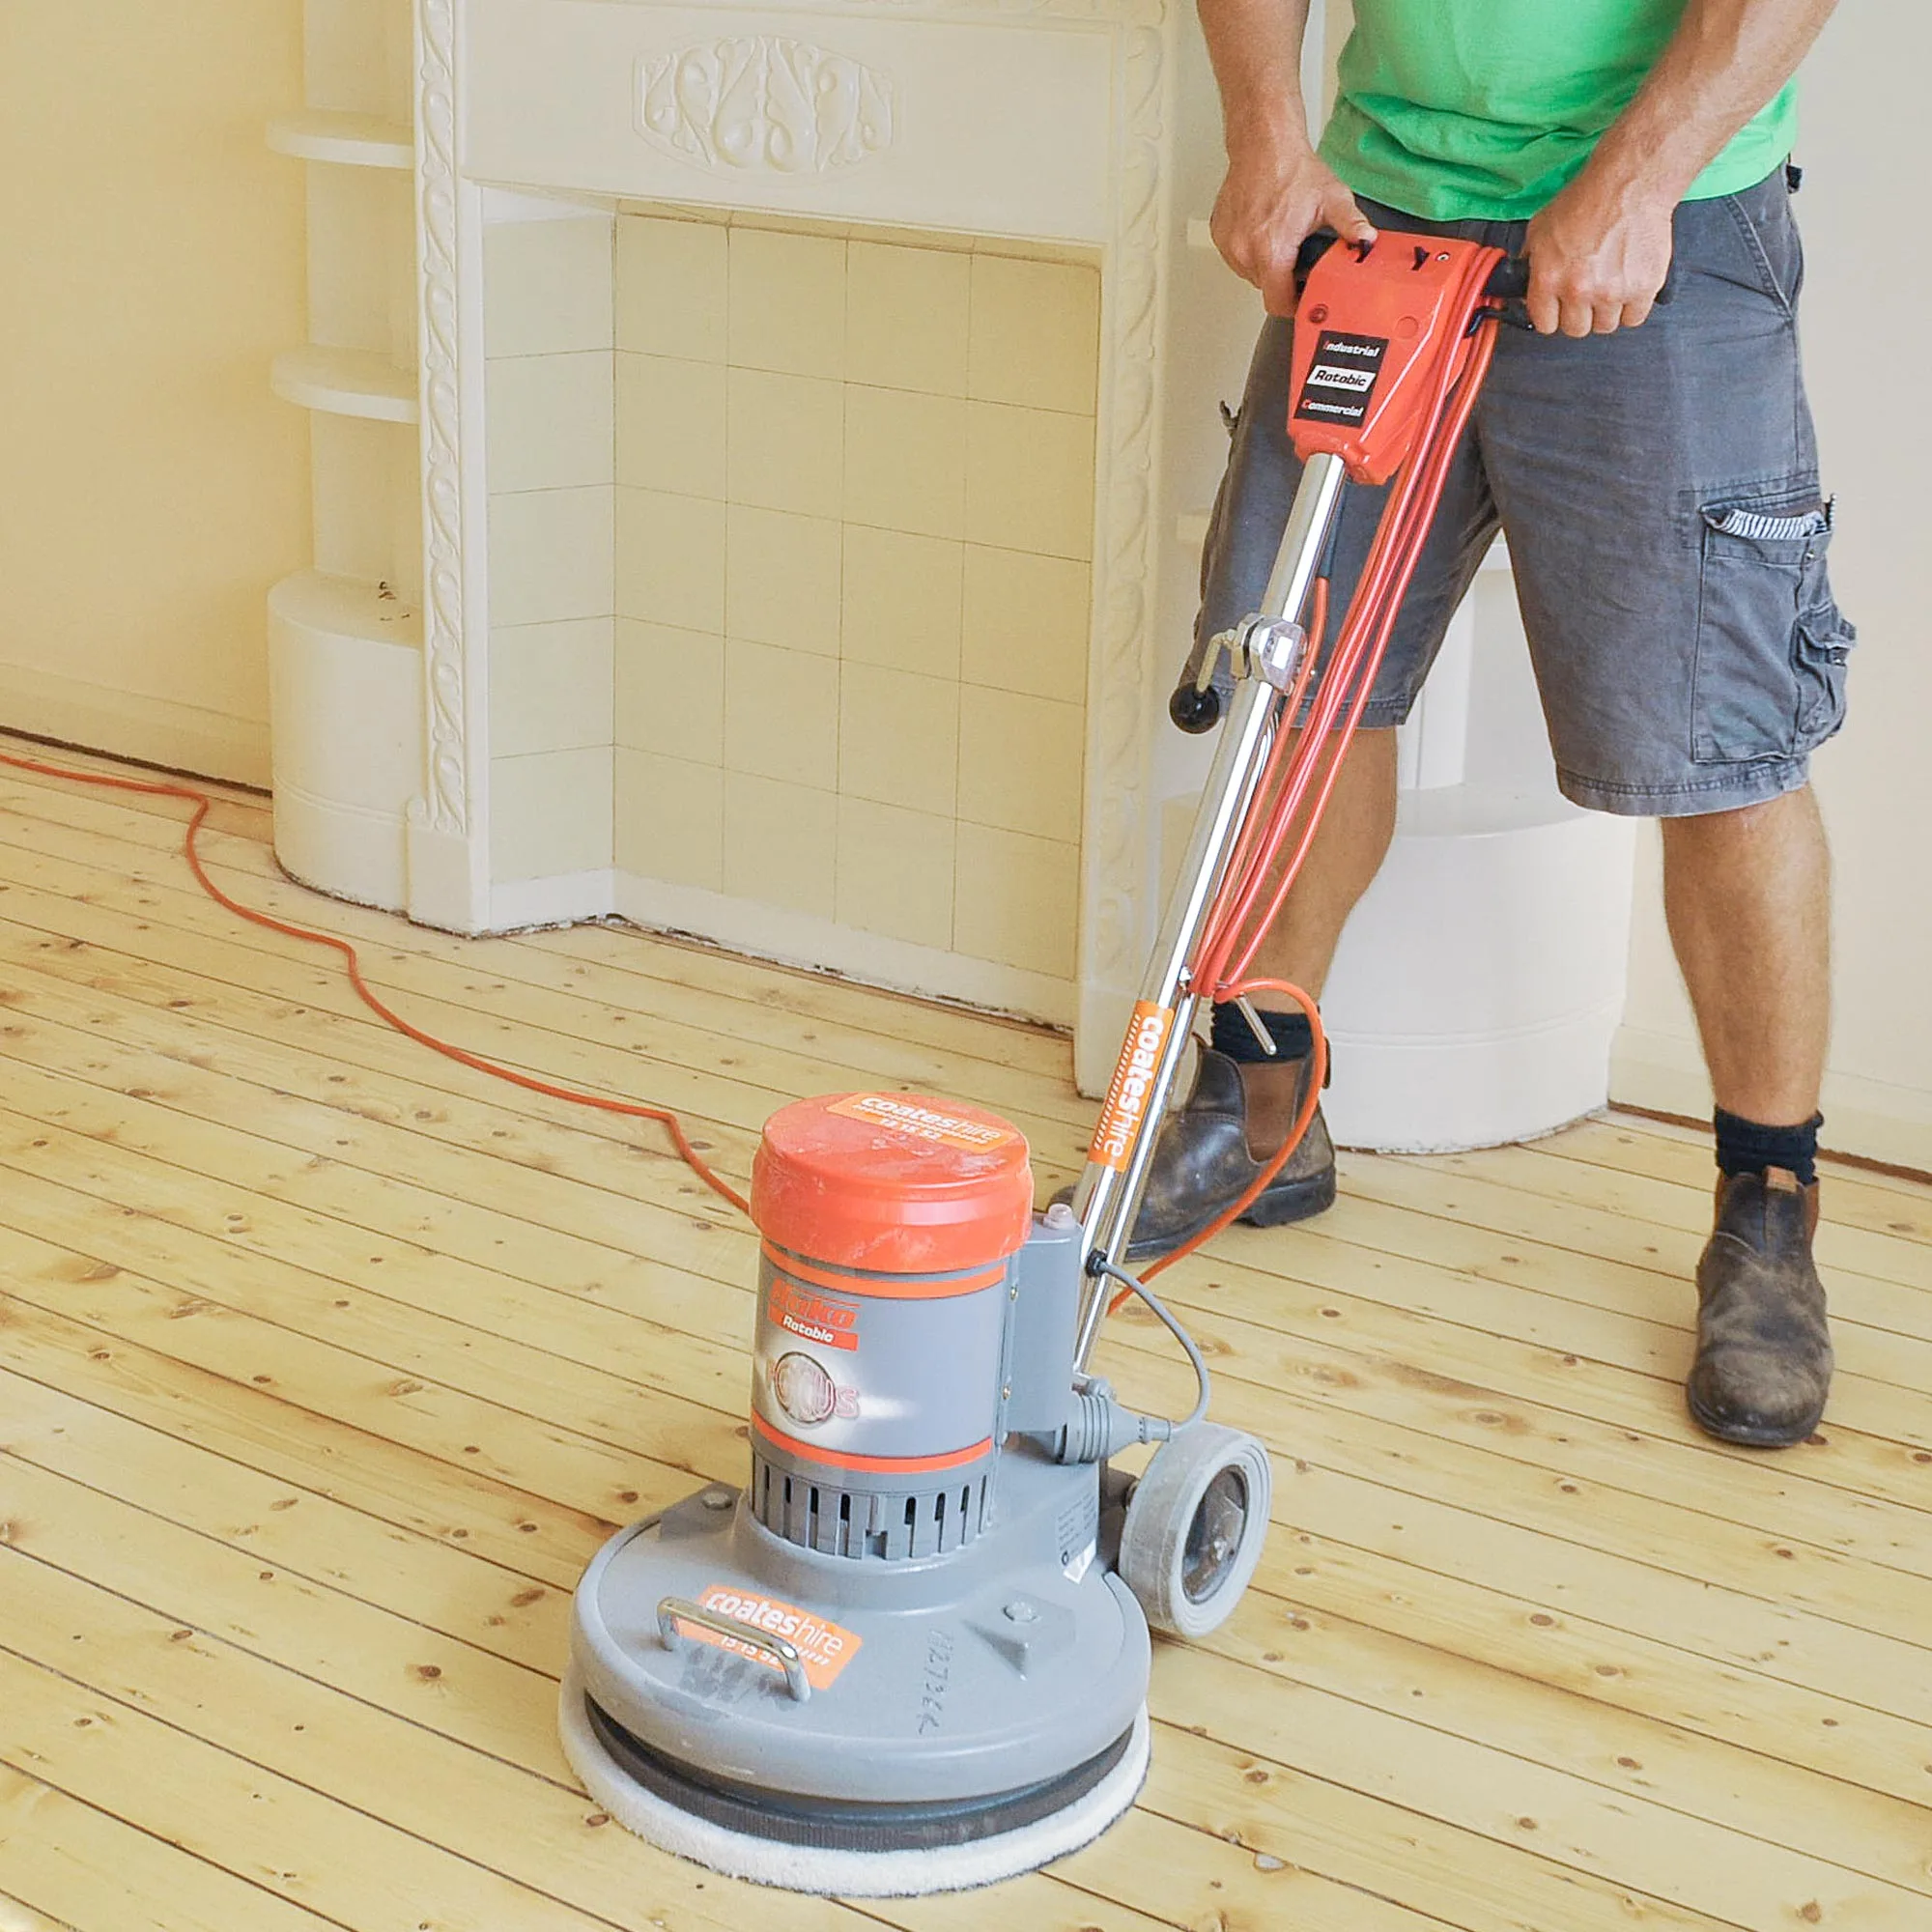
• Floor edger sander (hired)
• Floor polisher (hired)
• Wood putty (in a colour to match your floorboards)
• Feast Watson Proofseal
• Finish for floorboards (we used Feast Watson Floorclear)
You’ll also need:
40-, 80- and 120-grit sandpaper for sander; nail punch; hammer; utility knife; staple remover; safety gear (gloves, dust mask, earmuffs or plugs); screwdriver; hammer; pry bar; scraper; paintbrush; short nap roller or lambswool applicator
Here’s how
Step 1
Carefully remove all doors. To remove hinge screws that have years of paint over them, put a screwdriver into screw and give it a firm tap with a hammer. This will help to break up paint and loosen screw from hinge. Label each door so you know what goes where when you’re finished.
Step 2
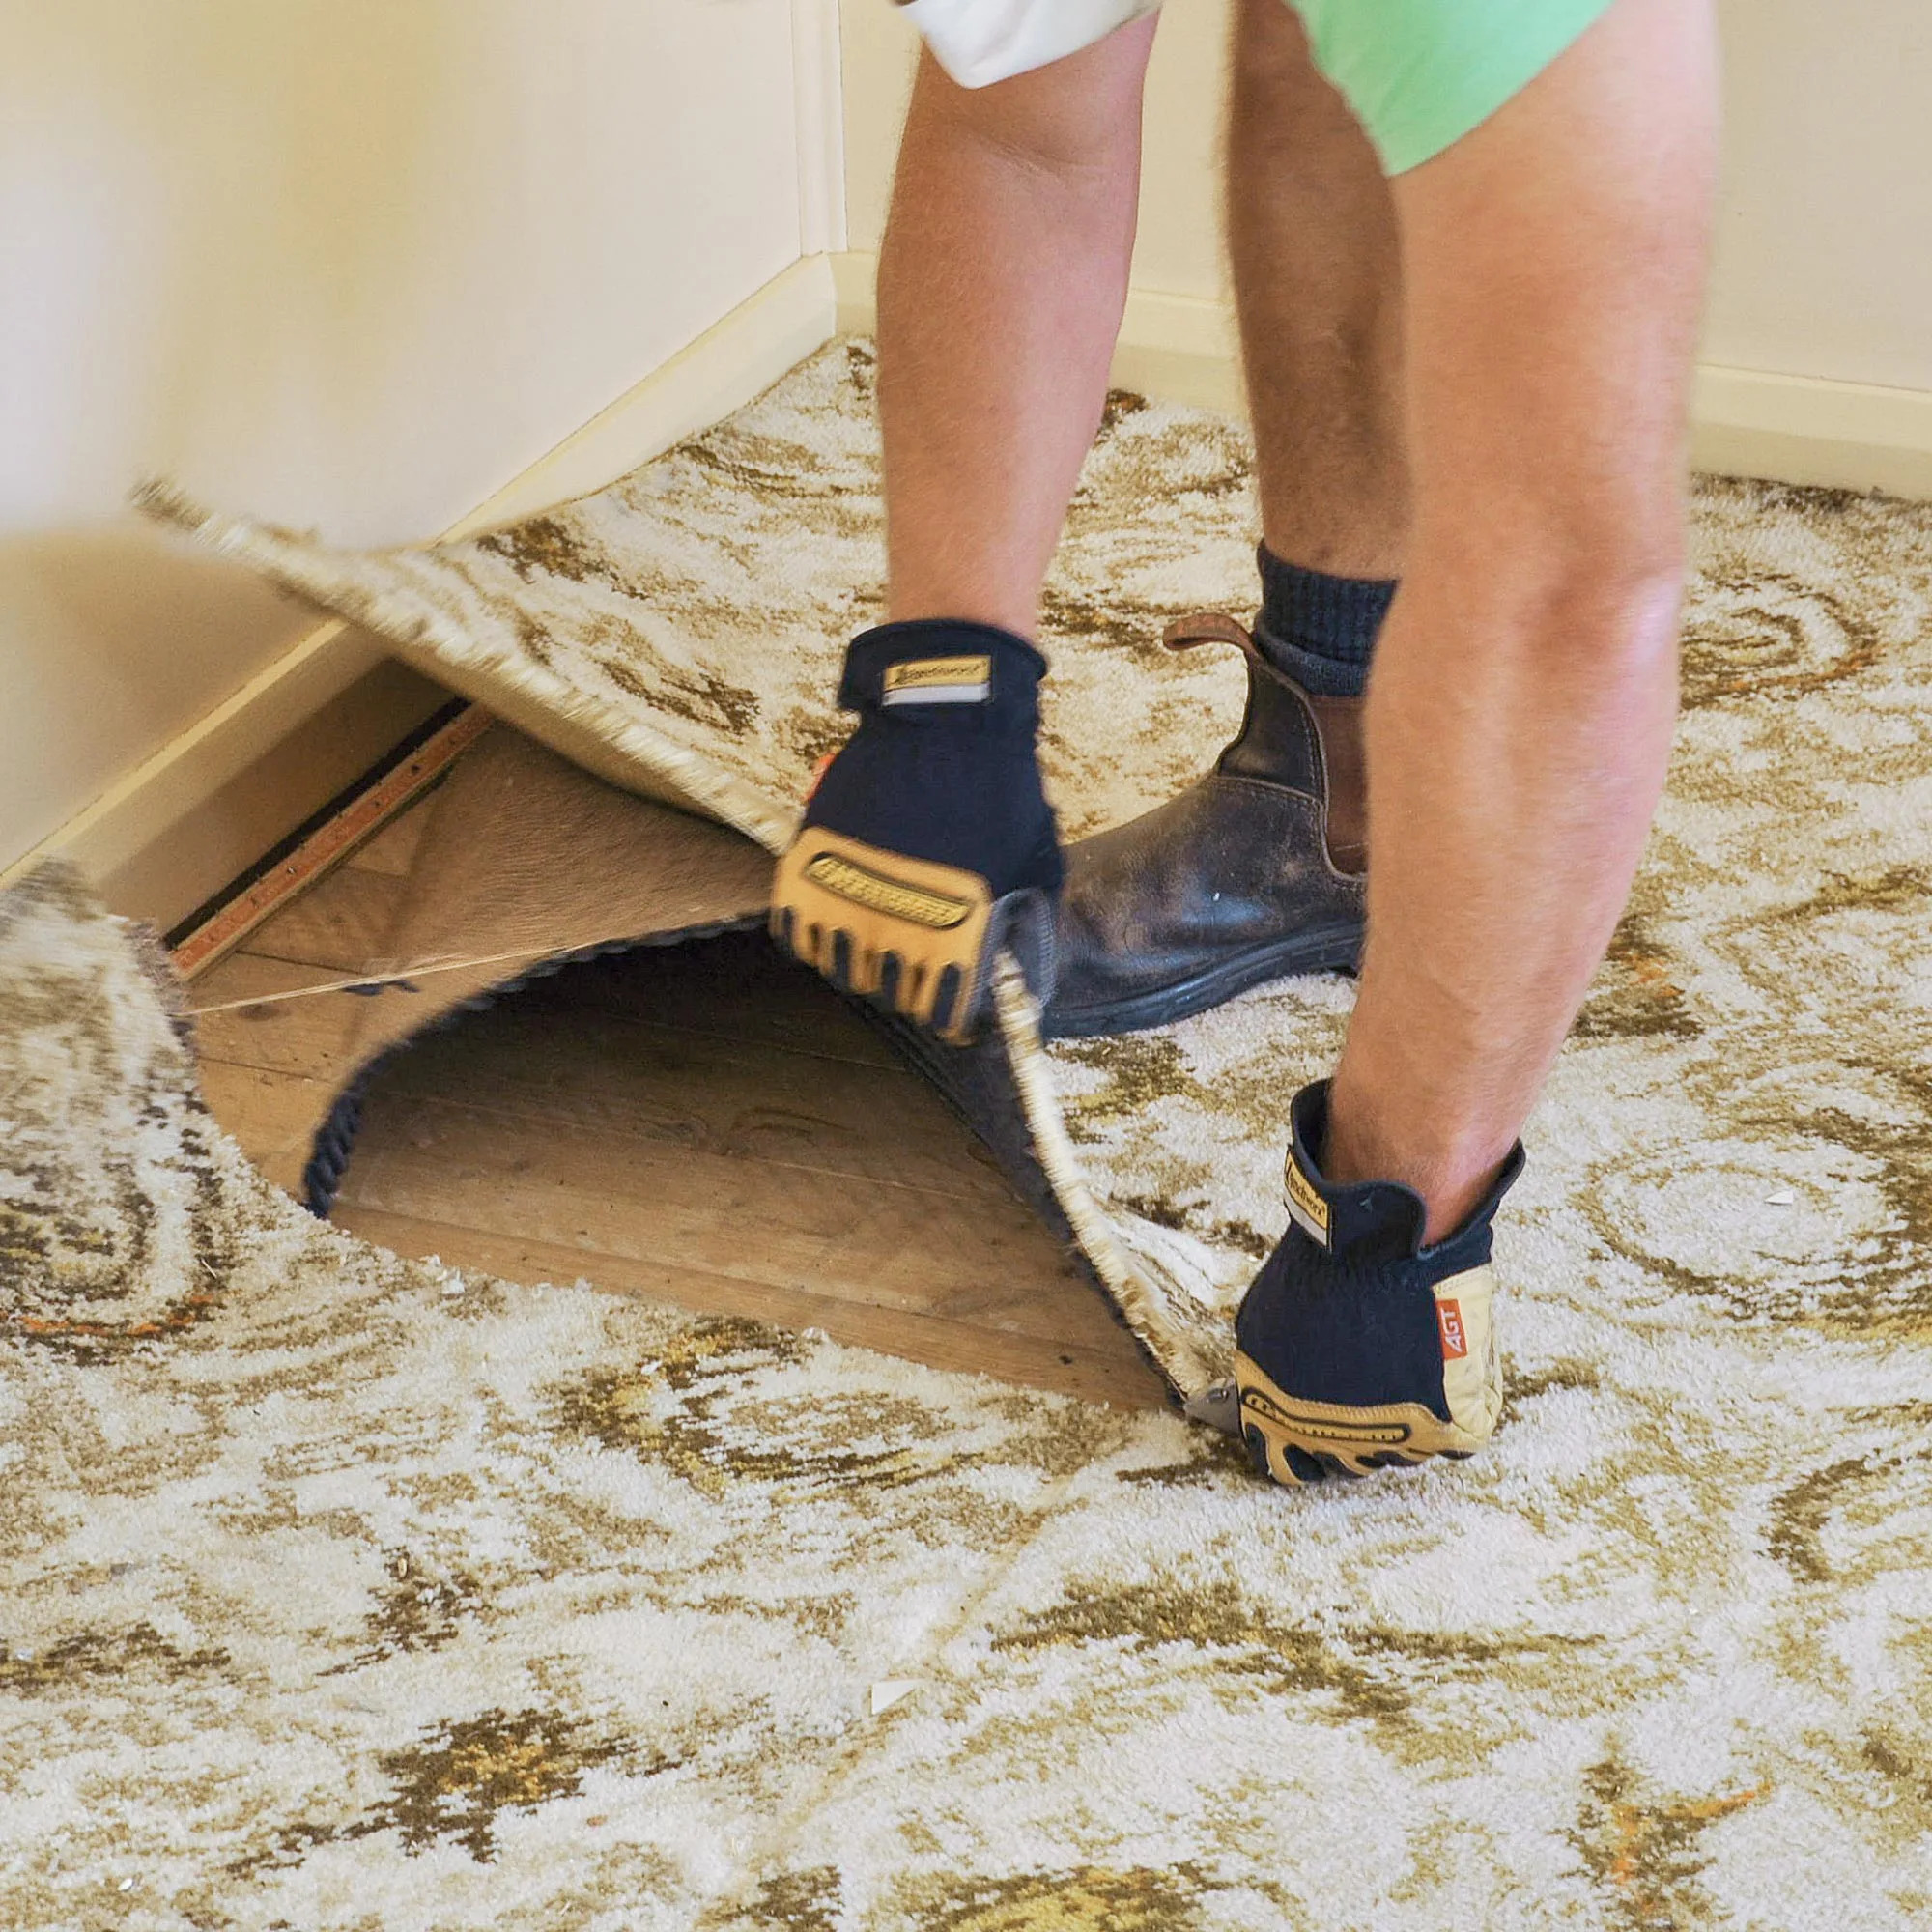
Use utility knife to cut carpet into strips. Don’t cut too deep, as you don’t want to score timber underneath. Roll up carpet and underlay together and remove.
Step 3
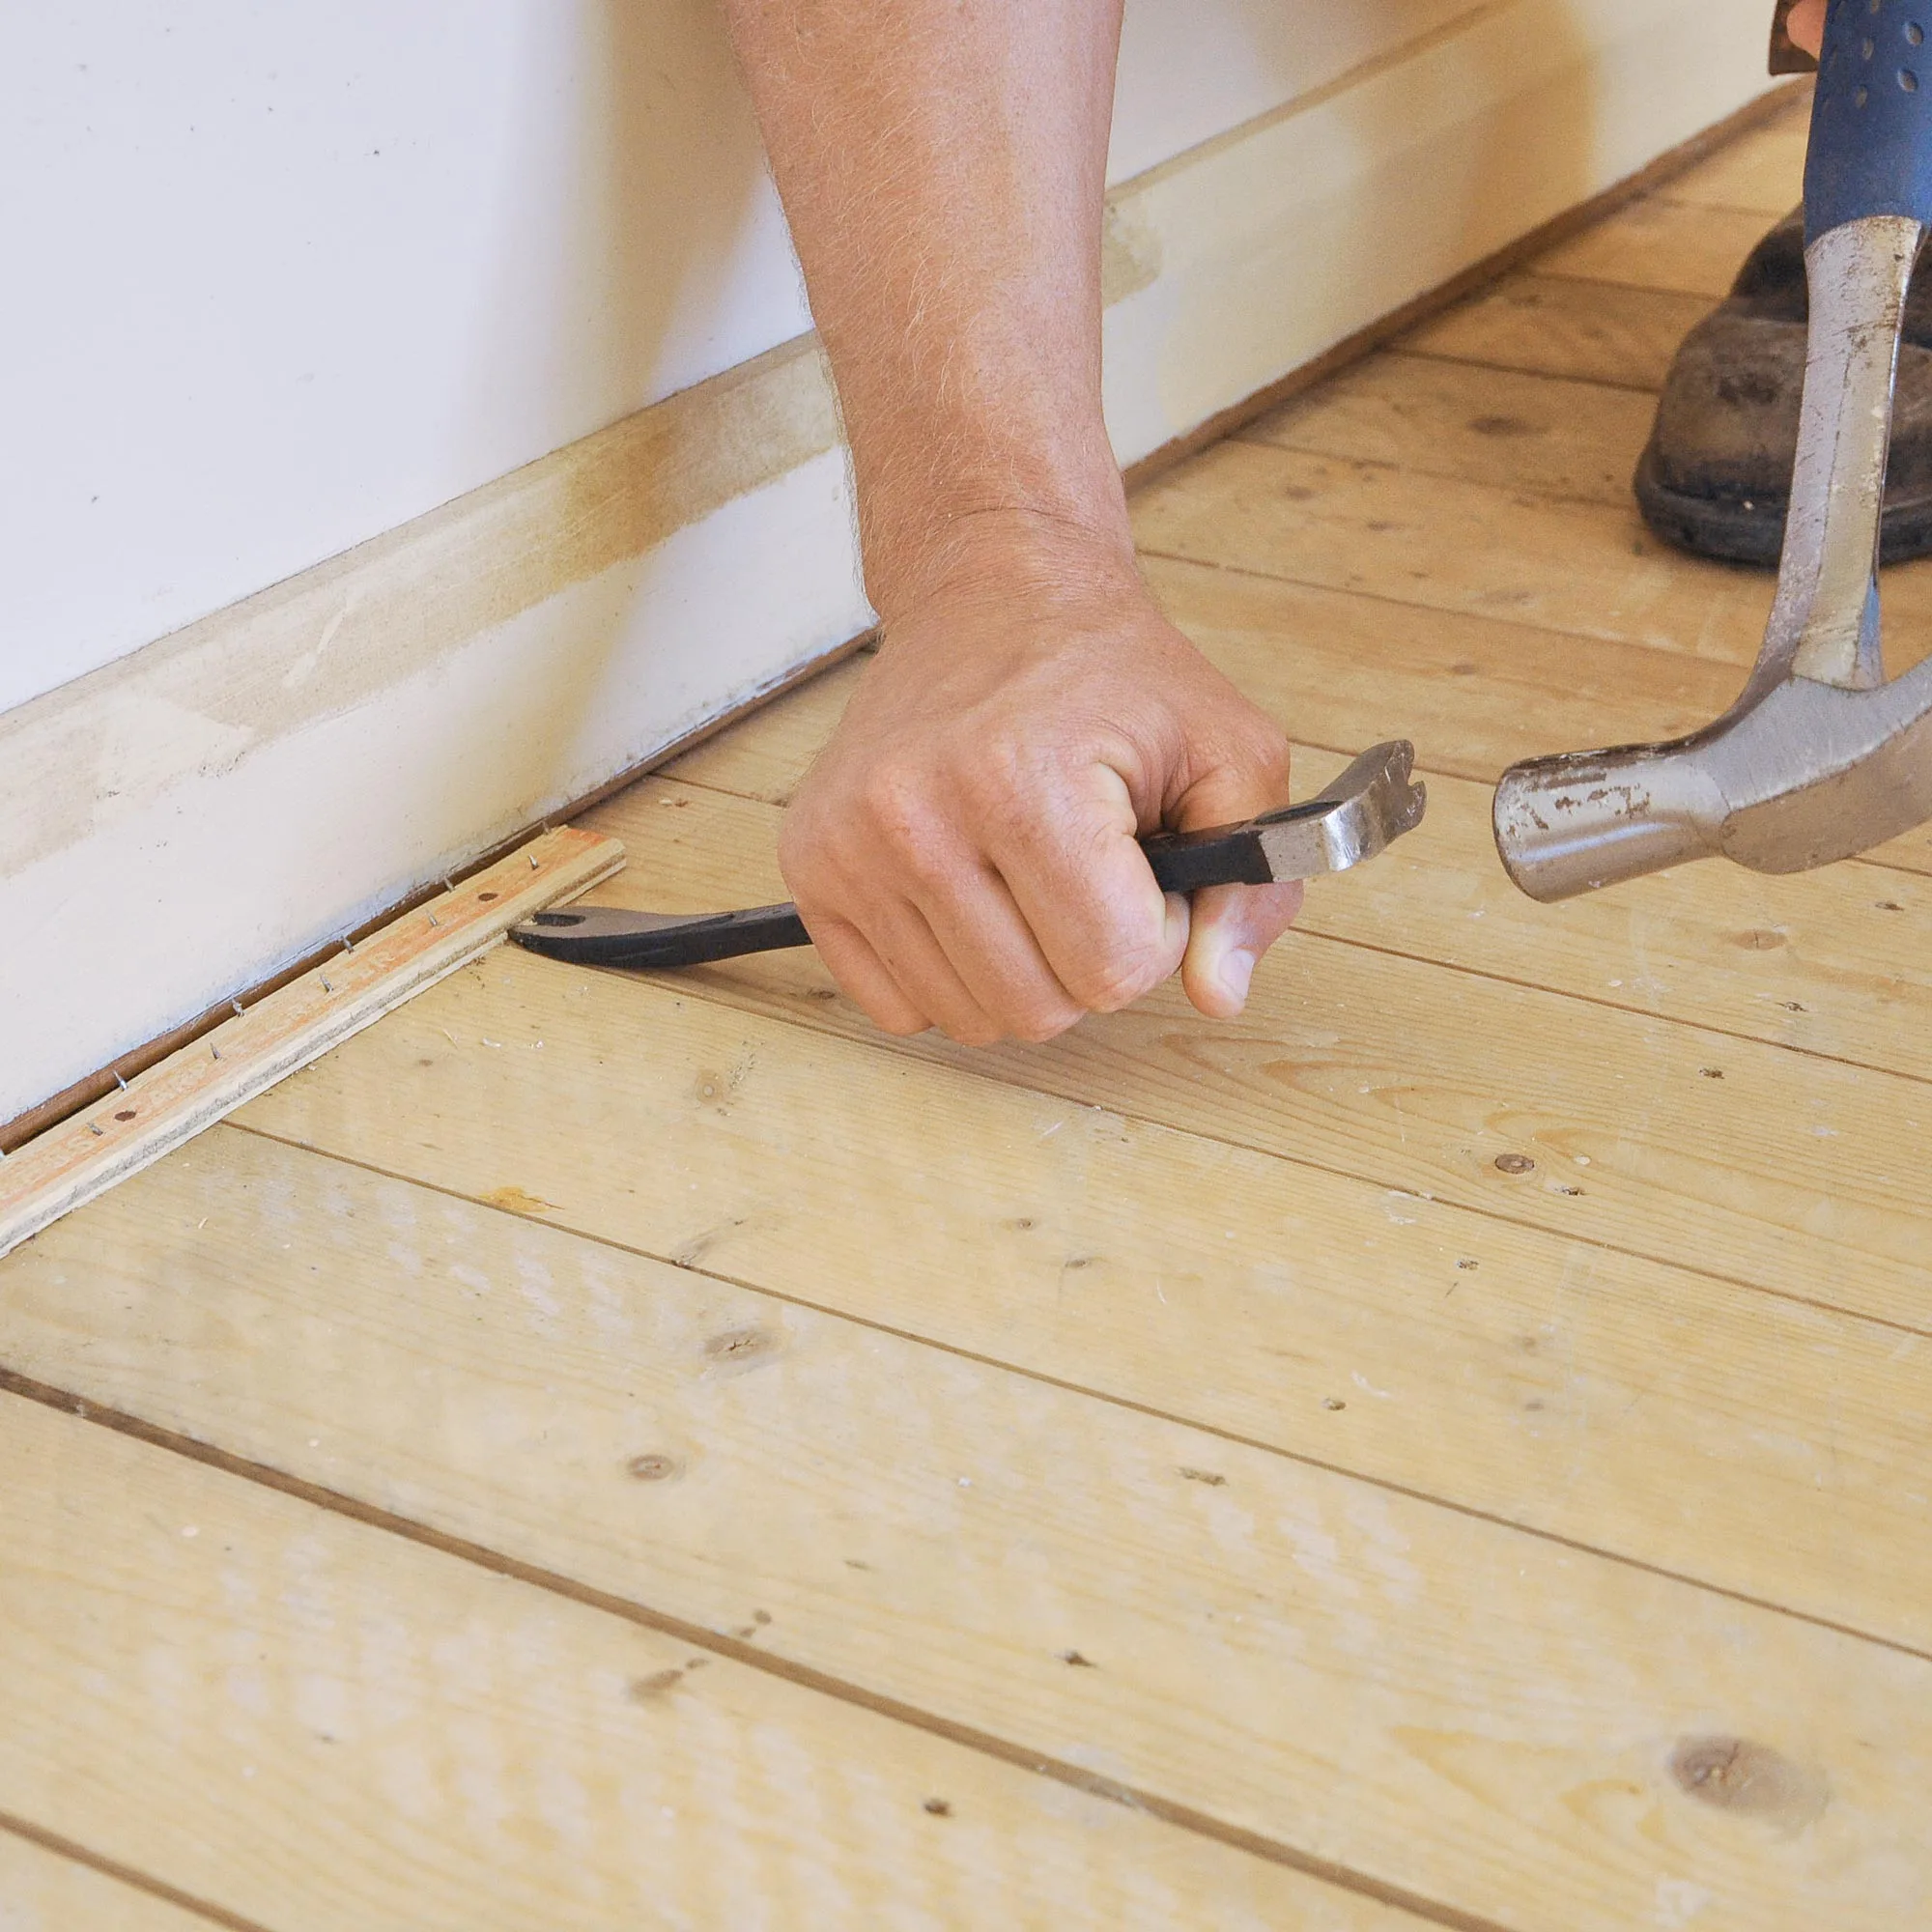
Remove nail strips along edges of floor using a pry bar. Pull up any staples used to fix down underlay using staple remover. Vacuum floor to remove all loose staples. Punch nails a few millimetres below surface of boards.
Step 4
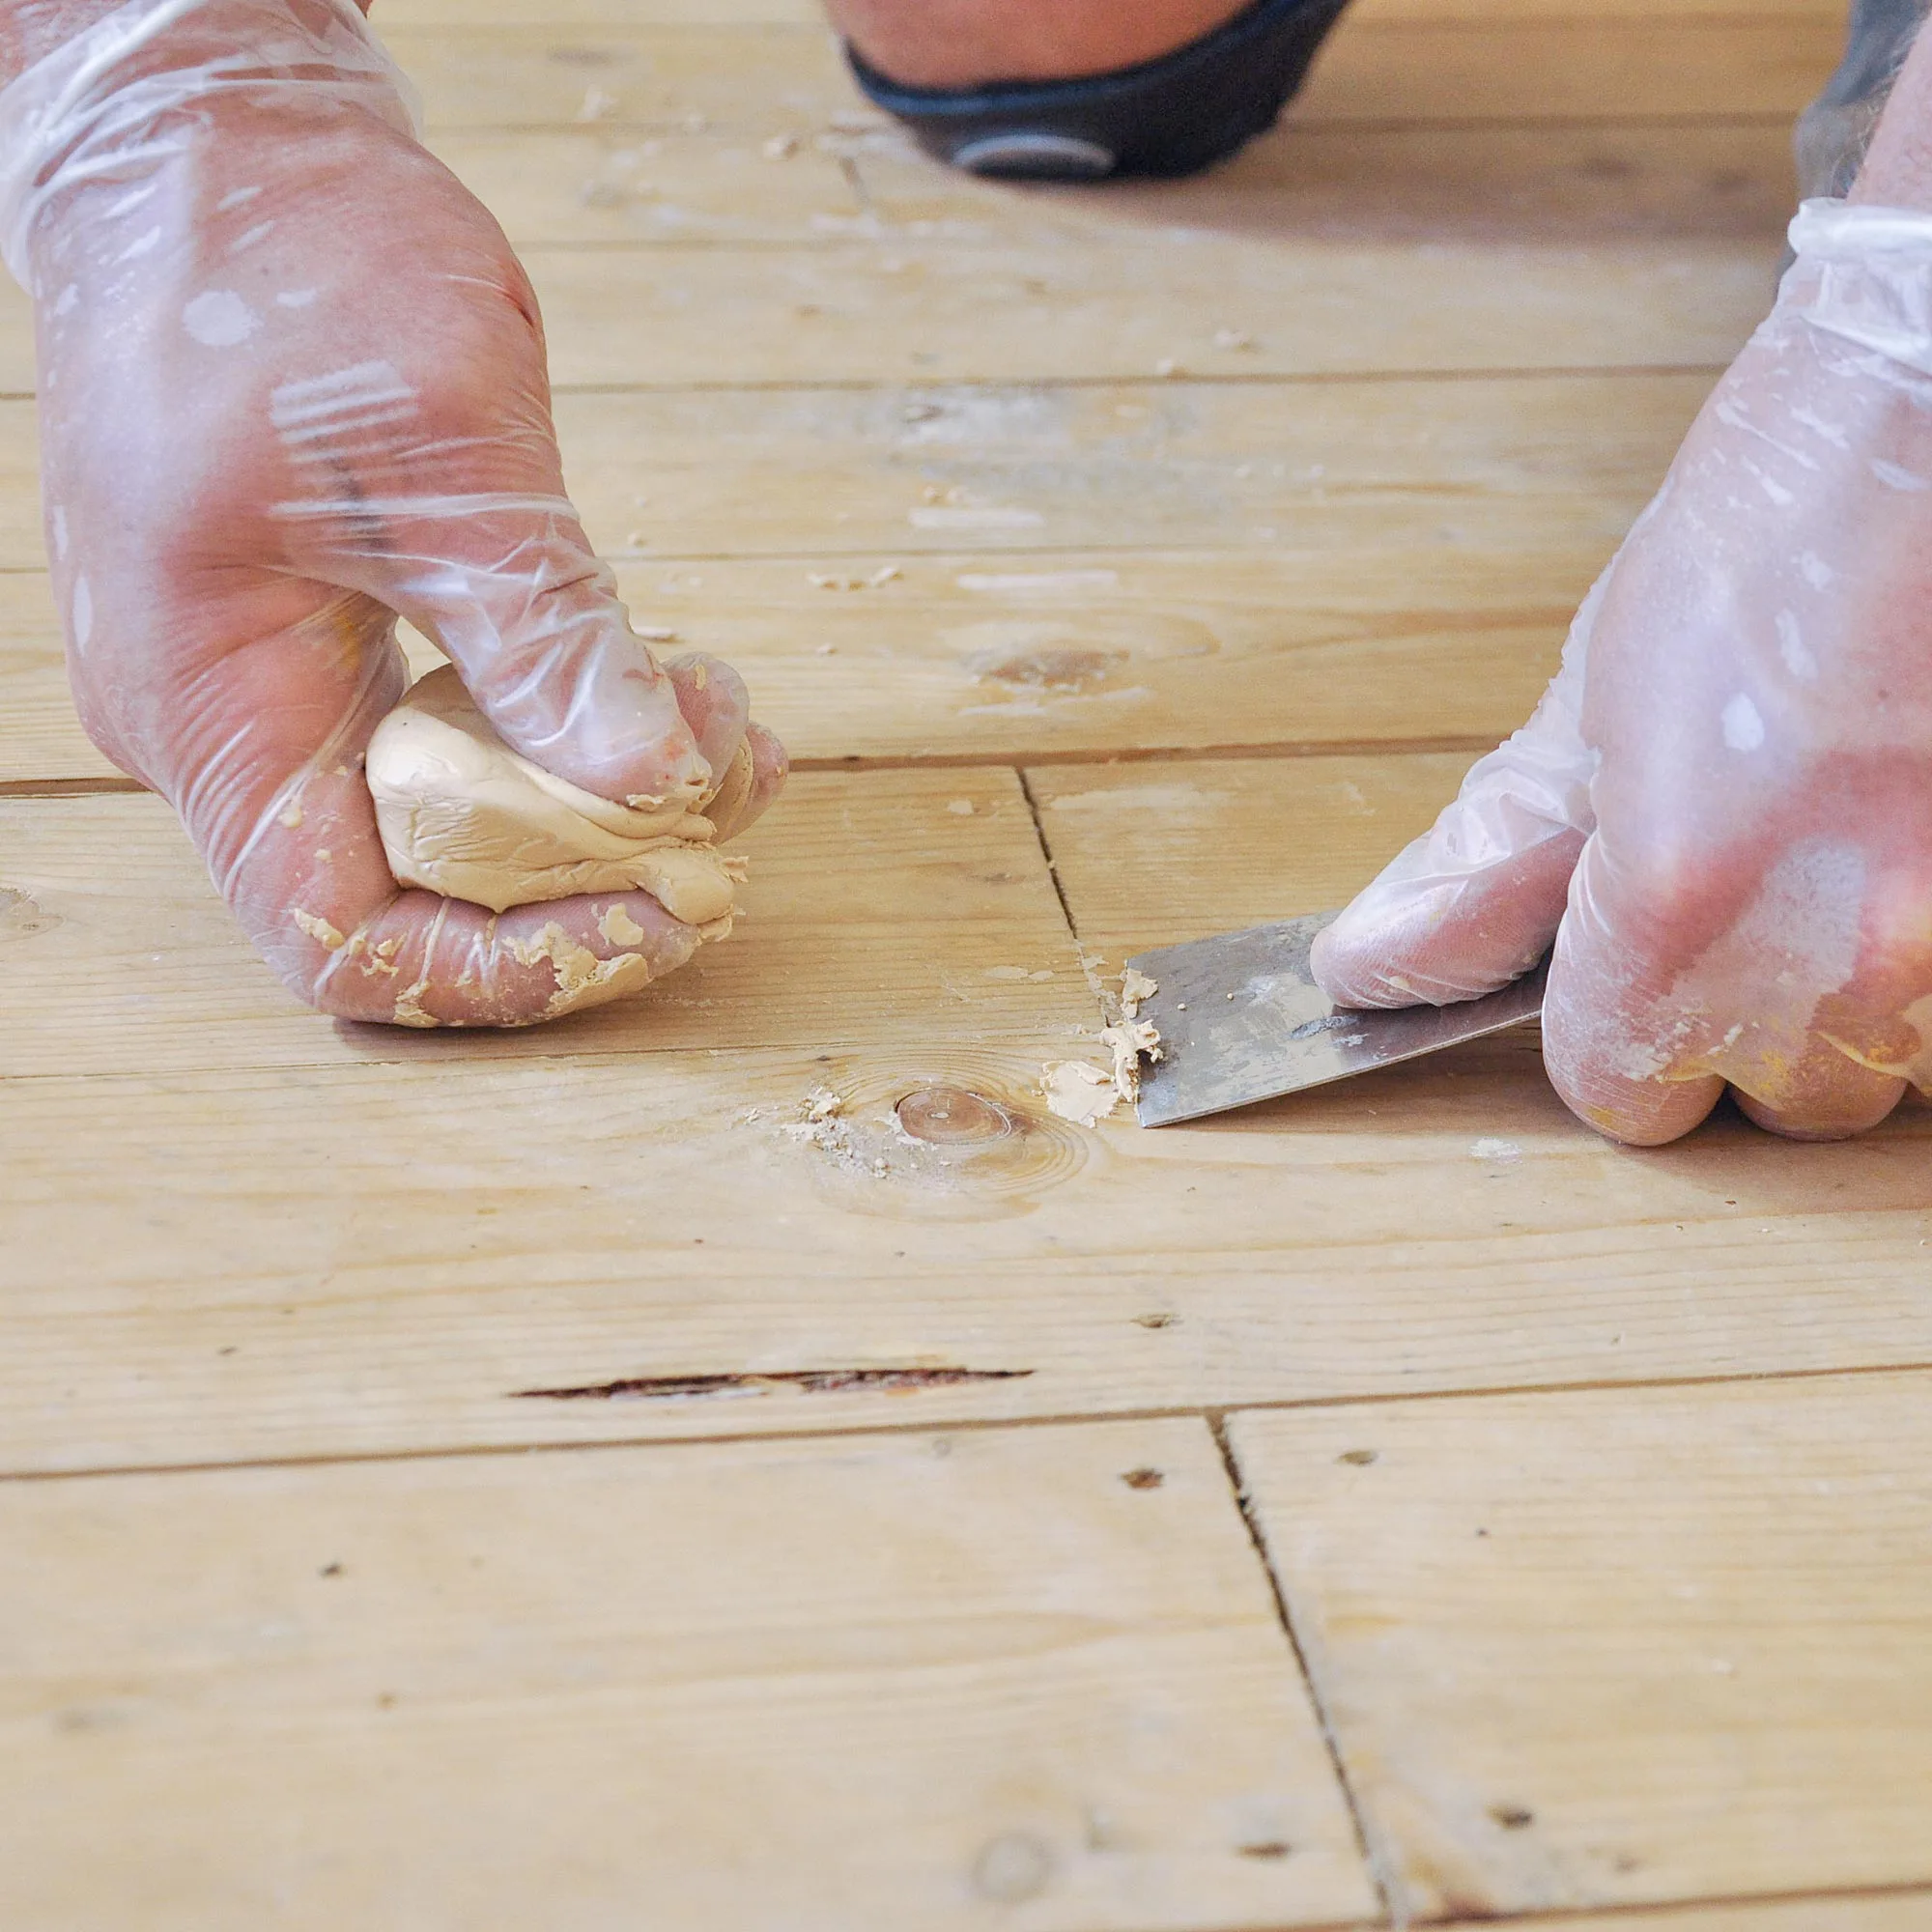
Fill nail holes with wood putty. If you’re unsure you have the right colour putty, test it on a part of floor that’s unlikely to be seen. Hold a ball of putty in 1 hand, push it into hole, then use scraper to make it flush with boards.
Step 5
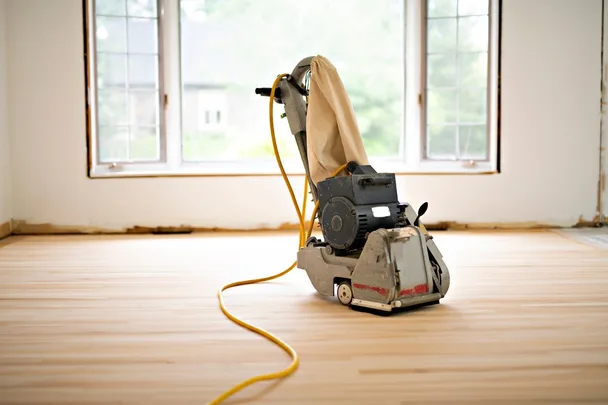
Using floor sander with 40-grit sandpaper, start sanding diagonally across boards. Never start or stop the machine while in contact with boards and move it slowly and steadily while sanding. Do 1 pass going 1 way, then switch to go on other diagonal.

Step 6
Switch to an 80-grit sandpaper and go along boards in direction of grain. Do a final sand along grain with a 120-grit sandpaper.
Step 7
Sand edges of room using edge sander. Like main sander, start with a coarse grade of sandpaper before moving to finer grades.

Step 8
Wipe down walls, windows and anywhere else dust has settled to ensure best finish possible, then vacuum. Apply a coat of Proofseal. This will soak in and prevent any tannins from leaching out of timber and discolouring any further coats. It also aids adhesion of further finishing coats to timber.
Step 9
Apply a first coat of your selected finish. Cut in along edges with a brush first. Use a lambswool applicator or short nap roller to coat about 3-4 boards at a time, going with grain. Always keep a wet edge so you can blend 1 pass with next. Once done, leave to dry for about 12 hours.
Step 10
Give floor a light sand with a floor polisher with fine sandpaper disc attached. This will remove any of the grain that has lifted and allow following coat to stick more effectively. Complete further coats as per manufacturer’s instructions.
Related stories
Native ad body.
Native ad body.

Native ad body.