
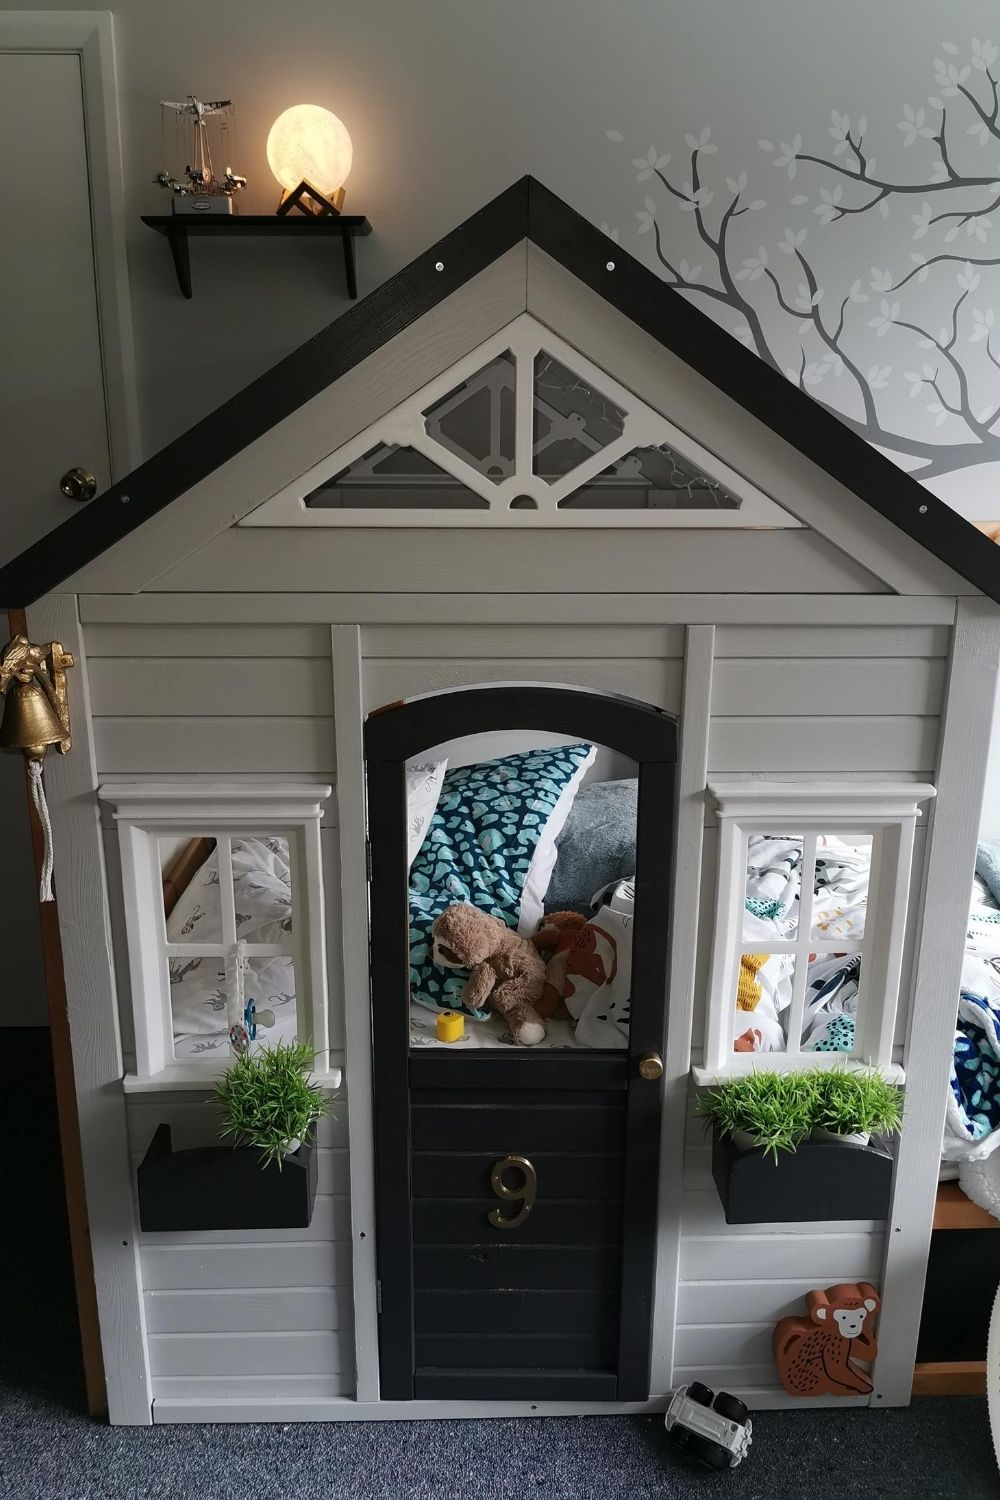
When mum of six Trina Gale’s youngest son was ready to transition from a cot to a bed, she wanted to make it extra fun. With the help of her husband, the two crafted together a cute cubby house-style bed. The project cost less than $400 and was made from a Kmart cubby kit, hardware store bits-and-bobs, and a DIY roof assembled from spare pallets.
Better Homes and Gardens Online caught up with Trina to find out more about their creative DIY.

What inspired your makeover?
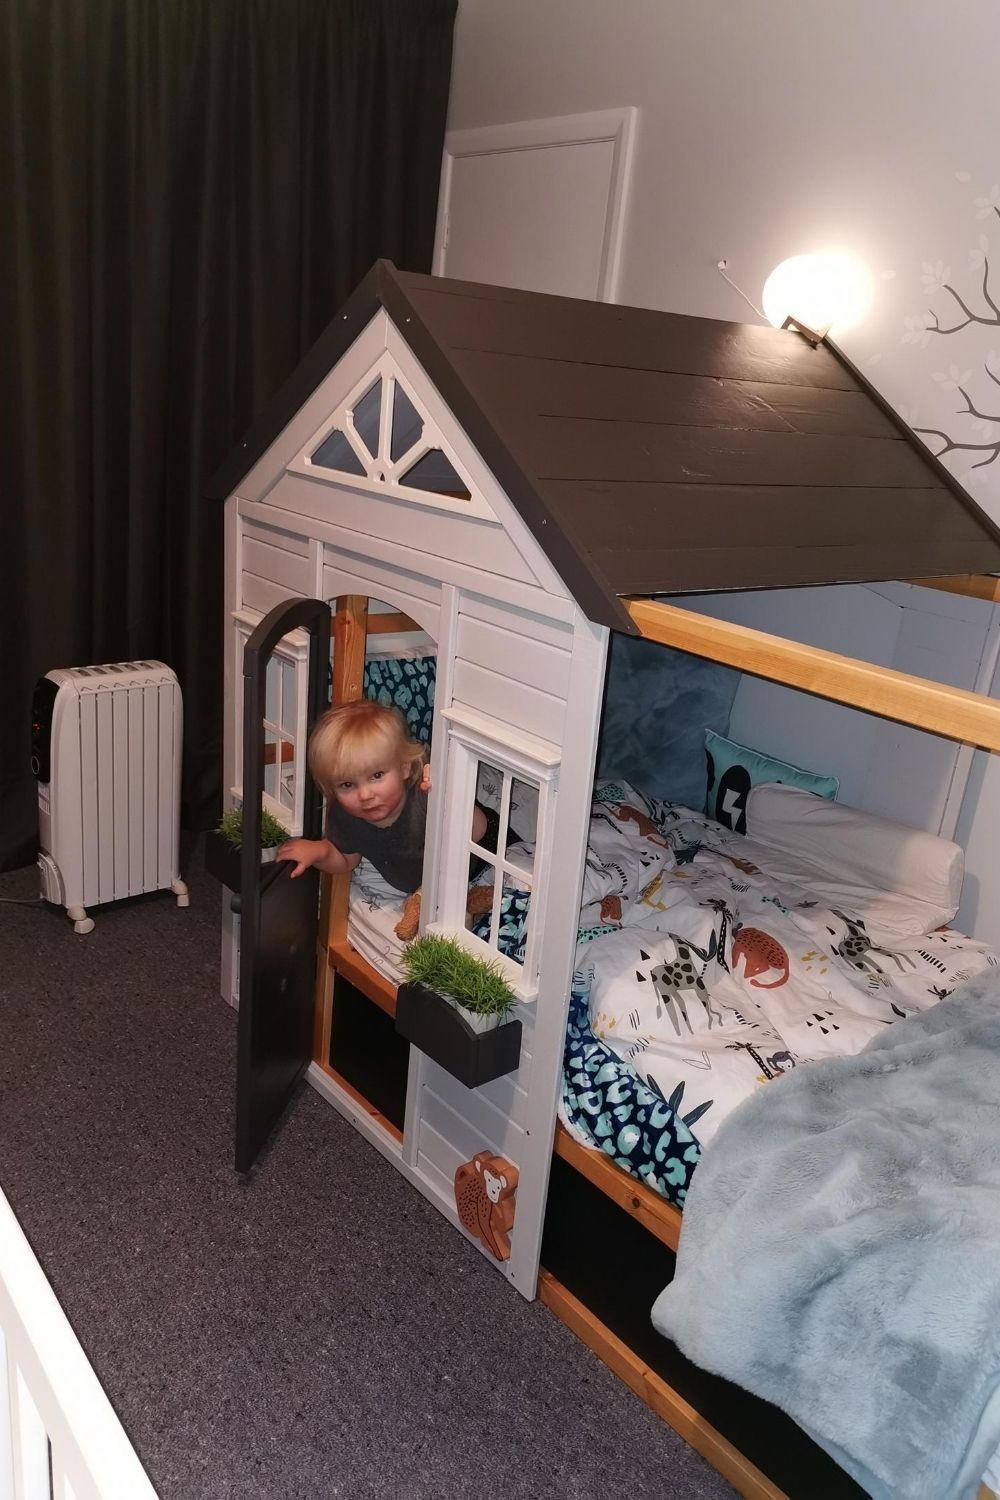
Ollie was due to be moved from his cot and into a bed, so I wanted to provide an environment where he felt safe and secure.
Have you done any makeovers before?
I’ve not really done any makeovers before actually, so this was all very new to me! It seemed simple enough to do in my head, but it was just a matter of turning my vision into a real functional bed and space for Ollie.


What kind of look were you after?
A hut, playhouse, cubby-kind of look with a roof, windows, a door, and lights.
What was the biggest challenge of the project?
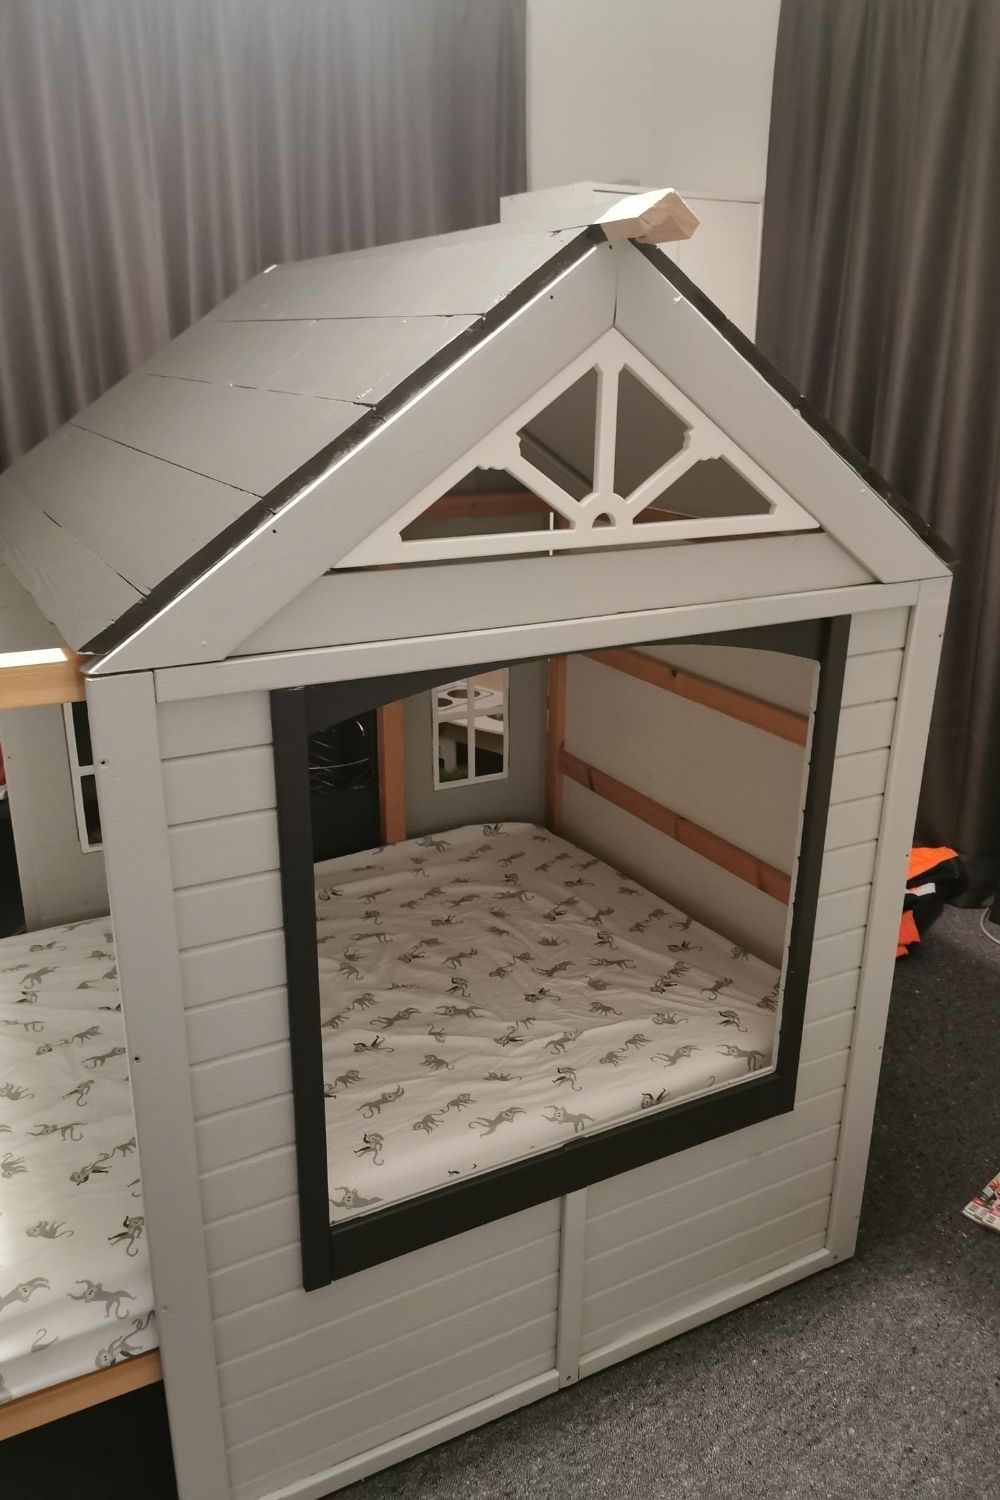
The roof was the most challenging part of the playhouse bed. The roof that came in the cubby house kit set wasn’t wide enough to fit the width of the bed. Thankfully my husband had some spare pallets and whipped up the same roof as in the kit set but just wider.

The Renovating Process
- Purchased the Kura Ikea bed frame and the Kmart cubby house.
- Sanded the wood.
- Used wood putty to fill in and staple holes.
- Painted the cubby house in sections.
- Set up the frame of the bed.
- Attached panels to the bed frame.
- Attached the roof.
- Added some architraves to really make the entire look of the cubby house-bed pop.
- Added a doorbell and fairy lights on the inside of the roof.

Budget Breakdown
Bed frame: $50 from second-hand website. (These are about $500 new)
Cubby kit set: $180 from Kmart
Architraves: $15 from any hardware store
Paint: $70
Plants: $6 each from hardware store
Bell: $20 from an online store
Bits and bobs (wood putty, decoration clips for the lights): $25
Fairy lights: $16 from Kmart
Total: $382
Favourite part?
I really just loved chipping away at it each evening for an hour or two when the kids were in bed. Painting is very therapeutic.
My other favourite part was the wee bell. It was cast iron and then I spray-painted it gold. It really does complete the overall look of the cubby bed. I also can’t forget to mention how excited Ollie was when he got to sleep in his big cubby bed for the first time. I’ve not seen him more excited before! The joy in his eyes was well worth the effort.


You may also like:
How one mum created an enchanted garden for her daughter
The Kmart cubby hack that’s breaking the internet
Related stories

Native ad body.

Native ad body.


Native ad body.


