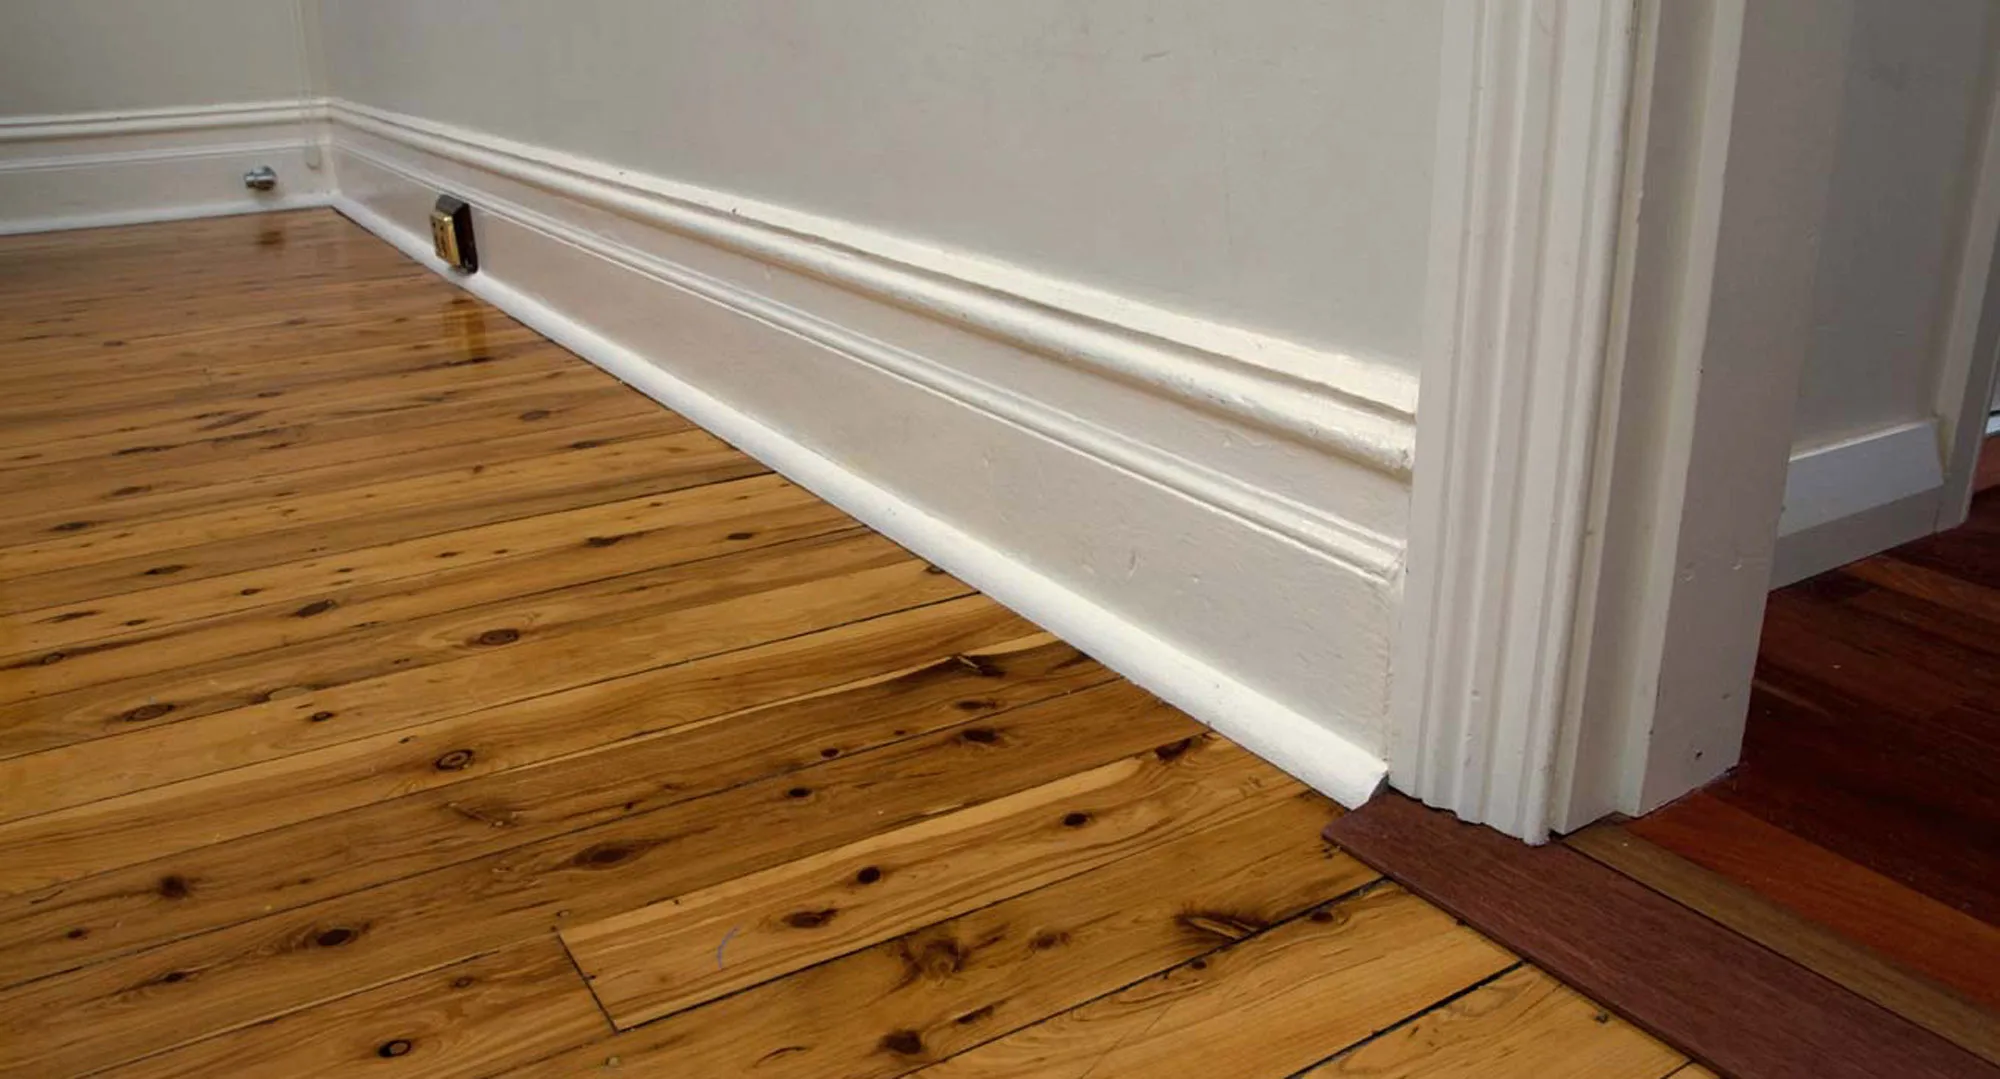
If you thought the worst part of having skirting boards was keeping them dust-free, then you’ve never had one with gaps.
WATCH: DIY fixes you can do around your home
A cracked skirting board can mean letting in a cold draught during the winter months. While heating, fireplaces, and electric throws can offset the chill, you might be better off repairing the gap.
If you’re wondering how gaps appear, it’s more common than you think. One simple cause is when you sand and polish a timber floor that was carpeted. Luckily, a small gap is easy to fix and can be filled with a matching flexible sealant or covered with timber moulding.
If your house is masonry and old, the gap could be the result of floors supported on piers subsiding independently of the walls. This gap is best covered by a quad moulding fixed to the floor that can slip up and down the skirting as the floor moves between wet and dry seasons, keeping the gap covered.
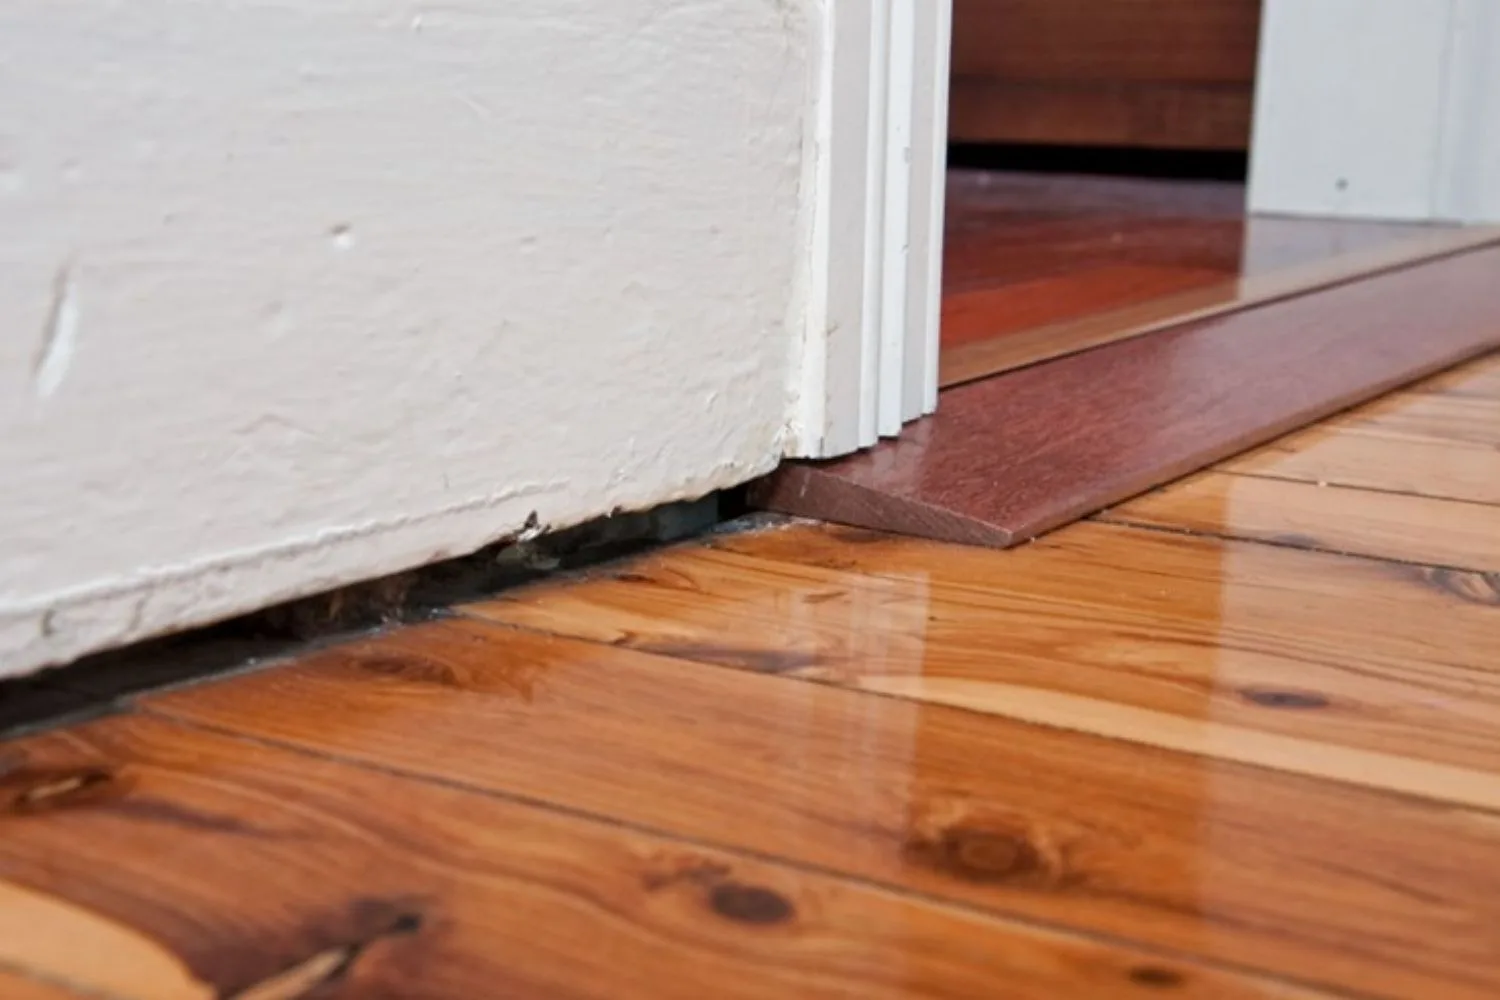
Before the weather takes a turn, winter-proof your home by starting with the skirting boards. The tricky task is easily accomplished with this quick four-step guide. Here’s how.
Gather your supplies
23mm quad moulding; mitre box; handsaw; coping saw; paint to match skirting.
Step 1
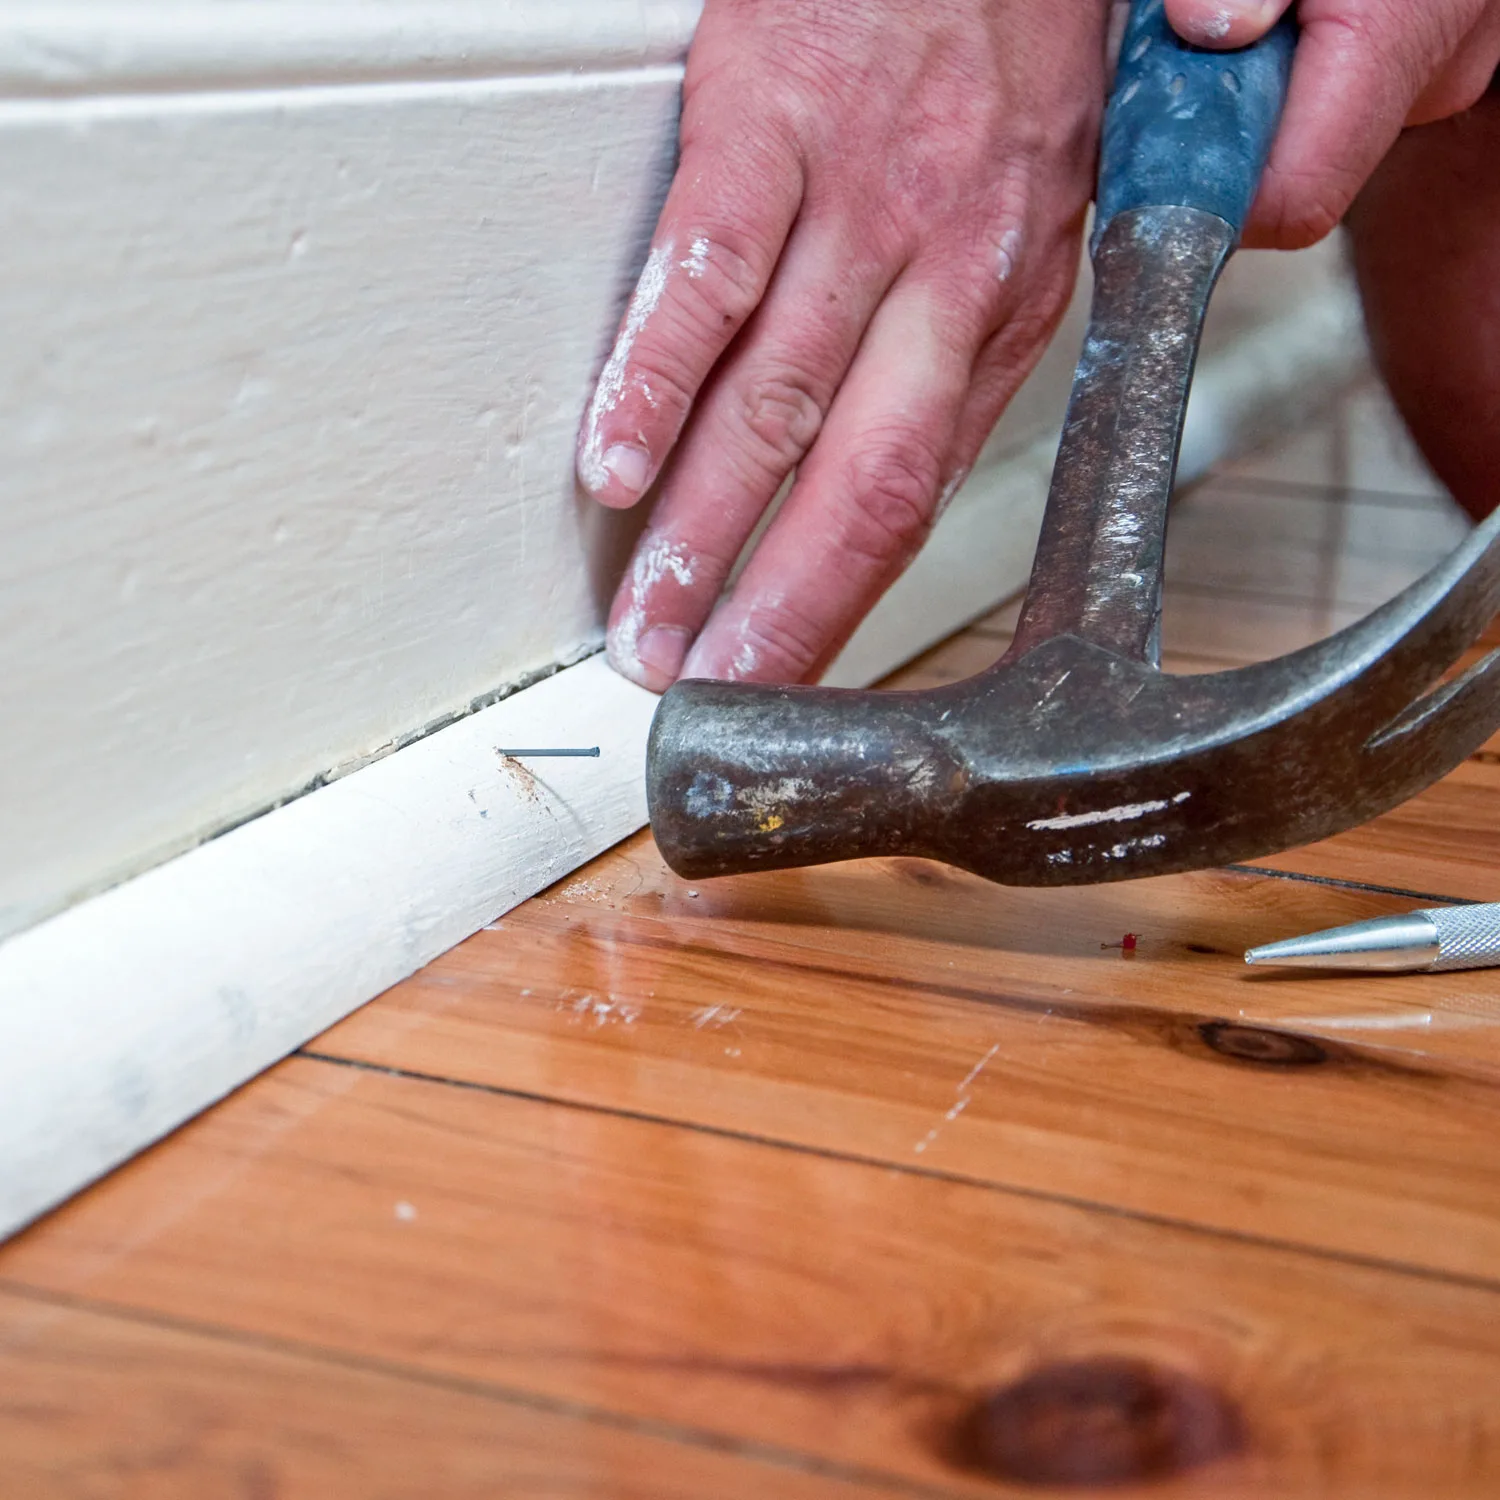
Paint quad. Cut quad for wall facing door with square cut at each end. Nail into position. If gap is stable, nail quad to skirting if there is enough timber. Otherwise, nail into floor. If floor is subsiding, only nail to floor. Nail to within a few millimetres of quad, then finish with a nail punch.
Step 2
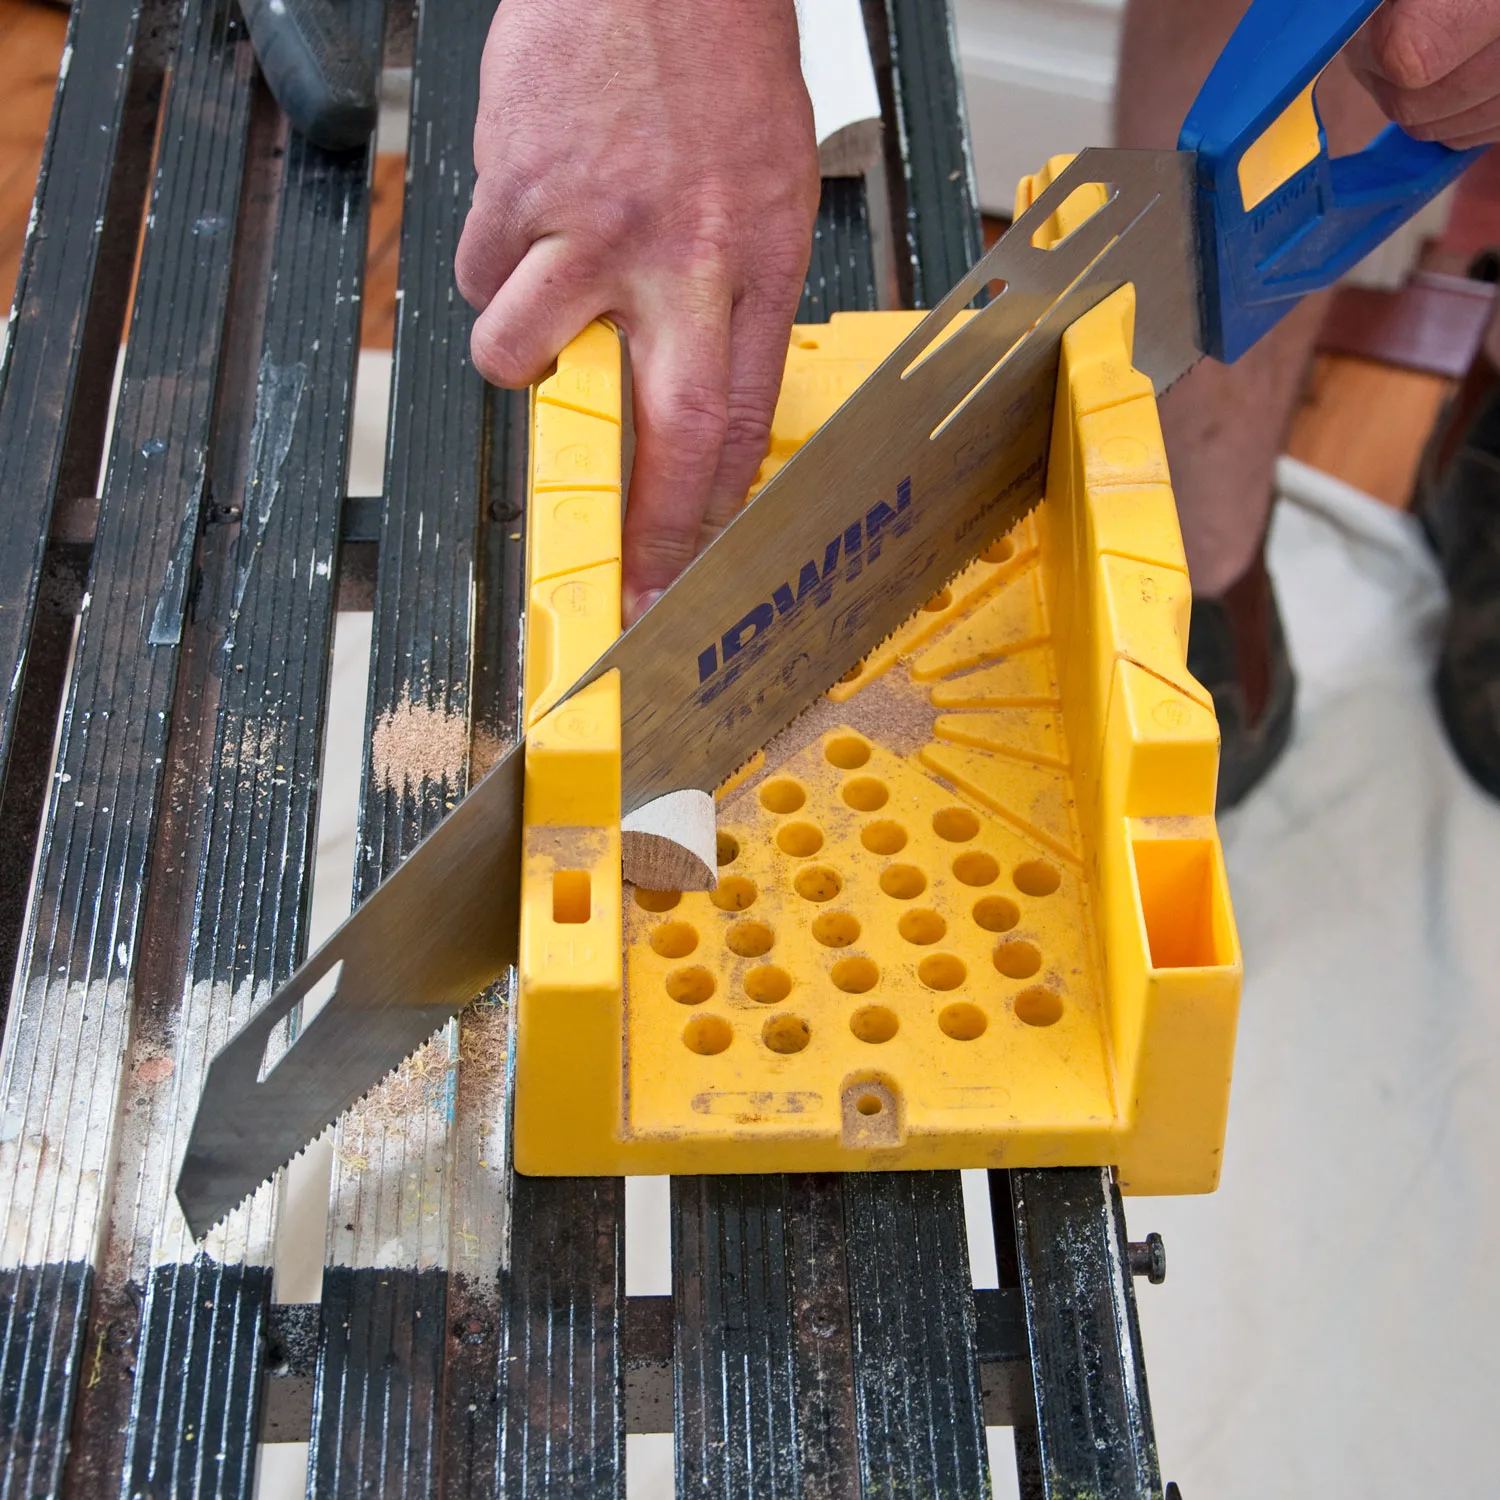
Working back towards door, cut closest end of quad square. Measure length again and add 2mm, to spring quad in place and keep joint closed. This time, cut a 45° angle, using mitre box.
Step 3
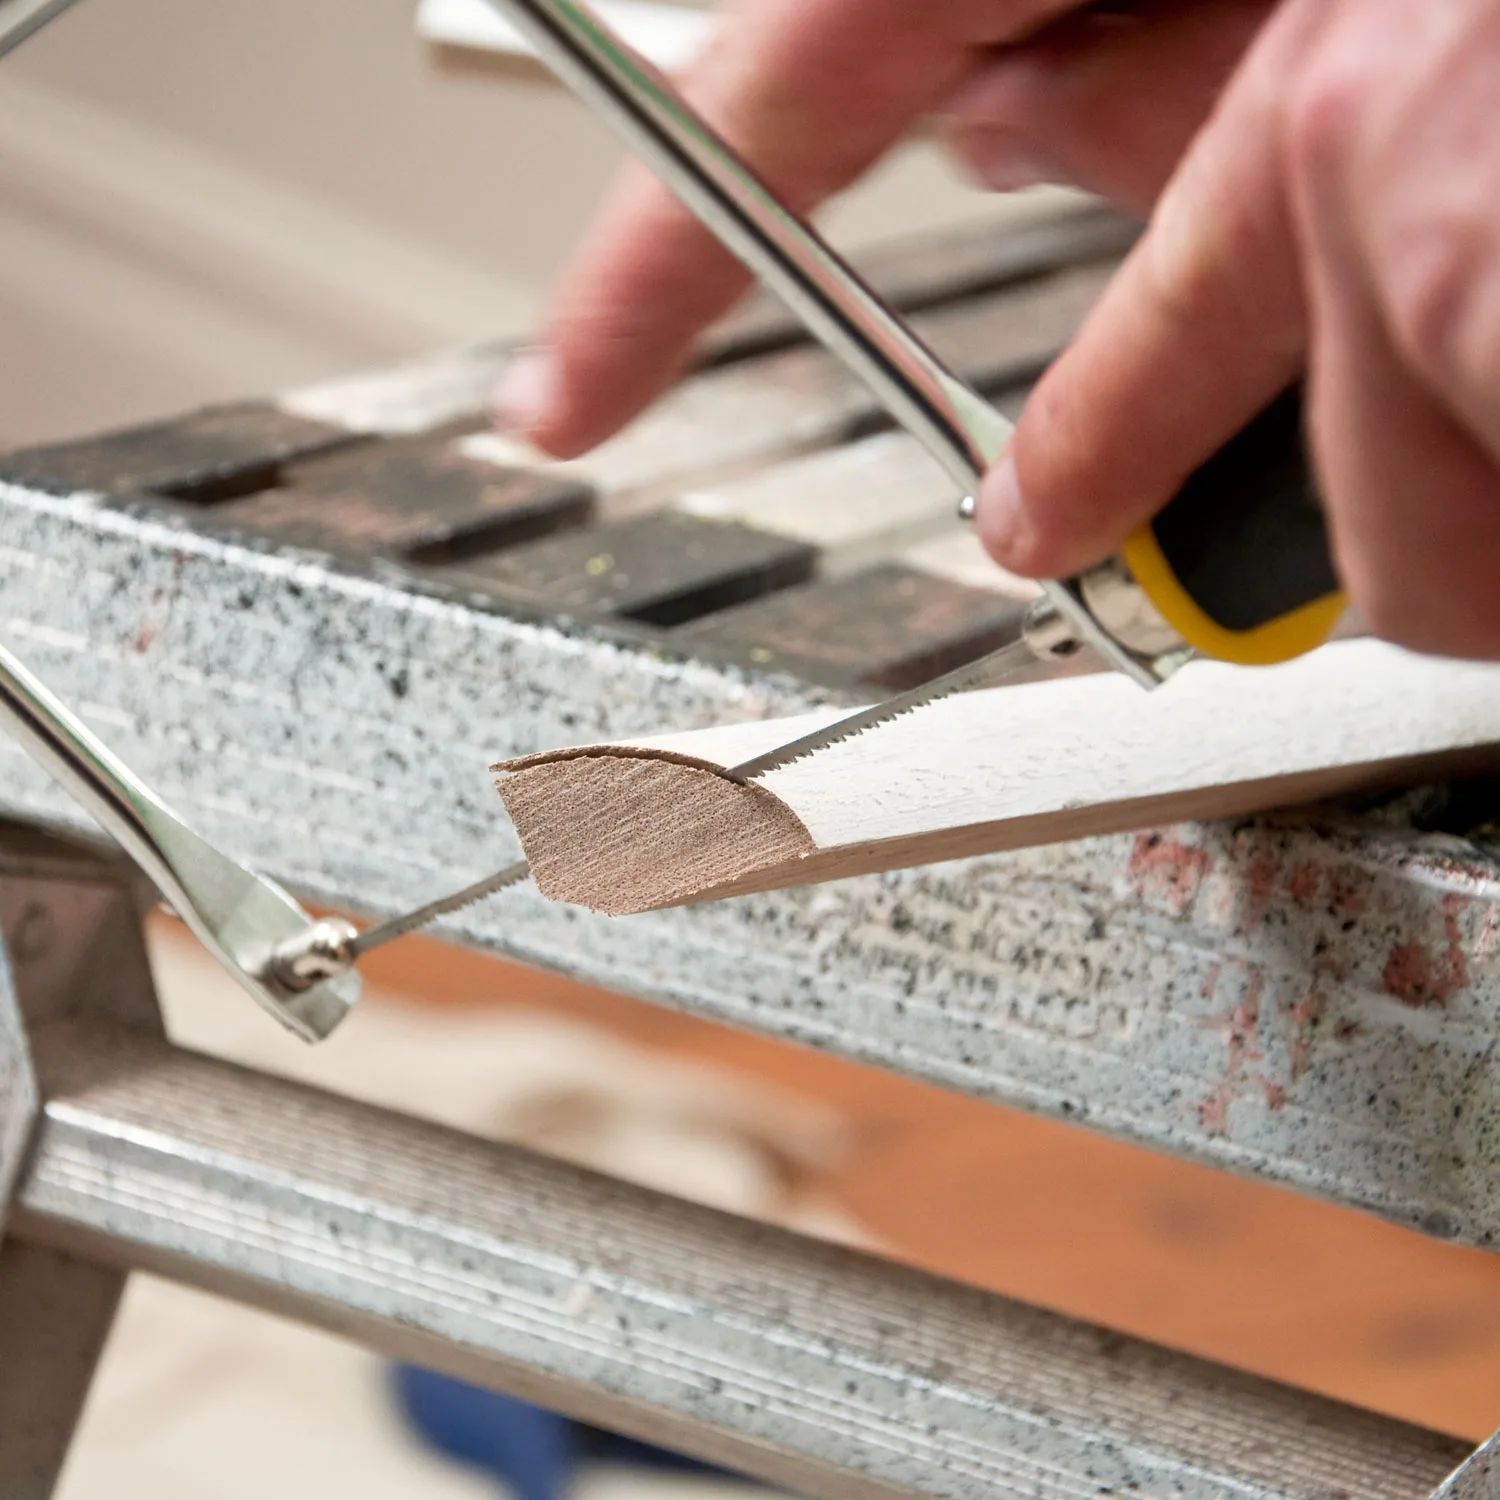
Use coping saw to cut along contour of curve so fine blade is at 90° to back of quad.
Step 4
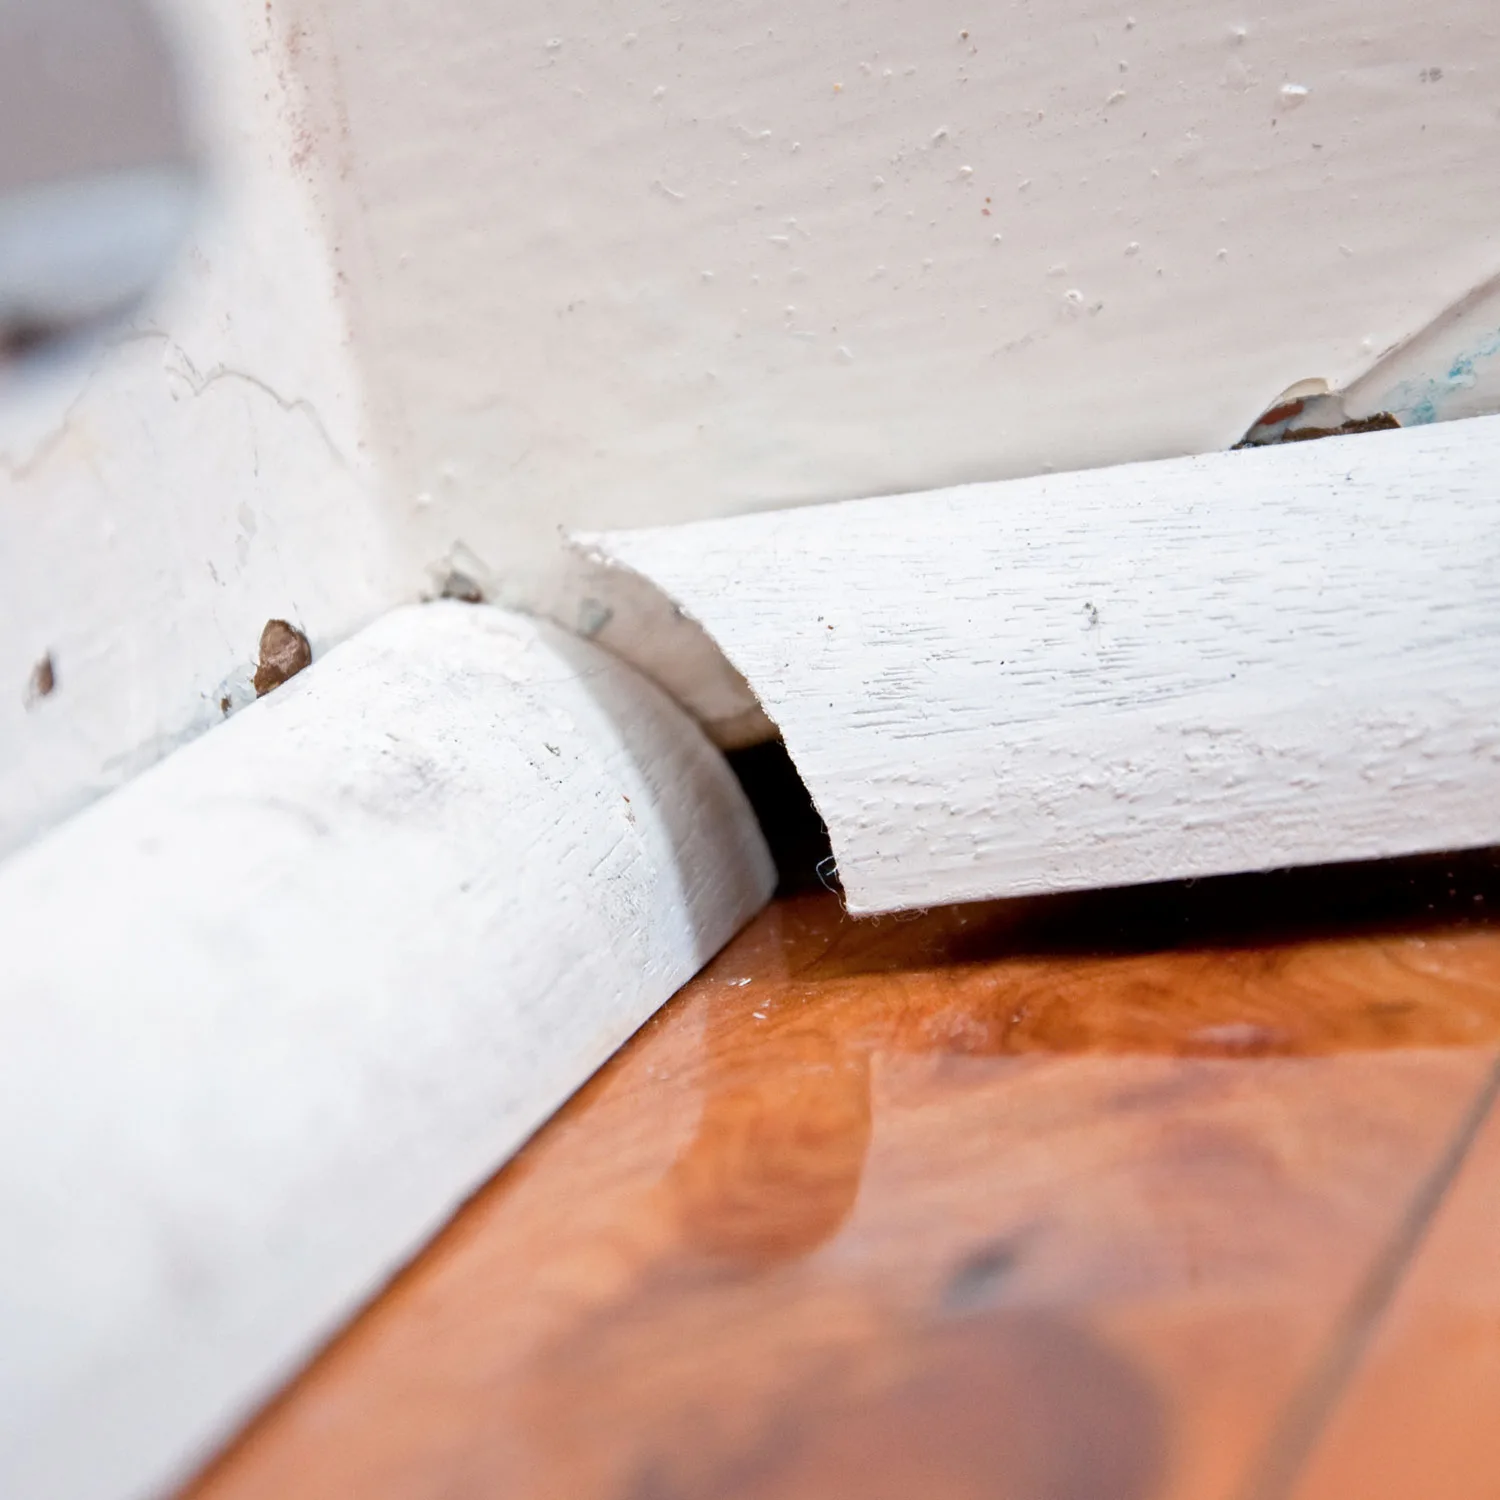
The result should fit snugly over curve of quad already on floor when at right angles. Refine cut with a file, if necessary. Spring in place and nail to floor. Continue working back towards door.
