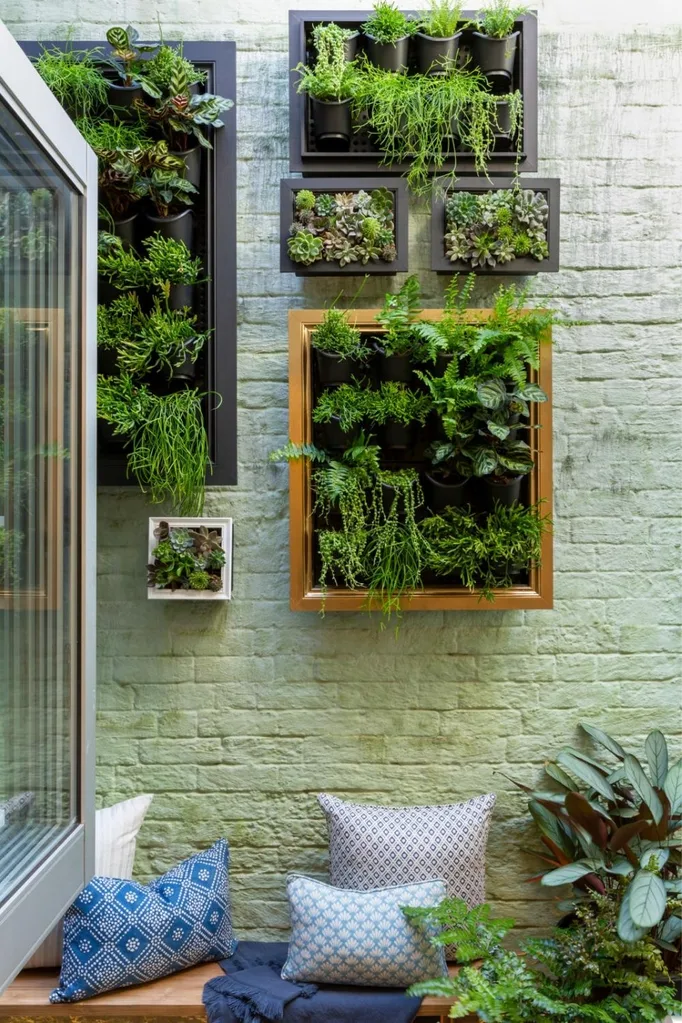
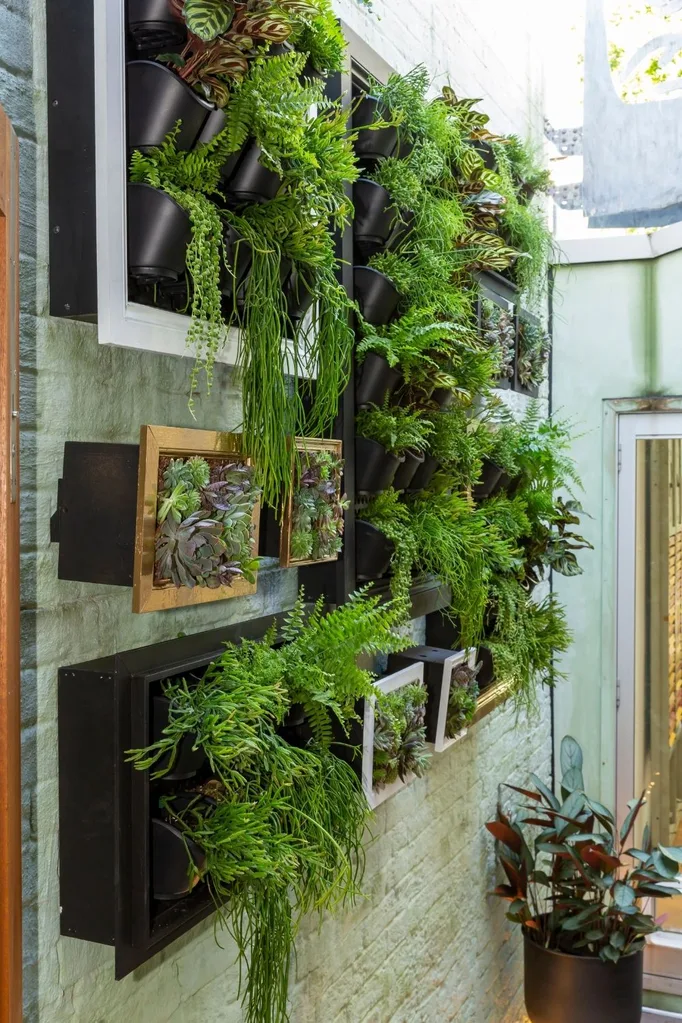
So you want to make an entrance? Zhooshing up an exterior wall by hanging plants and putting them in the frame creates a living gallery.
WATCH: Charlie makes a vertical garden with frames
It will give colour and depth to a dull dark corner and, suddenly, the bare wall that remains will have its texture turned into a feature. It can be an entrance that draws you inside – and one that also makes you want to linger longer.
Using vertical garden kits and DIY grow boxes, finished with custom made or upcycled picture frames, you can turn a dead zone into a lush oasis. Here are two different ways to create vertical garden frames for your bare walls.
Project 1: How to make a mini green wall
Gather your supplies
- Holman vertical garden kit
- 187 x 18mm primed treated pine
- 65 x 19mm x 2.4m Colonial Tasmanian oak architrave
- Selection of small ferns and succulents
You’ll also need
Saw; black and white exterior paint; paint roller; exterior PVA glue; drill; galvanised 50mm screws; galvanised 30 and 15mm button head screws; tenon saw; mitre box; 1.5 drill bit; galvanised 40mm nails; hammer; corner brace brackets; paintbrush; combination square
Note: Holman kits come with a backing board, integrated watering system, 8 clip-on pots, adjustable drippers, drip tray, hanging screws, plugs and plates and other accessories.
Here’s how
Step 1
Using a roller, paint lengths of pine with 2 coats of black exterior pain. Leave to dry between coats.
Step 2
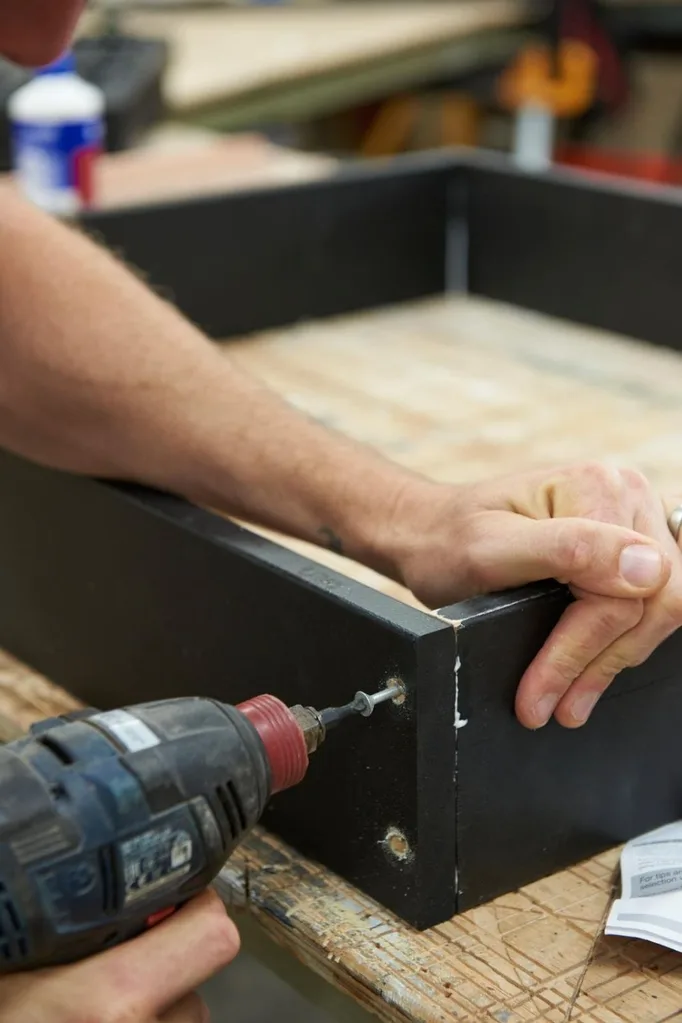
Cut timber lengths to make 2 sides, a top and base for a box that will fit around garden kit. Paint cut ends to seal. Butt sides into top and base. Glue, predrill and screw together using 50mm screws.
Step 3
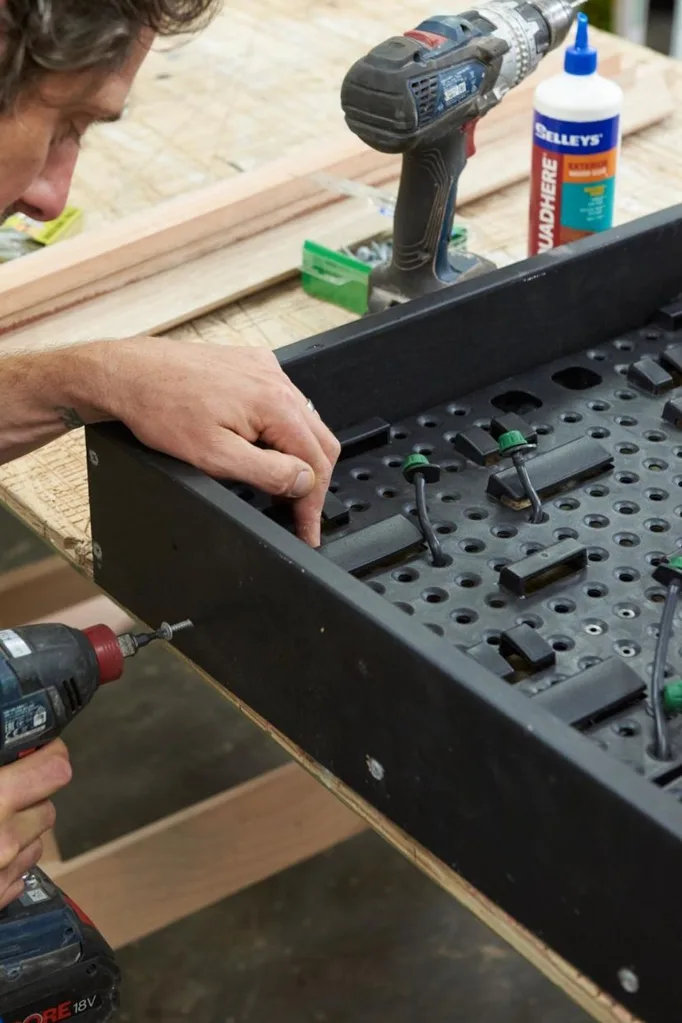
Sit box around kit backing board. Predrill through box into board. Screw together with 30mm button head screws.
Step 4
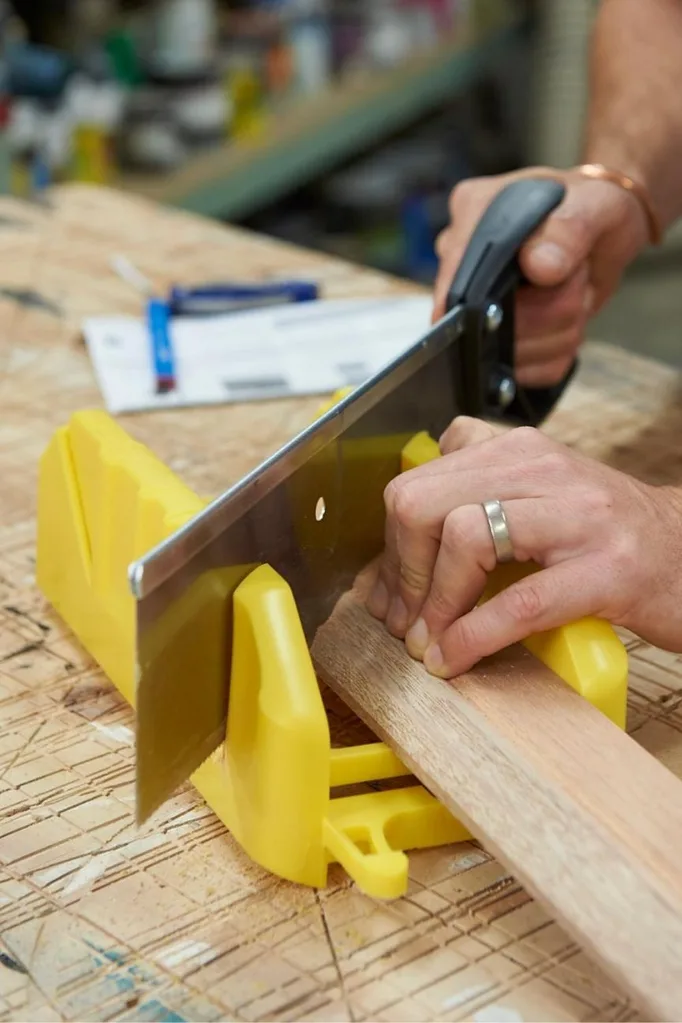
Use tenon saw and mitre box to cut architrave to length for front frame of box, cutting mitred ends on 45 degree angle. Short dimension on architrave pieces should be 8mm larger than the internal dimension of box side it relates to.
Step 5
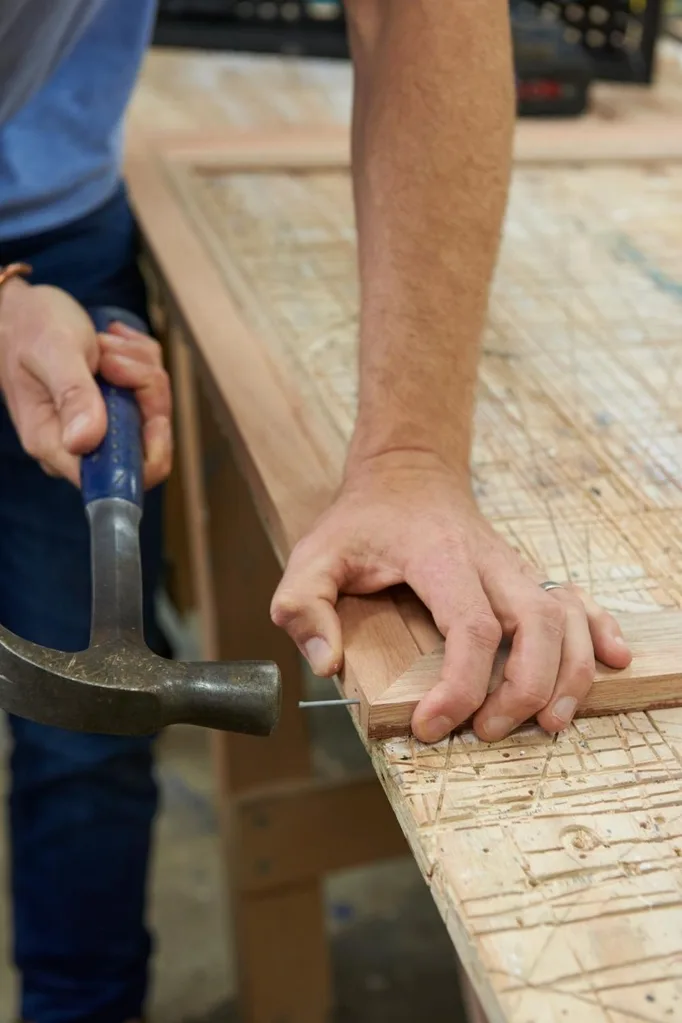
Spread glue on mitred corners and bring together. Predrill through edges across mitres using a 1.5mm drill bit, then join using 40mm nails.
Step 6
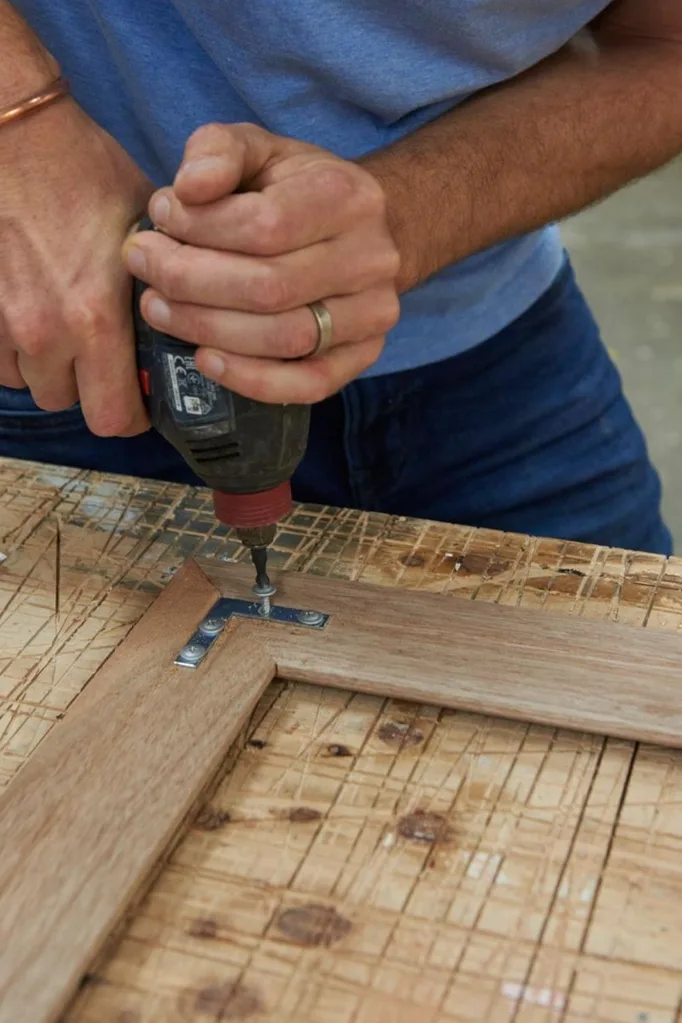
Reinforce mitred joins by screwing corner brace brackets across the back of them. Use 15mm button head screws.
Step 7
Apply 2 coats of white exterior paint to frame with a brush. Leave to dry between coats.
Step 8

Run a bead of glue around front edge of box and sit frame on top. Use a combination square to ensure distance from inside of box to frame is 4mm all around.
Step 9
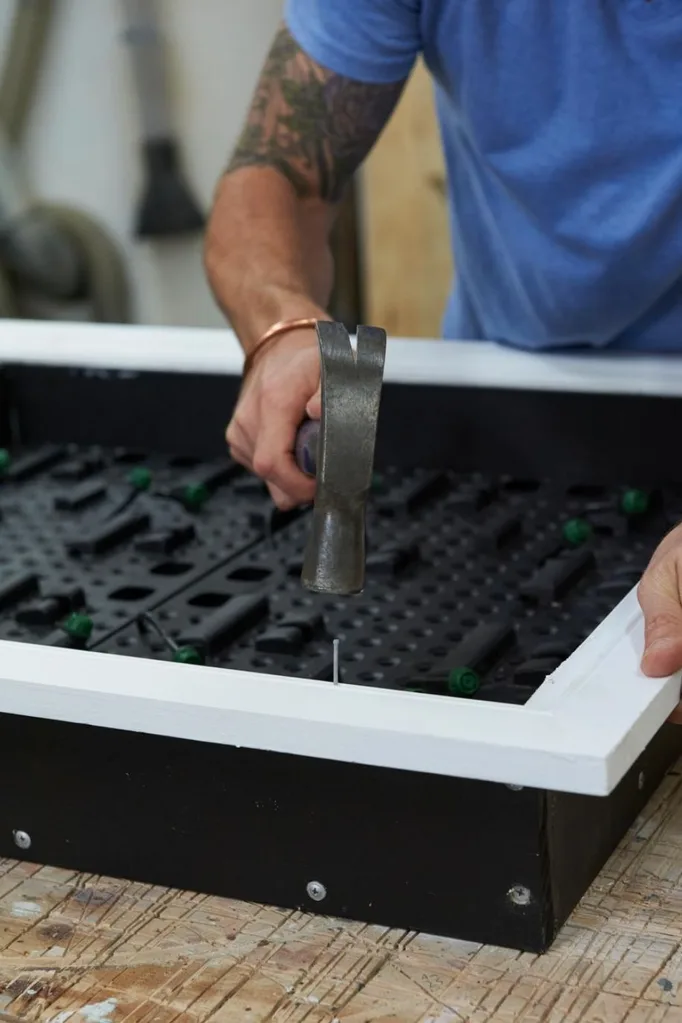
Predrill and nail through frame into box.
Step 10
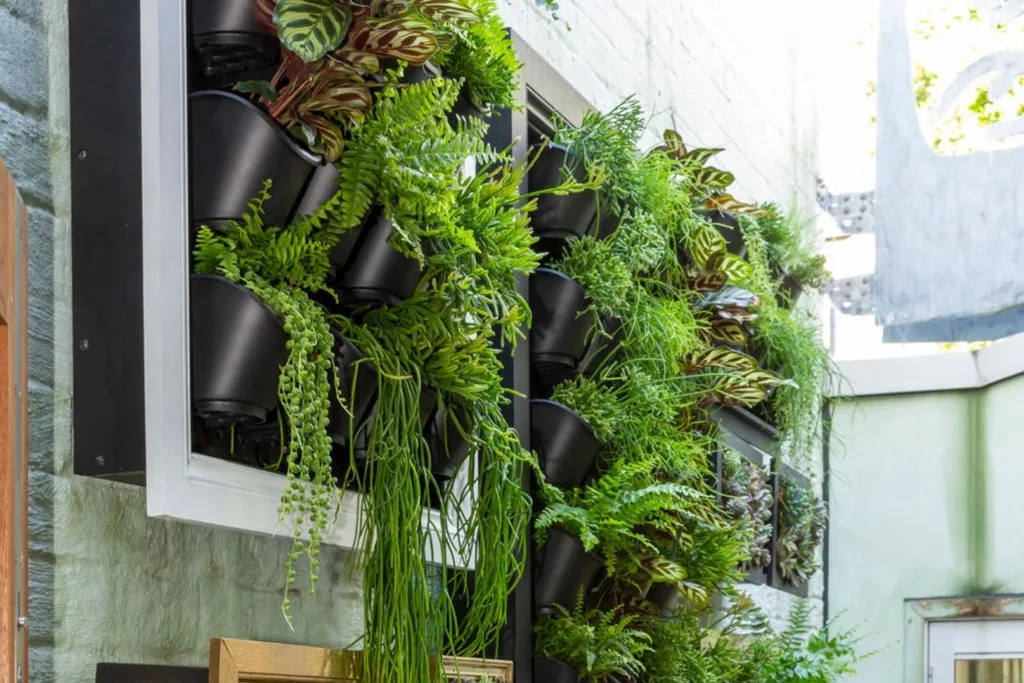
Plant up supplied pots and finish assembling the vertical garden kit as per the instructions.
Project 2: How to make a growing frame
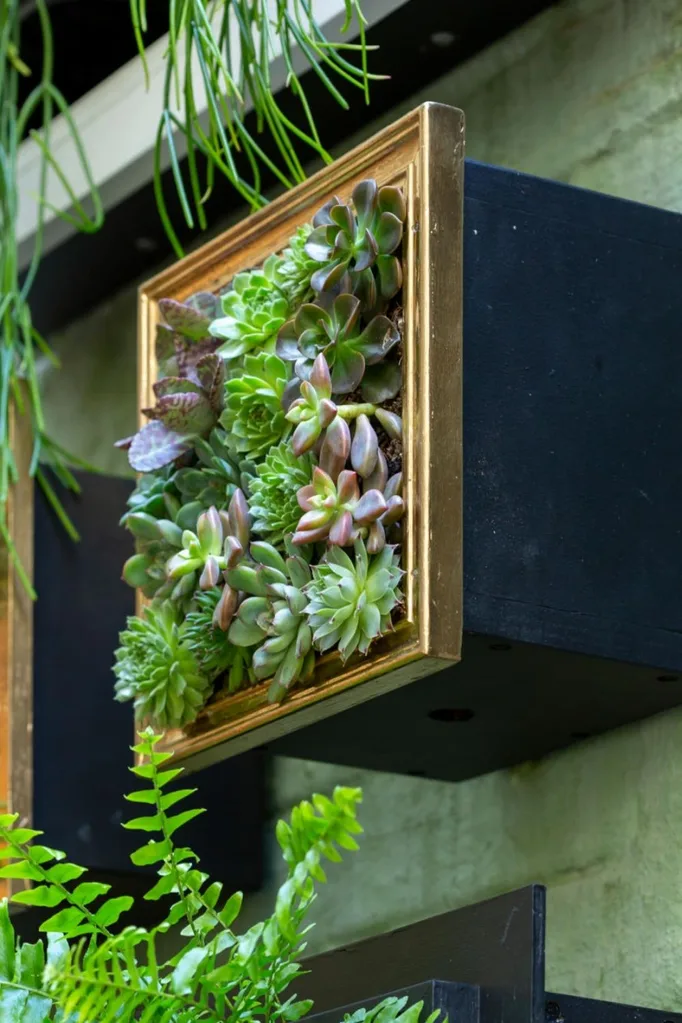
Gather your supplies
- 18mm marine plywood
- Picture frame
- 25 x 25mm wire garden mesh
- Small succulents
You’ll also need
Tape measure; circular saw; exterior PVA glue; drill; countersinking and 1.5mm drill bits; galvanised 50 and 65mm screws; 20mm spade bit; black exterior paint; paint roller; succulent potting mix; staple gun; staples; tin snips; hammer; galvanised 40mm nails; wall plugs; spirit level
Here’s how
Step 1
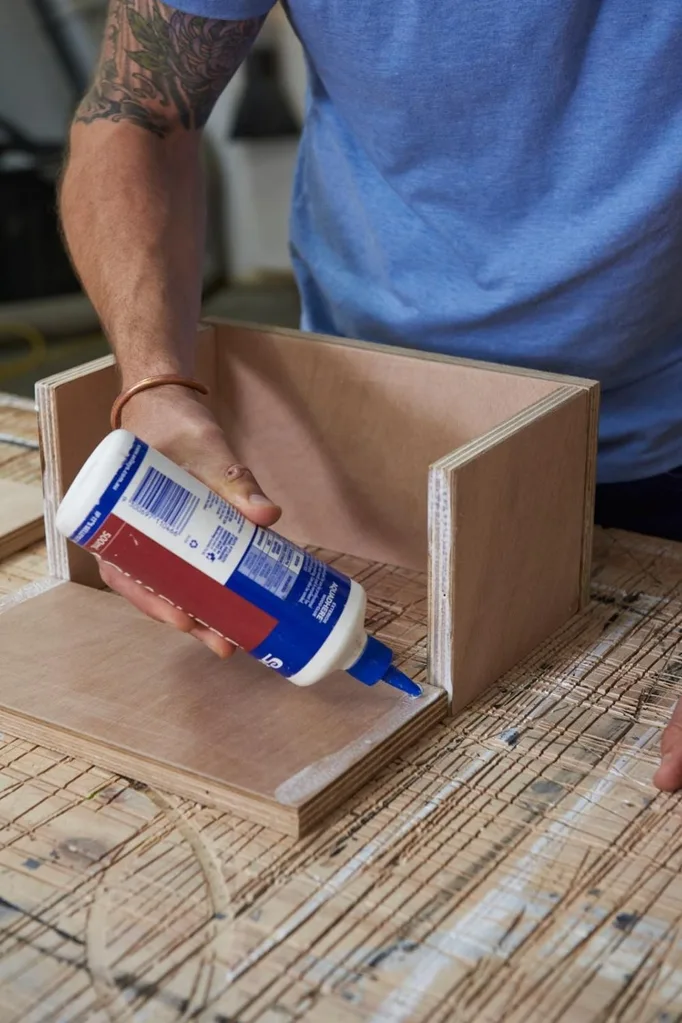
Measure picture frame for size of box. Cut ply into top, base, sides and back with a circular saw. Position sides and back between top and base and glue, then predrill using a countersinking drill bit and join with 50mm screws.
Step 2
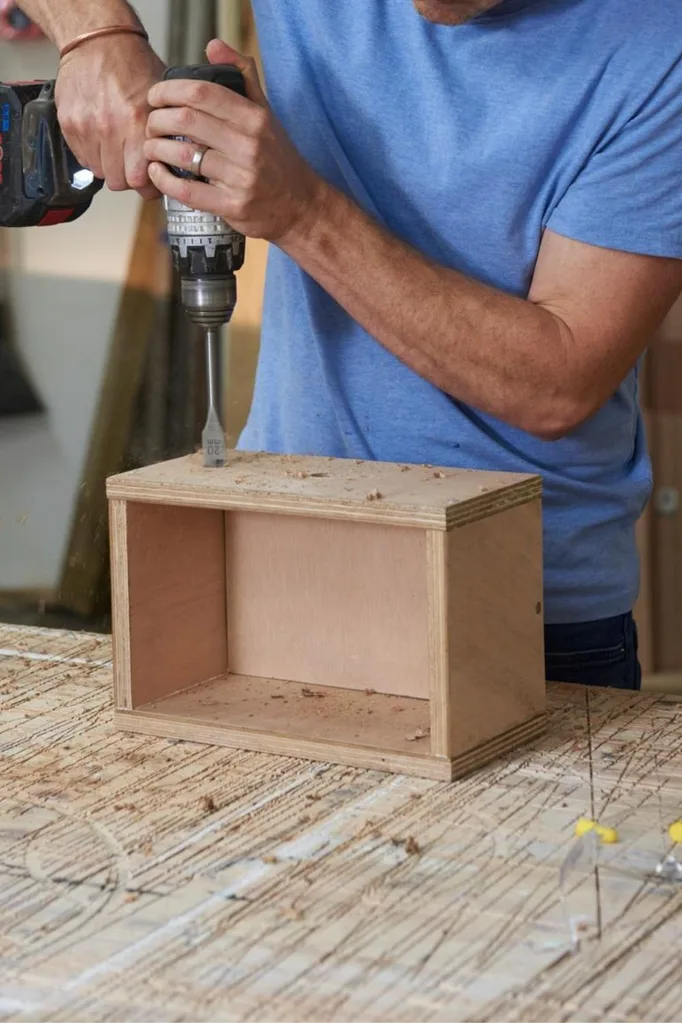
Use a 20mm spade bit to drill holes in top and base of box. Top holes allow for watering while base holes are for drainage.
Step 3
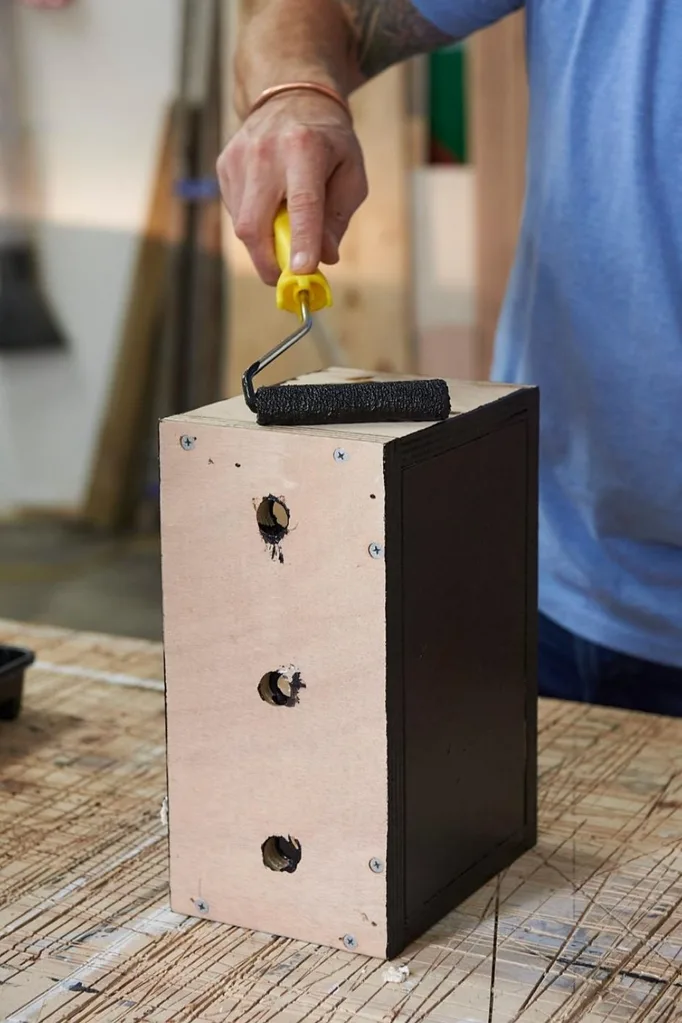
Apply 2 coats of black paint to entire box with a roller. Leave to dry between coats.
Step 4
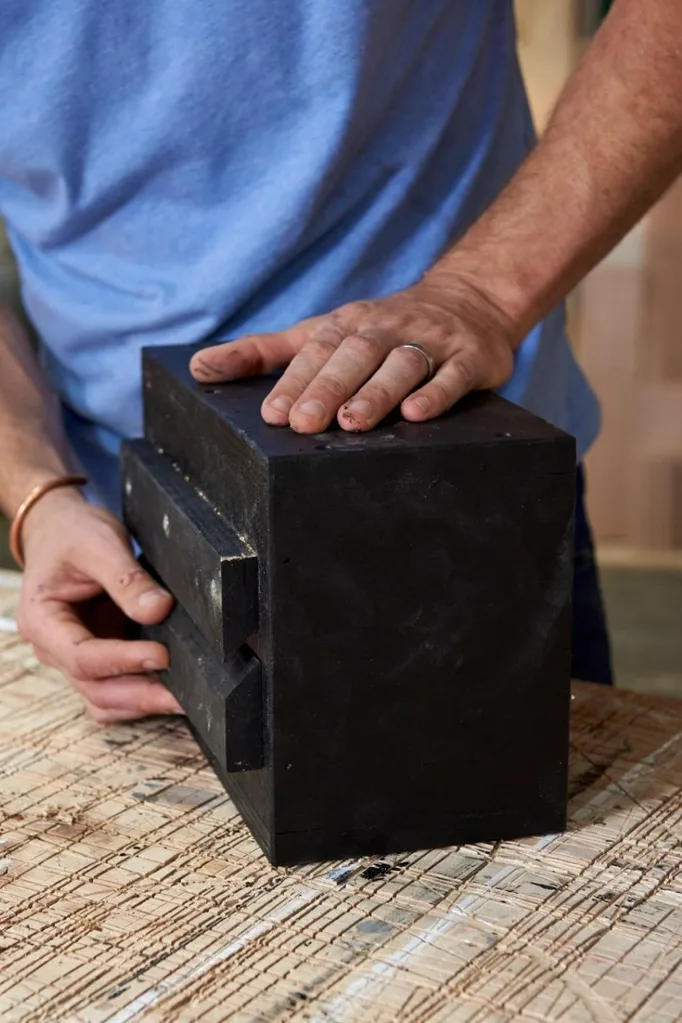
Cut a plywood block, slightly shorter than box, down the centre on a 45 degree angle to create a split batten. Apply 2 coats of black paint. Glue and screw half of batten to back of box with angled cut facing box bottom. The second half of the split batten will go on the wall, the 2 pieces locking together to hang the box on the wall.
Step 5
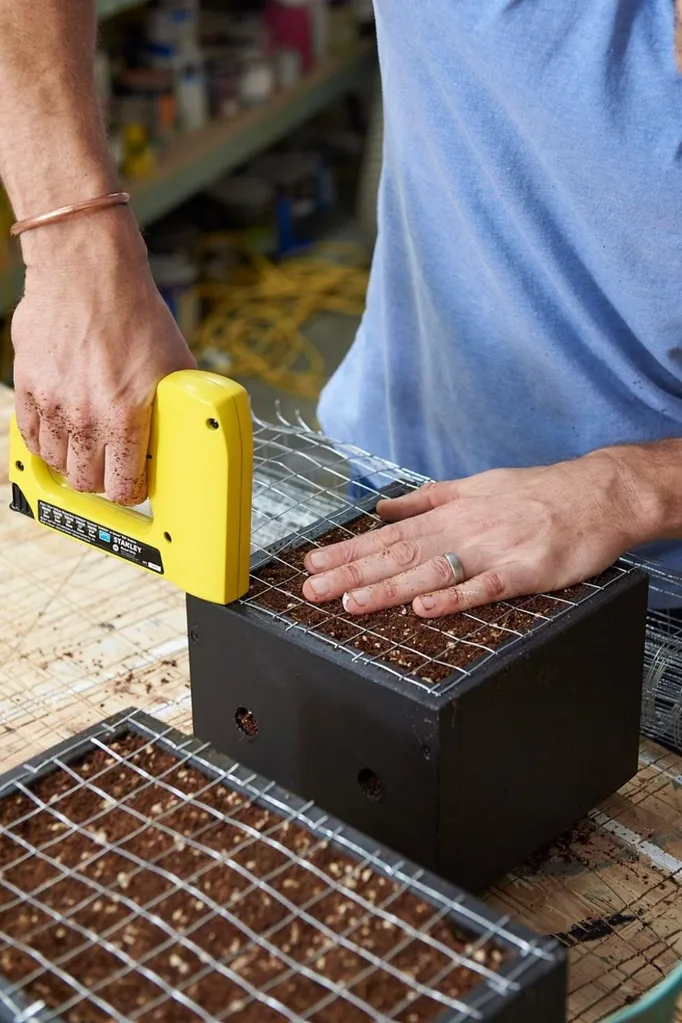
Fill box with succulent mix, lay garden mesh over the top and staple to the box. Cut off excess mesh using tin snips.
Step 6
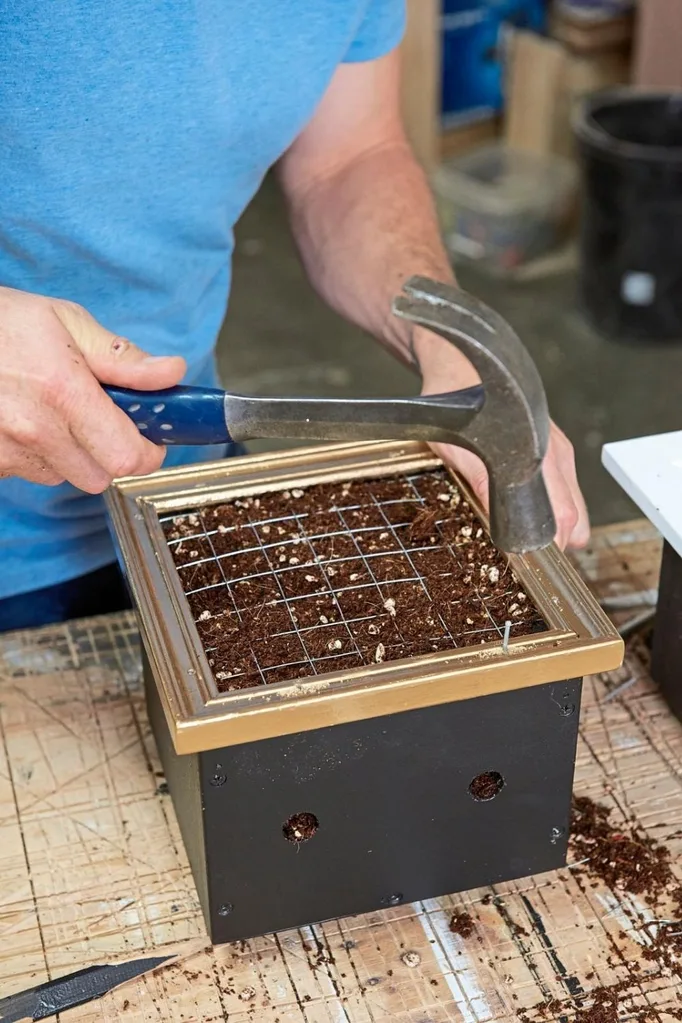
Predrill picture frame around inner edge using a 1.5mm drill bit. Position frame on top of box and attach using nails.
Step 7
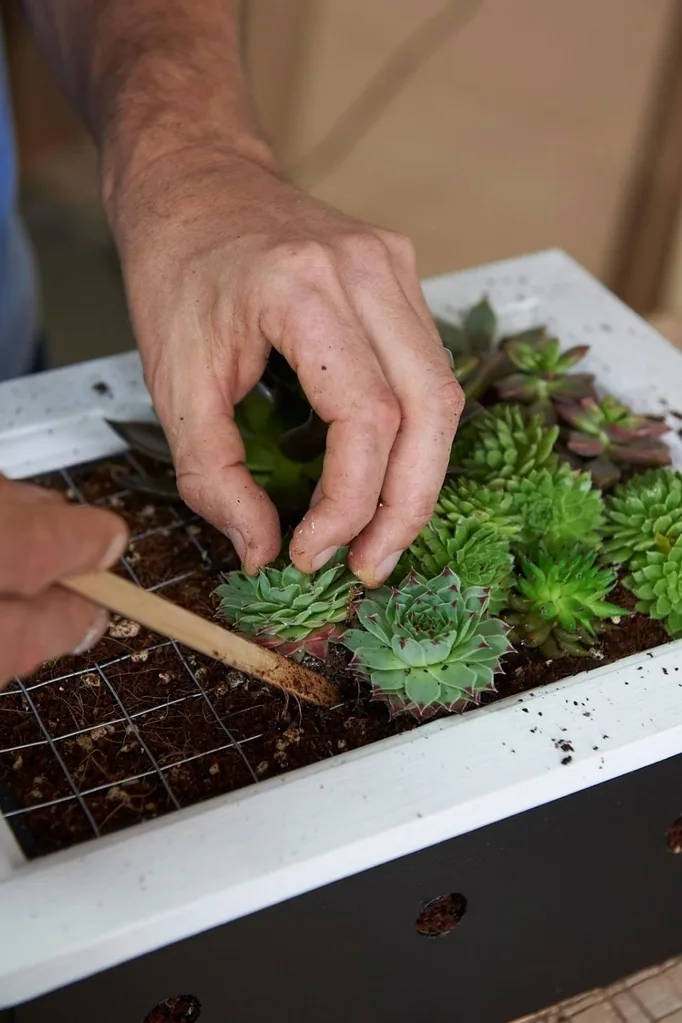
Using a pencil to make planting holes in potting mix. Gently insert succulents through wire mesh into holes and gently firm down mix around plants. Water in.
Step 8
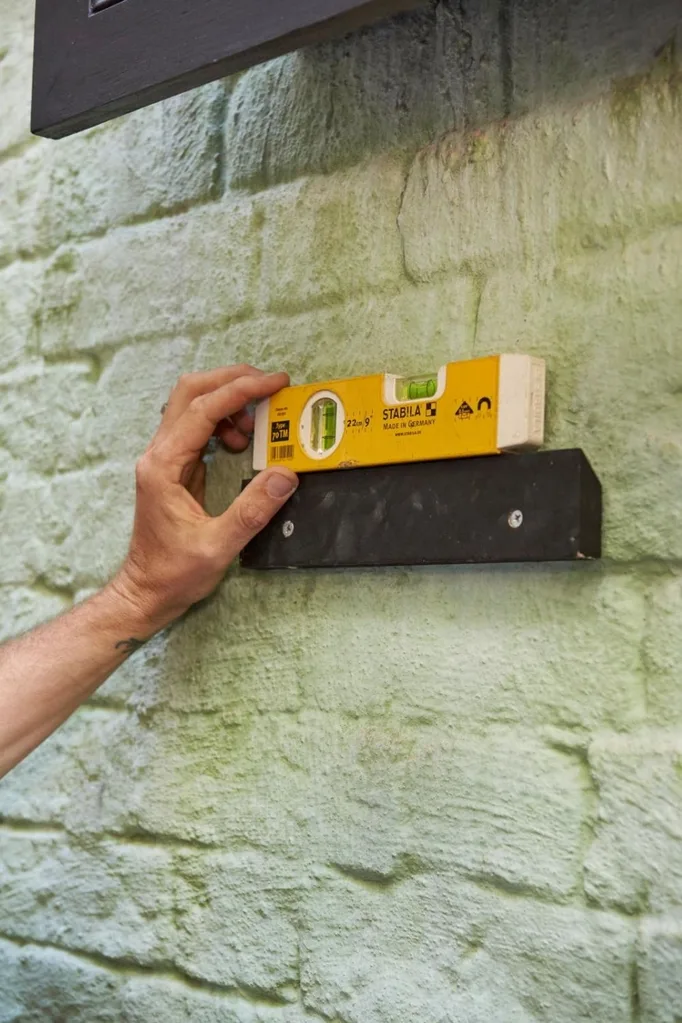
Attach second half of split batten to wall using wall plugs and 65mm screws. Make sure batten half is level and with the angled cut facing up, and in the correct position to suit your wall design.
